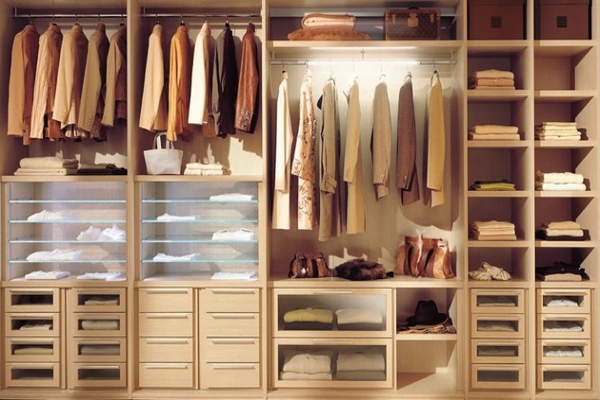
Solving the problem with a lot of things and lack of furniture is very simple. One roomy wardrobe will become a haven for all people constantly wandering from a chair to a chair of clothing. The simplest version is a built-in wardrobe with a set of shelves, height-to-ceiling. Below we will consider step by step how to make a chiffonier in such a design with your own hands.
Built-in wardrobe with their own hands
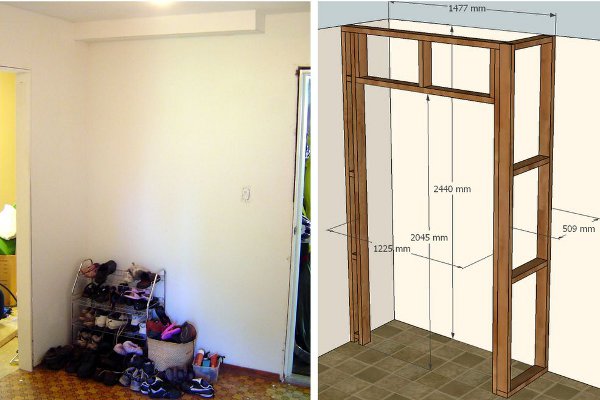
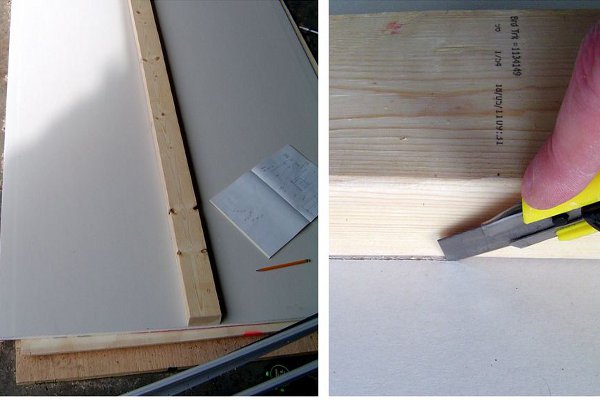
- Any furniture begins with the simplest project. Before assembling, we should carefully consider the locations of each shelf of the chiffonier made by one's own hands and its desired height. Even a primitive drawing will help to calculate the amount of material.
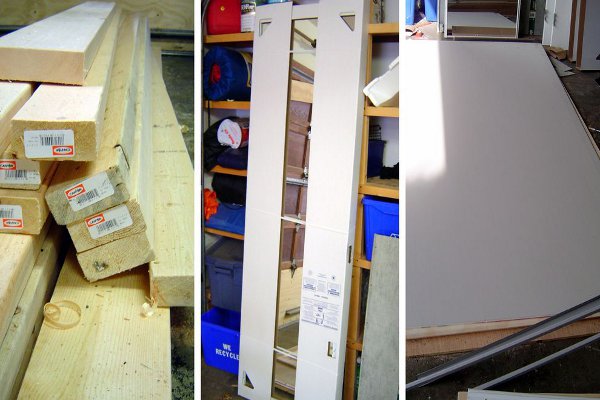
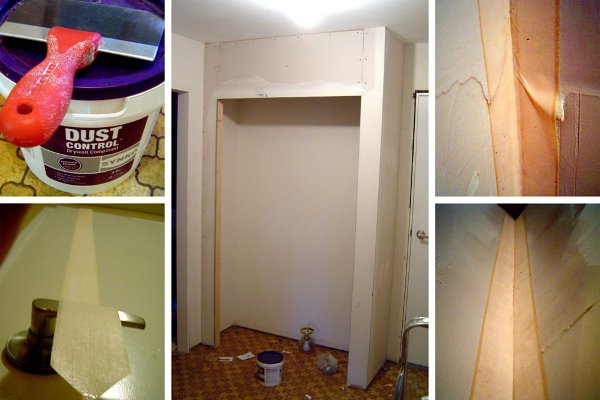
- And here, in fact, and all our workpieces: beam, finished doors with a mirror under the cabinets of the compartment, the material for the carcass sewing. Here you decide for yourself what exactly will become the best material: drywall, chipboard or other options. For registration we will use plaster, paint in the tone of the walls of the room and paint to finish the shelves inside.
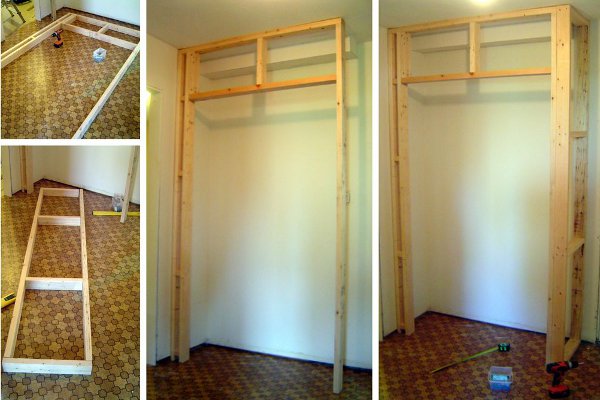
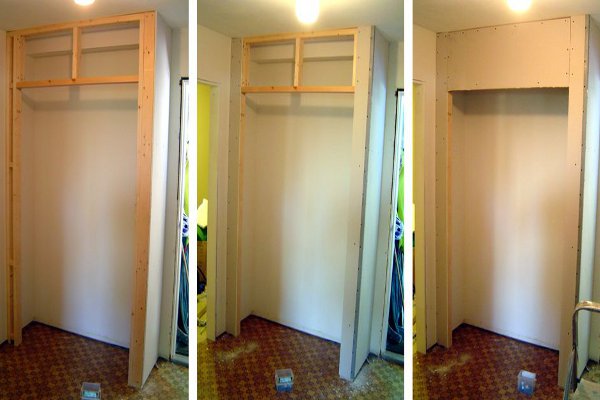
- Right on the floor, we begin to collect the backbone of the cabinet. First we collect the side parts, then we check the correctness of the assembly of the structure already in the vertical position.
- We decided to make a built-in type with our own hands, which means that the chiffonier should be literally fastened to the floor and walls. This is how we will fix the frame to its place.
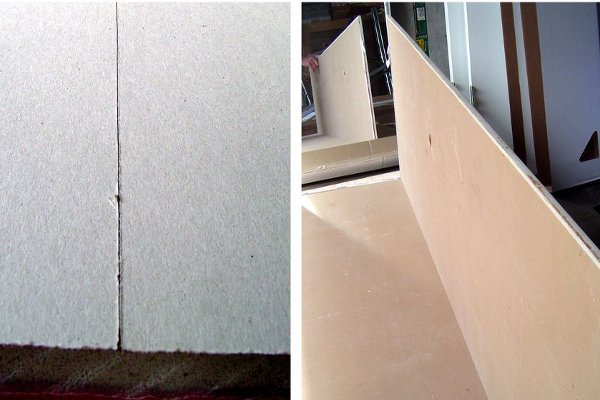
- In our version, the plasterboard will be used for casing the case. To cut off the desired length, we first through the guide and the knife we cut through not completely the piece of sheet, then gently bend it and break off the desired part.
- It's time to make the sewing of the chiffonier, made by yourself, as rationally as possible. Even the so-called cutting will not hurt. If you correctly arrange all the details on the sheet, enough about two or three. First, the sidewalls were sewn, then the upper part. Next, sew up the front pillars. We try to cover the frame by several millimeters so that it can not be seen with closed and open doors.
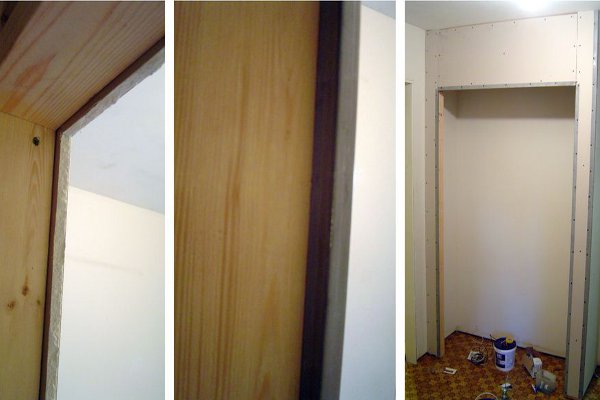
- The frame is sewn, then it should be completed. All the corner pieces we aligned with the profile corner, which means that this part should be closed, so that after the finish coat everything went to the same level.
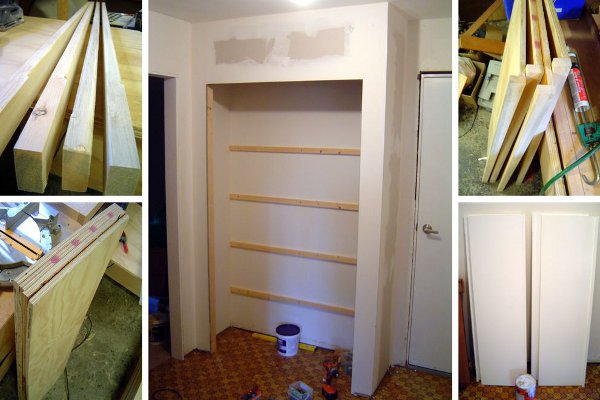
- It remains to work for small. The outer part of the chiffonier is ready, it remains to collect by oneself internal, as it was originally designed. In our case, these are shelves. First fix the wooden slats. Each rake is the base for the shelf.
- Further from wooden boards we cut out preparations for shelves, we paint them, preliminary having beaten forward support.
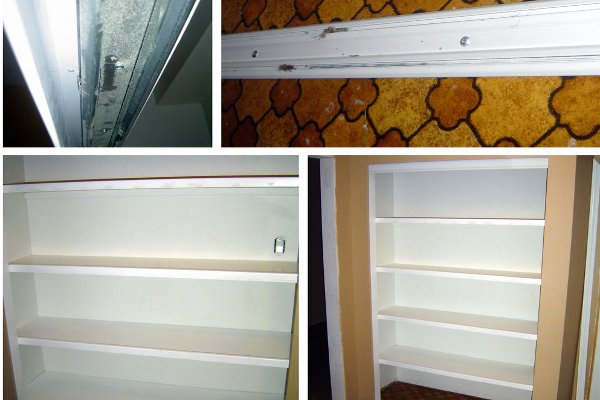
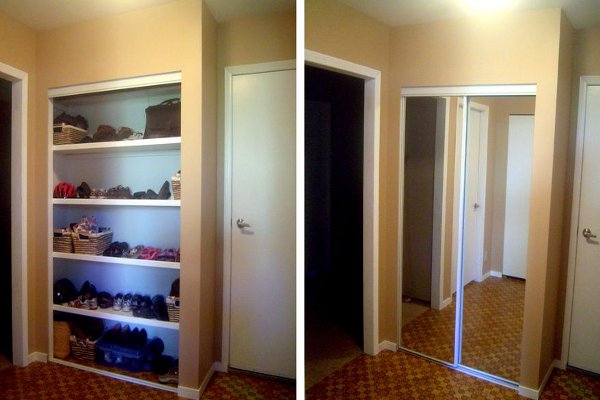
- We decided not to take up much space and make an embedded design, so the doors were chosen by the type of the closet compartment for maximum space and space saving. They will travel by means of such rails, which we fix on the upper and lower edge of the frame. Since the cabinet turned out to be quite large, it has a backlight for ease of use.
- And finally, the last part of the master class of building a chiffonier with their own hands is the decoration of everything done. We already pre-plastered all the places with fasteners, leveled the surface. Next, it only remains to apply a couple of layers of interior paint to the tone of the walls in the room.
- At the very end, we install ready-made sliding doors with mirrors and get an almost invisible, but very roomy cabinet.
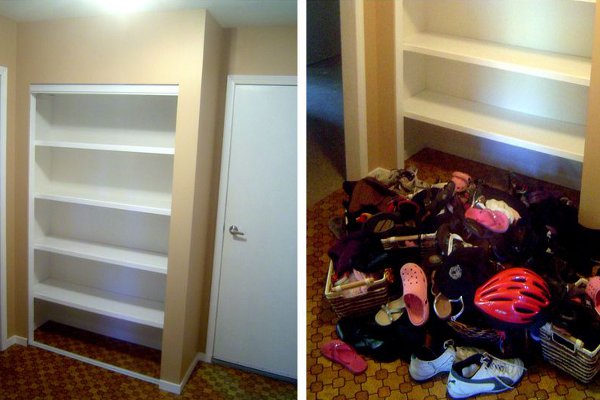
This is a very good solution for the rational use of unoccupied space, as well as real saving of your money, because the purchased materials will not be able to catch up with the cost of furniture of good quality. In addition, the design turned out to be compact and almost invisible.