Kitchen apron - an indispensable thing for the hostess. And sew it yourself is very simple. In this master class I will show in stages how to sew an apron for the kitchen with my own hands.
Sew an apron - a master class
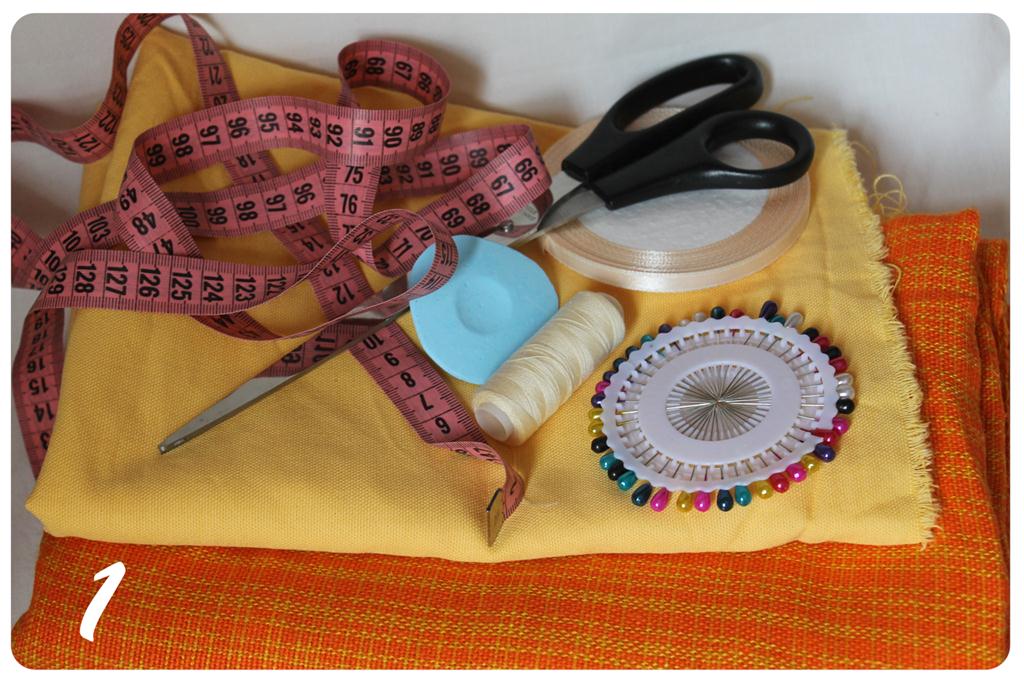
For this we need:
- sewing machine;
- fabric of two kinds;
- thread;
- scissors;
- satin ribbon;
- chalk;
- needles for chipping;
- meter.
Performance:
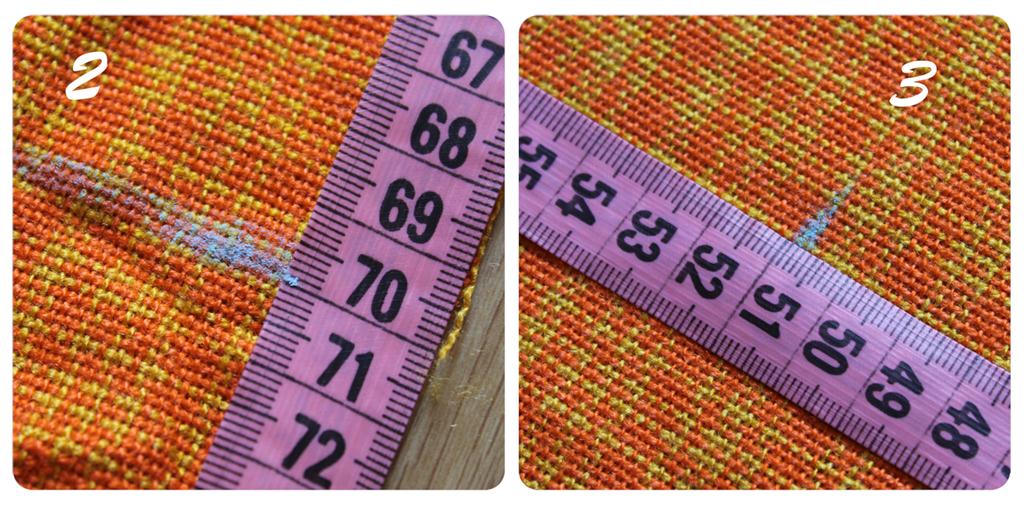
- First of all, spread your main fabric on a large surface (it is more convenient on the floor). Now measure the length of the desired apron. The beginning of the apron is slightly below the collarbone. Then, on the hip line, measure the desired width of the apron to the strings.
- We measure the length and width of the fabric. The width is 0.5-1 cm more. I have 70 to 51 cm.
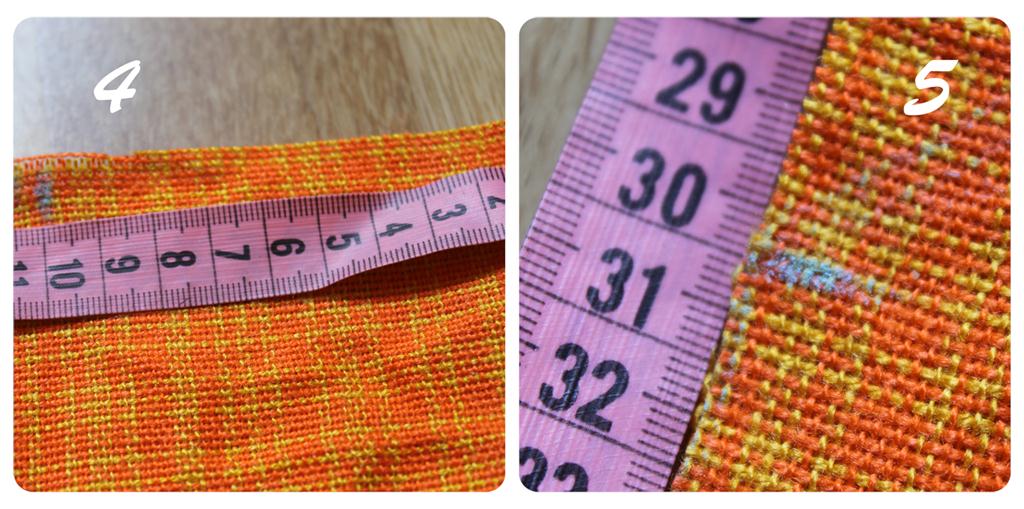
- Cut out the resulting rectangle and add it in half.
- Measure the desired width of the top of the apron. At me - 20 see and from an edge of a bend measure aside half of this length.
- Now measure the length from the beginning of the apron to the strings (to the waist or just below). I have - 30 cm. And measure this length on the fabric.
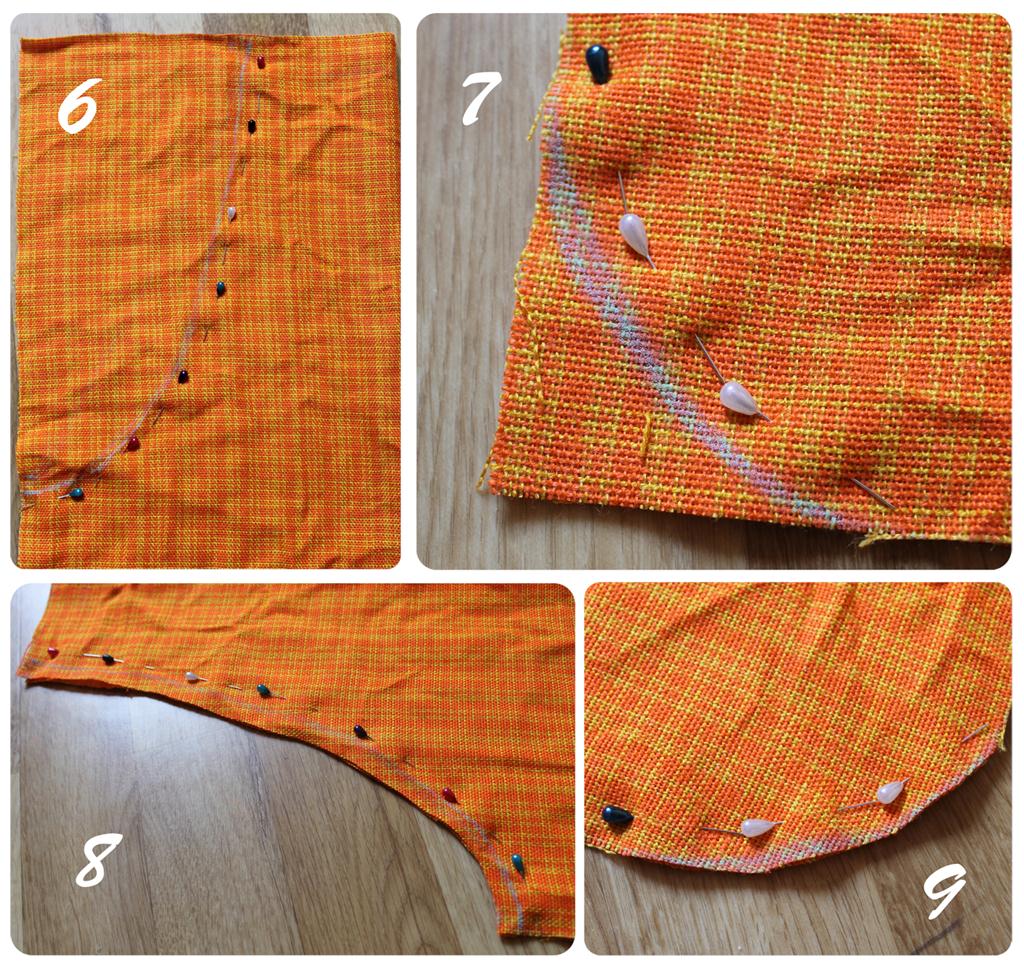
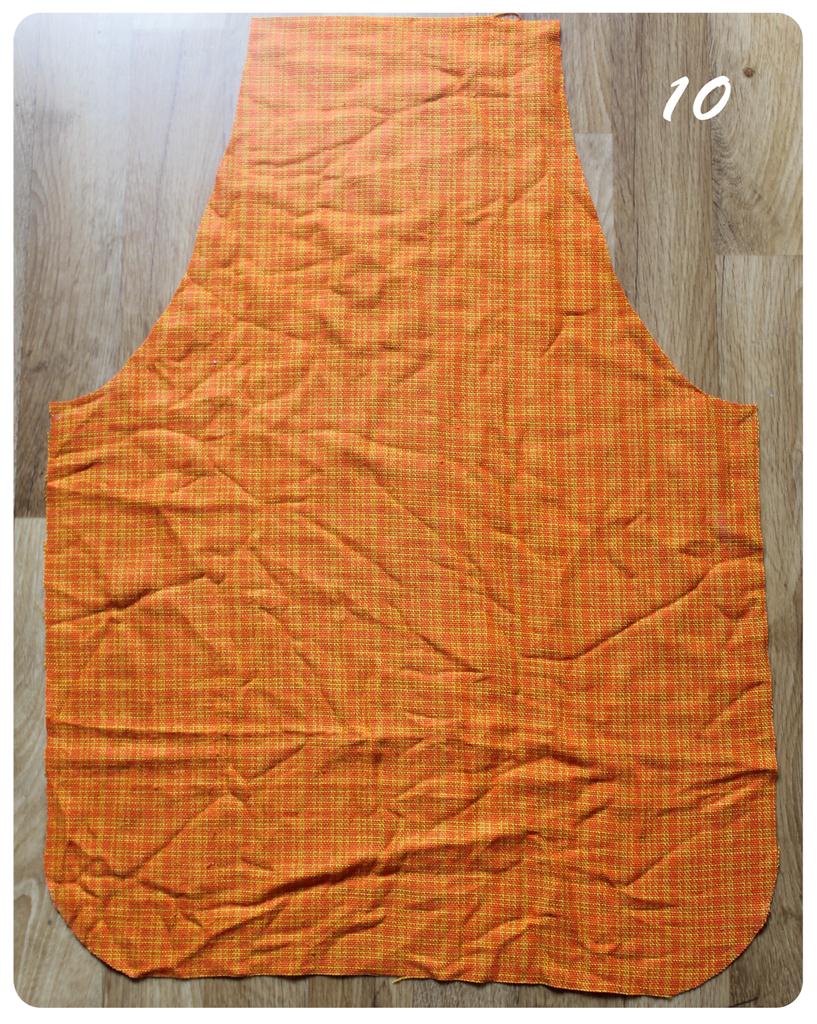
- Connect the top and side marks with a curved line. From the bottom, also draw curved lines in the corners. Fasten near the lines with needles and cut. From above with an allowance of 1 cm.
- The base for the apron is ready.
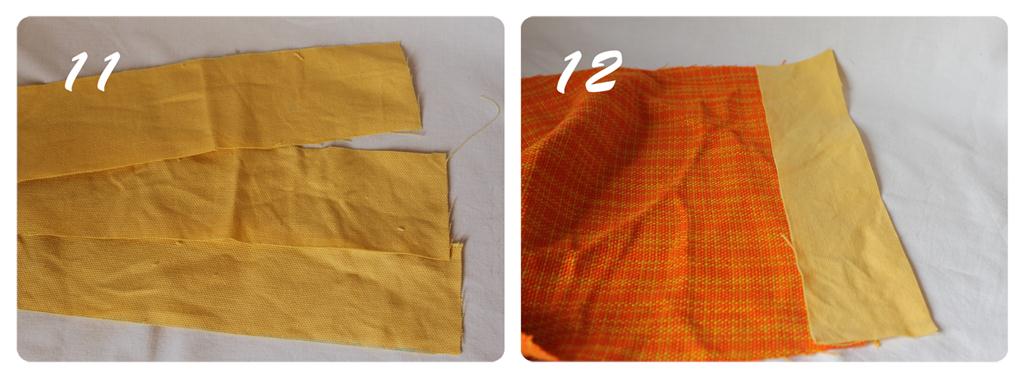
- Cut out of the other fabric three strips the size of 48h5 cm, we need them for strings. And a strip along the length of the top of the apron and a width of 5 cm.
- All the details are ready. We proceed to sewing an apron.
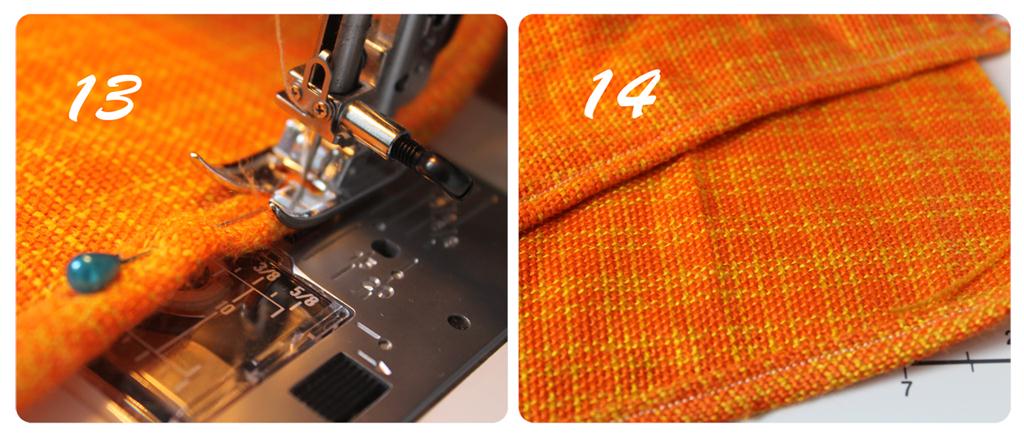
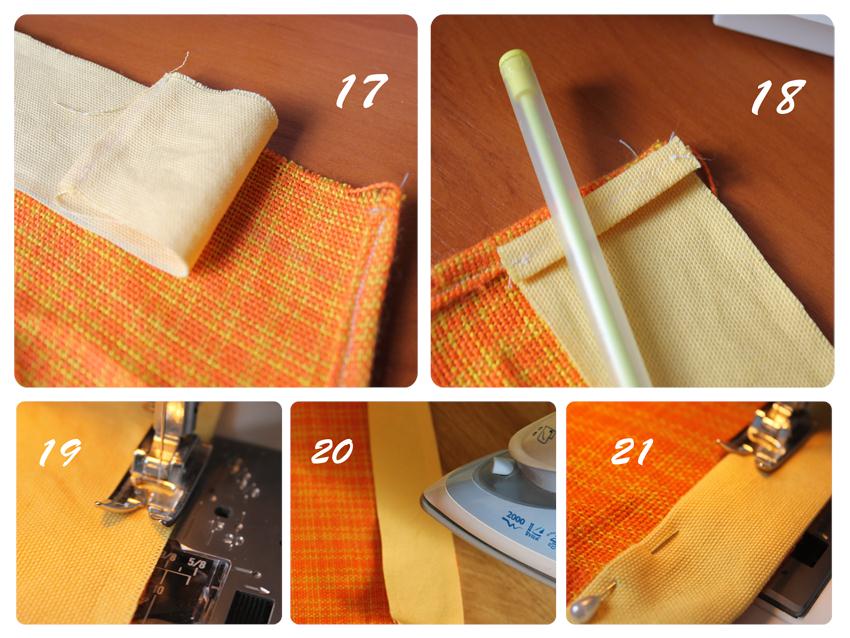
- First of all we sew an apron on all sides, except for the top. To make it more convenient to sew, wrap the fabric in half and pinch it with needles. Stitching.
- Now take a strip of fabric for the top of the apron and sewn on both sides so that the strip remains longer than the top of the apron.
- Then apply our strip to the back side of the apron. Bend from the side as in the photo and stitch. In the end, also do not forget to fold the strip across the width of the apron.
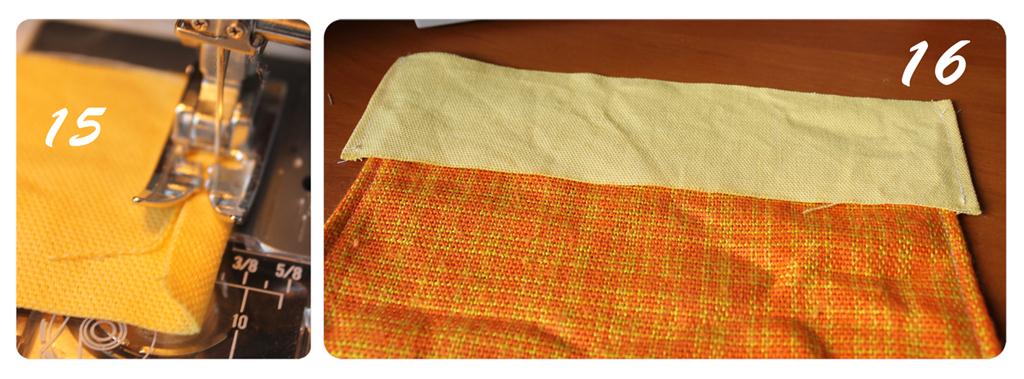
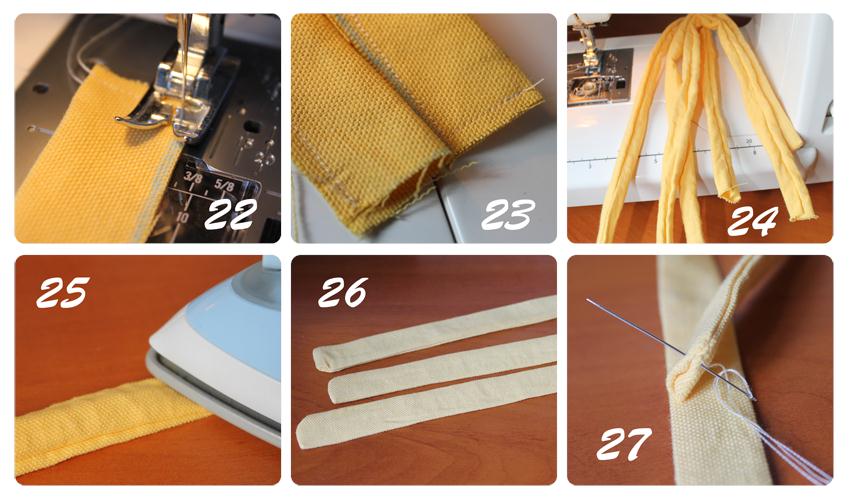
- Remove the strip on the front and iron it. Then fold the strip from below and sew to the apron.
- Now proceed to the eyeballs. We stack each strip face-to-face and stitch it. We leave one side for eversion. Then turn and iron. The place of the eversion is sewn with a hidden seam.
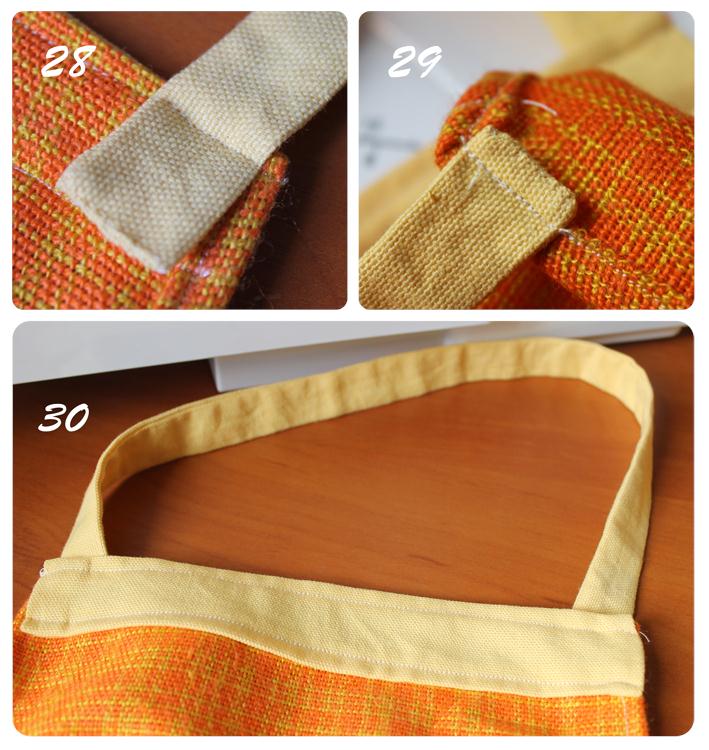
- Sew our aprons to the apron. Adjust the upper loop to pass the head.
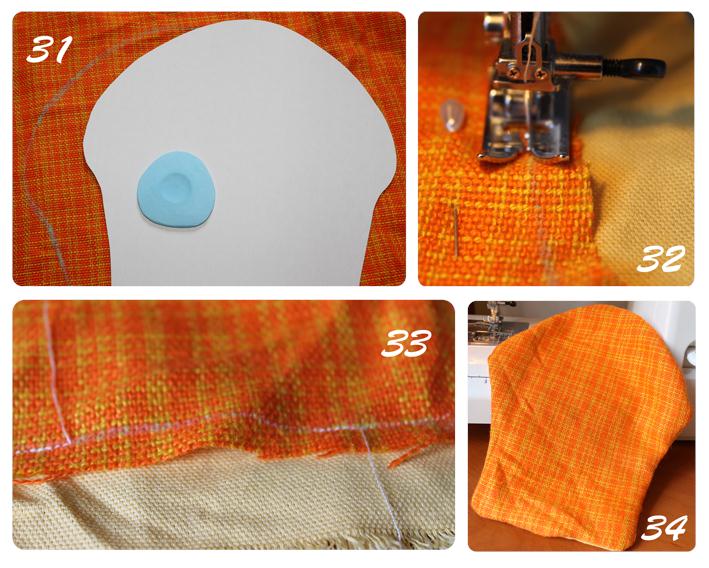
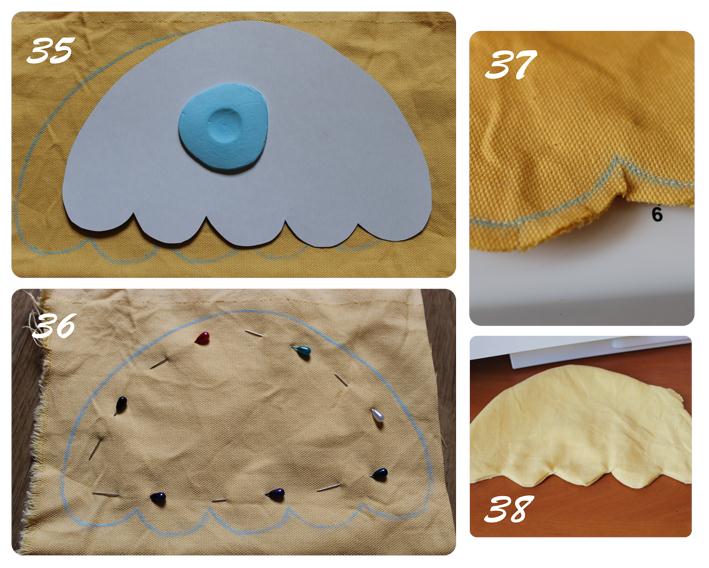
- Let's make another pocket and thereby decorate our apron. I offer a pocket as a pirozhenka. Randomly draw a cake on paper or cardboard. The basis will be from one kind of fabric, the top - from the other. Apply a pattern of cake to the main fabric and circle the chalk. Then cut out with the allowance. Now attach the resulting detail to the additional fabric, prikolite needles and sew among themselves. Leave room for the eversion. Trim excess fabric and make incisions in rounded areas. Turn out the resulting pocket. Spot the place with a hidden seam.
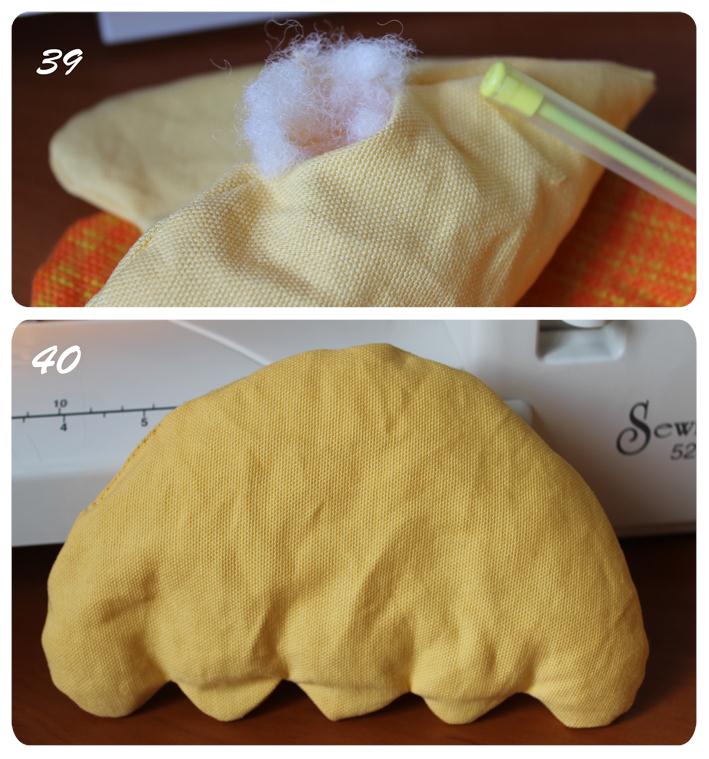
- Now fold the extra fabric in half. Attach a pattern of the top of the cake and circle it in small pieces. On the contour, fasten with needles and suture. Leave room for the eversion. Then, with the allowance, trim the excess fabric. Make incisions in the rounded places and turn out.
- The next stage is not mandatory. I fill the top of the cake with a filler to make it more plump and stitch the place with a hidden seam.
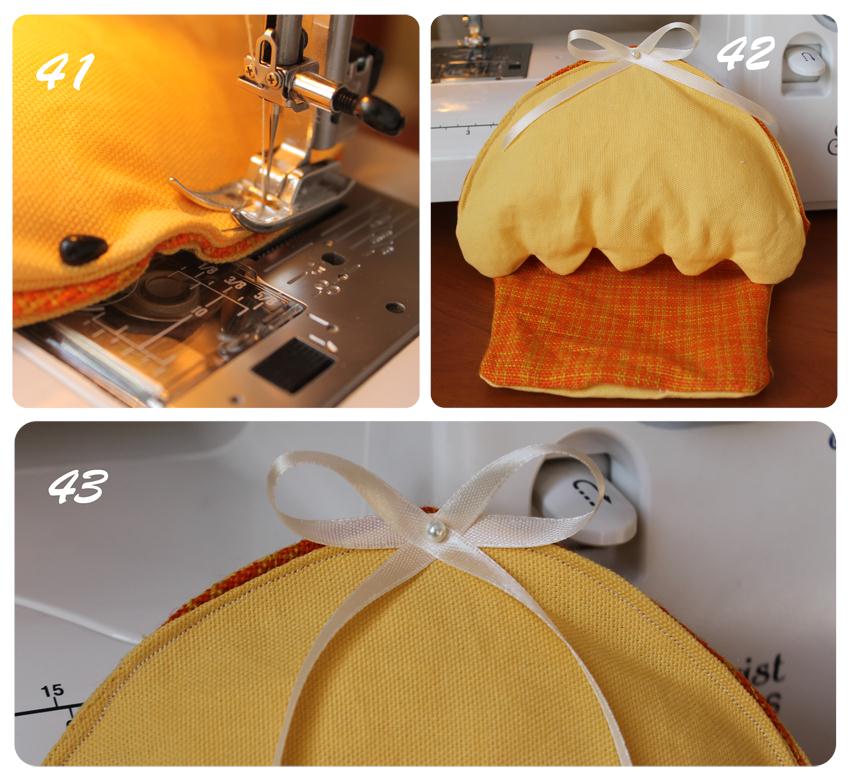
- Now we sew the top of the cake to the base along the top edge. You can decorate the cake with a bow of satin ribbon.
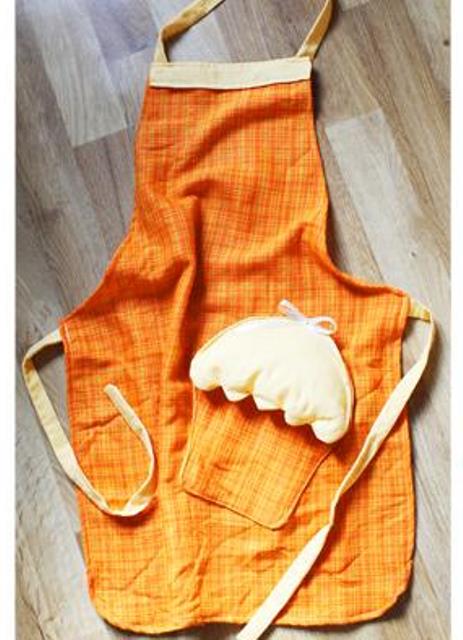
- Sew our pocket to apron slightly with a slope. Our apron is ready.
- As you can see, making a simple kitchen apron is easy enough!