Have you decided to make laminate floors in your room and have already purchased all the material for this? Do not hurry to get down to work right away: the laminate purchased must undergo a period of acclimatization for two or even three days in the room for which it was purchased. At this time, the moisture and temperature of the material itself will equal the same indices in the room. And only after that the laminate will be ready for packing .
How to put a laminate on an uneven floor?
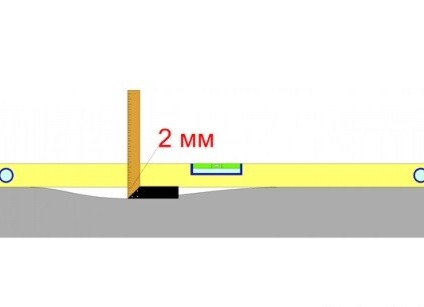
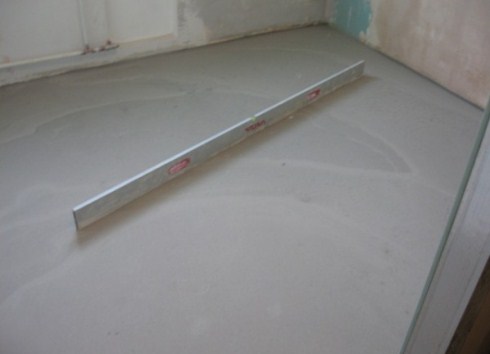
- Many owners are interested in the question whether it is possible to lay a laminate on an uneven floor. Before starting laying, experts recommend checking the smoothness of the floor basis with the help of a building level. A permissible height difference is 2 mm per meter of length. If the deviations are more than permissible - the ground must be leveled.
- There are several options for this:
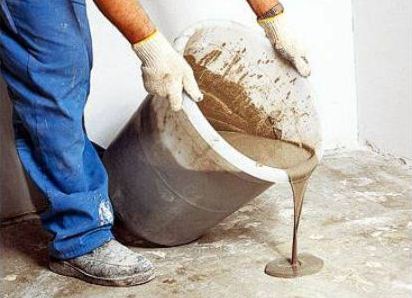
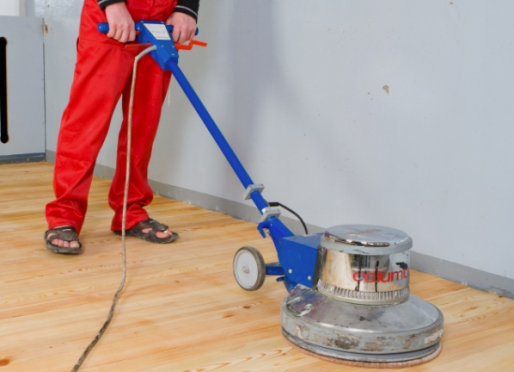
- In the old concrete floor all pits and cracks are carefully sealed, and after that the floor is polished;
- a new cement screed should be primed, it will help to avoid dusting and creaking of laminate panels because of the sand or grit between them;
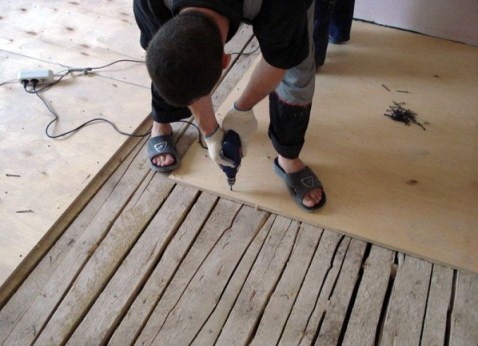
- the old floor of the wood is leveled with sheets of plywood or fiberboard;
- The new wooden floor is ground and leveled.
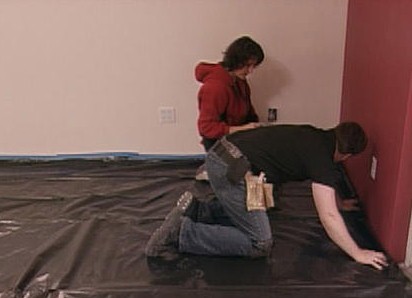
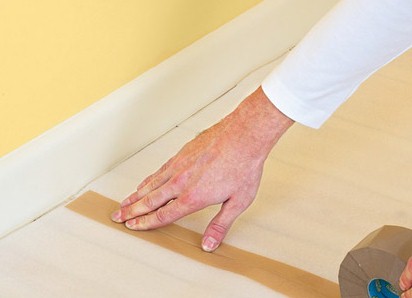
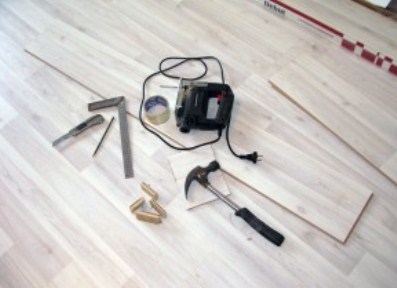
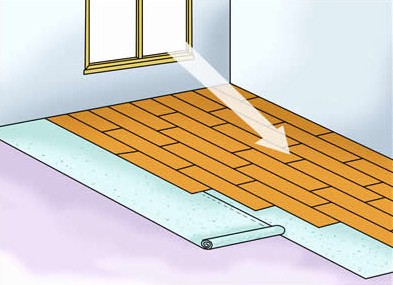
The next preparatory stage is laying the waterproofing layer from polyethylene or special film material. Cloths must be floored with the overlap on the walls and overlap each other by about 15-20 cm. Between them, the canvases are glued together with adhesive tape. The time has come to lay the substrate. You can use its various types: from roll foam polyethylene, sheets of polystyrene, from natural cork or cork-bituminous material. The roll backing is laid in the same way as the film: the linens are laid overlapping, and the joints are connected by adhesive tape. The sheet substrate is laid in butt-end, after which also the sizing of the joints is applied. For laying a laminate we will need such tools: - saw or electric jigsaw;
- tape measure, pencil;
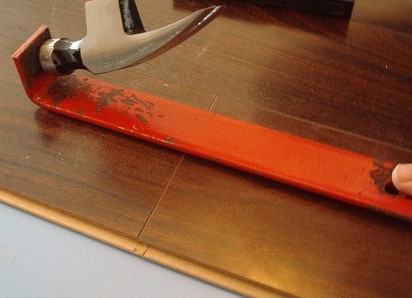
- hammer, clamp;
- wooden lath.
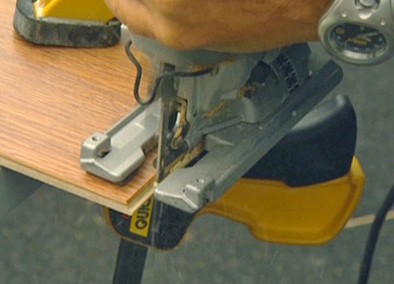
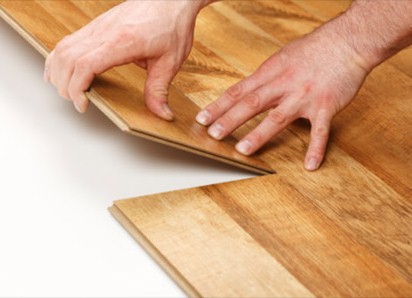
Begin to mount the laminate should be from any angle, but we must remember that the panels should be located along the rays of light, then the joints between the lamellas will be almost invisible. In the event of humidity changes or changes in operating conditions, the laminate may contract and expand. In order that the surface is not swollen, a special gap of 8-10 mm is left between the walls and the installed laminate. To do this, insert special pegs or spacers into the gaps. Panels in the first row are laid with a spike to the wall, and these thorns must first be cut with a jig saw, then the fitting of the panels to the walls will be more dense. The end part of each panel is snapped with a special lock. To do this, the panel spike is inserted into the groove of the already installed lamella with a slight slope, and then the panel is pressed against the floor. The second row of panels should be stacked with a displacement of 25-30 cm. To do this, the part of the panel is cut off and a narrow cut is laid against the wall, and a whole lamella is already attached to it. All subsequent panels are stacked in the same way as the first row. The collected row is fixed with a hammer and a bar. In order to fix the panels of the last row rigidly, it is necessary to use a clamp and a hammer. After installing all the laminate panels, the gaps between the walls and lamellas are covered with decorative skirting boards. As you can see, laying a laminate with your own hands on an uneven floor is quite possible with your own hands. If you do everything right, then the laminate floor will last you for many years.