You recently finished repairs in the kitchen, everything is sparkling and sparkling with freshness, but the walls look dull and dull? Not enough jewelry! The final touch in the design of the kitchen (or dining room) can be decorative plates on the wall. They can be bought in souvenir shops, but we offer you a more economical way to decorate the walls of the kitchen - the dish's decor with your own hands. This is a great option if you like to draw and have some spare time available.
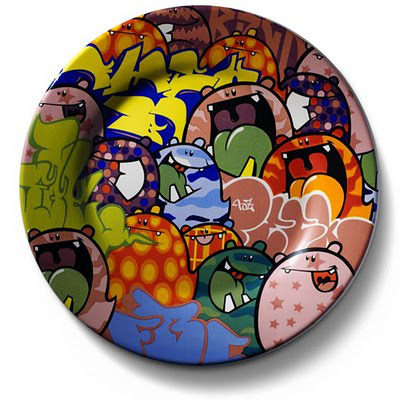
Decor of a dish with acrylic paints
The usual plate can be turned into decorative with the help of acrylic paints. Even if you can not draw, there is a way out. Print out the picture you like on the printer and transfer it to the prepared surface with copy paper, then apply the ink using the brushes. Very convenient for painting are ceramic plates on the wall, because they are easier to paint, and it is more reliable. Attend to this lesson, you can and children, resulting in a composition of decorative plates on the wall will become a family heirloom. Thanks to the decor you can give a new life to old dishes or remnants from the grandmother's service.
Decoupage of plates on the wall
There are more sophisticated techniques for making decorative plates on the wall with their own hands, for example, decoupage. For this purpose both ordinary plates and transparent glass are suitable - the drawing should be applied from the outside. For decor, you can use fabric, photographs, illustrations from magazines, postcards or napkins. The latter option will be considered in more detail.
We need:
- a plate (without a relief pattern);
- a napkin with a pattern;
- scissors and glue PVA;
- acrylic lacquer;
- brush for drawing;
- paints;
- ribbon;
- glue "cold welding".
- The image on the napkin should not be larger than the dish itself.
- Now cut out the picture we selected. It is desirable to give the image a rounded shape - this will simplify the work. Since the napkin is multi-layer, it is better to separate it and use only the top layer.
- On a plate with a thin even layer with the help of a brush, we apply PVA glue.
- Very carefully apply to the glued plate. The napkin should be well disrupted. Do this slowly so as not to break the picture. We apply the second layer of glue directly to the picture to fix it on our plate.
- We are waiting for the glue to dry completely, after which it is possible to draw additional decorative elements with acrylic paints.
- We let the paints dry and cover the plate with varnish.
- Now you need to consider how to attach the plate to the wall. To do this, we need a little glue, which is called "cold welding", outwardly it resembles plasticine. We fasten a loop of decorative tape in a piece of glue.
- Give glue a more accurate shape and attach it to the plate.
- To make a piece of glue that will serve as a fastener for the plate on the wall, more attractive, you can decorate it with the remnants of a bright napkin, a cloth or paint with acrylic paints. There are other ways to fix the plate on the wall. For example, using a lid with a ringlet from an ordinary tin can. The lid should be glued to the bottom of the product so that you can hang the plate on the wall on the ring.
Such homemade decorative plates will be a highlight in the interior of any room.
How correctly to make a composition from decorative plates on a wall?
- the color range of decorative plates should not contradict the interior of the room;
- placing products in order in accordance with the size (from large to smaller) gives a sense of dynamics, symmetric placement - conservatism and rigor;
- color solution and style of performance should be repeated in other accessories of the room.