In order for the room to look cozy, you need to pay attention to the design of each part. To smooth the joints between the wall and the ceiling, often use ceiling plinths. They are also called fillets. They give the interior a complete image, and also with their help you can hide the small defects made during the repair. Shops offer a huge range of fillets of different materials. If gluing skirting boards to the ceiling will be carried out independently, it is best to choose materials such as polystyrene, polyurethane, polystyrene. They are light enough and their installation does not require high qualification. To visually make the ceilings higher, you need to choose narrow bars. Wide elements will shorten the walls. This should be taken into account when selecting materials.
Preparing for the installation process
Before you glue the skirting on the ceiling you need to prepare everything you need to work.
Selected fillets should match the entire interior in color, because only then will the room look harmonious.
It is also important to correctly calculate the number of elements. For this it is recommended to use a certain formula. You need to calculate the perimeter of the room and divide it into the length of one bar, the chosen plinth. To the obtained number it is necessary to add a spare unit. In general, before you glue the plinth on the ceiling you need to prepare the following set of tools and materials:
- the required number of fillets, calculated by the formula;
- tape measure, pencil;
- putty knife;
- knife, stool;
- sealant;
- glue.
It should be emphasized that when choosing a glue, you should carefully read its composition and instructions on the packaging, especially when it is planned to work with polyurethane. In this case, acetone is not allowed in the composition, since it can corrode the material, which will lead to a rapid damage to the repair.
Main stage of installation
Now you can go directly to the question of how to paste skirting on the ceiling. It is best to do this with an assistant.
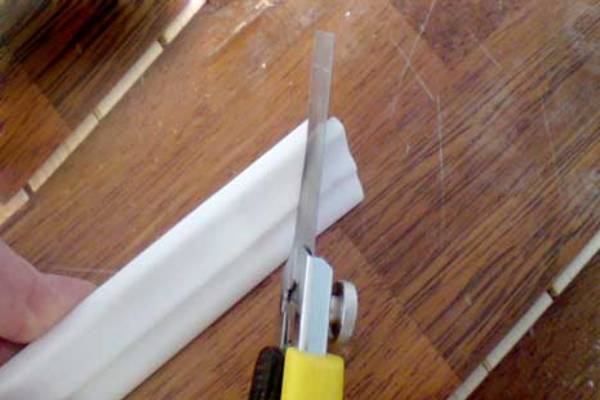
- It is better to start working with corners, therefore before you paste the plinth on the ceiling you need to prepare the workpieces. To do this, they should be cut carefully, in accordance with the measurements taken. Sometimes cornerstones are sold with the baseboards, which greatly simplifies the work, because this stage is excluded from the installation process.
- The polyurethane fillet should be cut with such a special tool as a chair, and a knife can be used for the foam plastic.
- Next, you need to try the workpieces, attaching them to the corner in which the installation is planned.
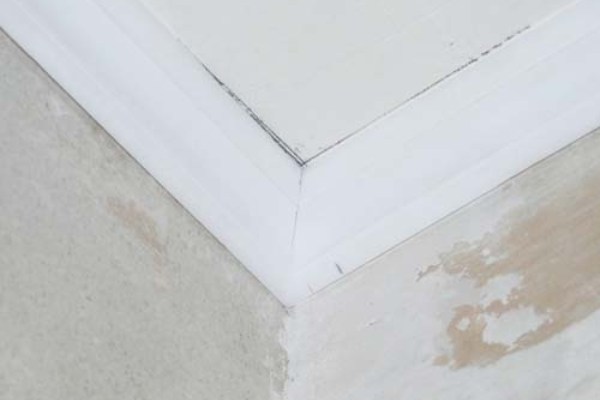
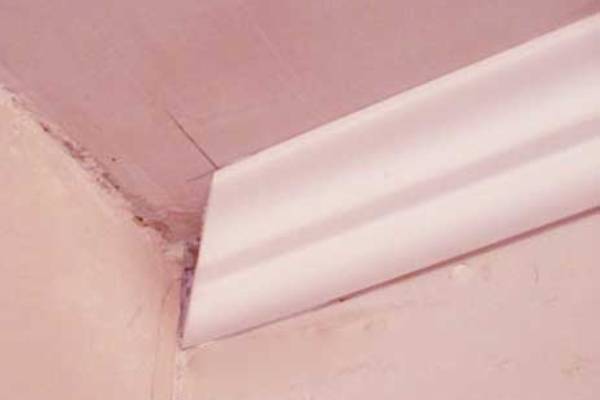
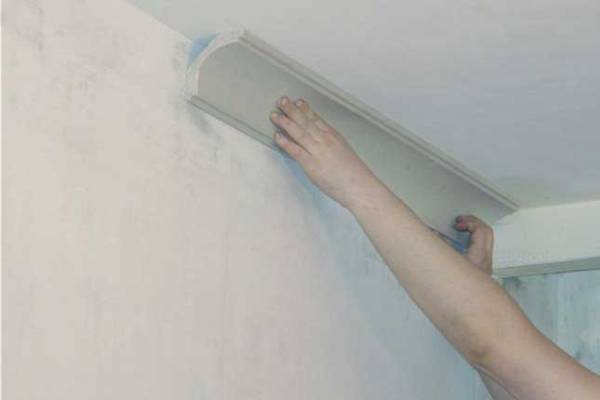
- Now you need to glue with both sides of the material. One side will be fixed to the ceiling, and the other will be glued to the wall. By attaching the fillet to the surfaces, you need to press it and hold it for a while. But you can not push hard to not make a dent. This is especially true for foam plastic, which is a fragile material. The joints of the strips are treated with a sealant to give a neat appearance. As mentioned earlier, you have to start from the corners of the room.
- On the perimeter of the room installation is carried out in a similar way.
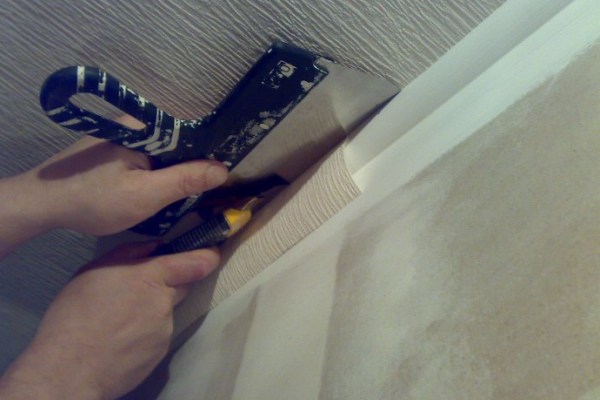
- Only after installation of all fillets in the room is carried out, proceed to other types of finishing, for example, to wallpapering . They cut off with a knife, and the edges, using a spatula, you need to fill it with a plinth.
Installation does not require special preparation, but it requires carefulness and attention to detail. After all, carelessly installed fillets will spoil the whole impression of the repair and appearance of the room. It is better to spend more time on installation, but in the end, the room will please a cozy and warm atmosphere.