Facing with mosaic is an excellent variant of decorating a bathroom and even a swimming pool. This material is attractive in appearance and easy to care for. The mosaic is durable, resistant to the effects of various chemicals, does not lose its color after many years of service.
Technology of laying mosaic
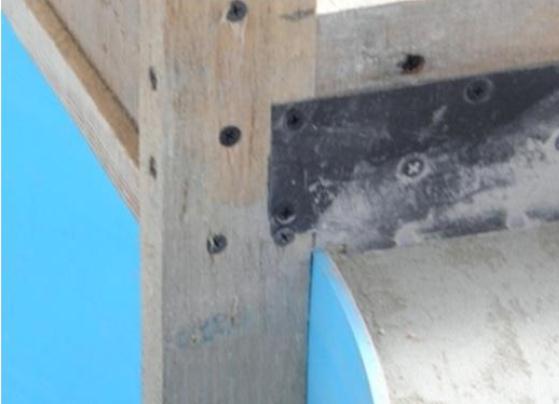
The optimal basis for laying the mosaic is concrete: it provides better grip of the mosaic elements. All surfaces for laying the mosaic must be leveled and cleaned of dust and dirt. Remaining irregularities will lead to excessive consumption of glue.
Dry glue for laying the mosaic is diluted with water in a ratio of 6.8 liters per 25 kg of dry mixture. Thoroughly mix the resulting mixture to a homogeneous state with an electric mixer. The glue should not be too thick, but do not drain off the spatula. Such a solution should be prepared in small portions, since the thickened and unused glue can not be re-diluted with water: the adhesive qualities of it are lost. Glue on the surface should be applied with a layer of no more than 10 mm.
If the mosaic tile is laid on the wall, then the mosaic canvas is first laid out on the floor, measured, not forgetting to take into account the seams between the mosaic elements, and the wall is delineated by these dimensions.
How to lay the mosaic?
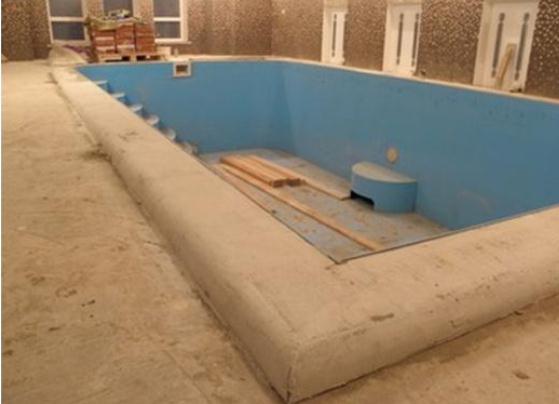
I offer you a master class on laying a mosaic on the concrete edge of a plastic pool.
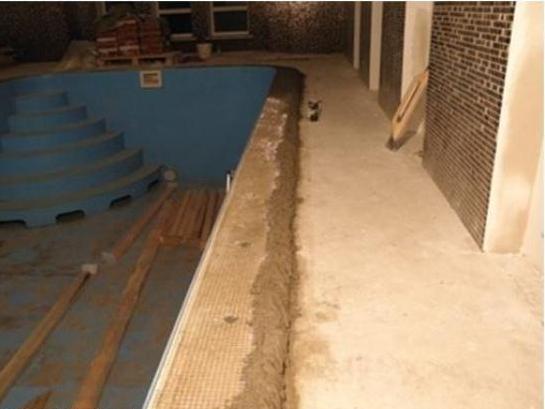
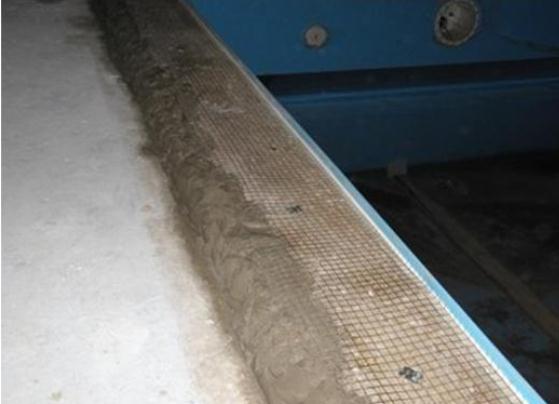
- Surface preparation. On the concrete edges of the pool we fill the net and on it we put a rough layer of concrete solution.
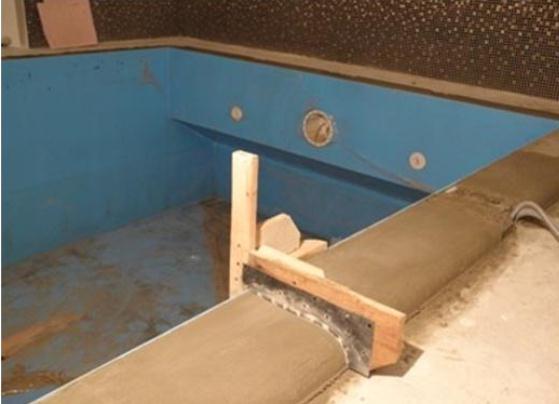
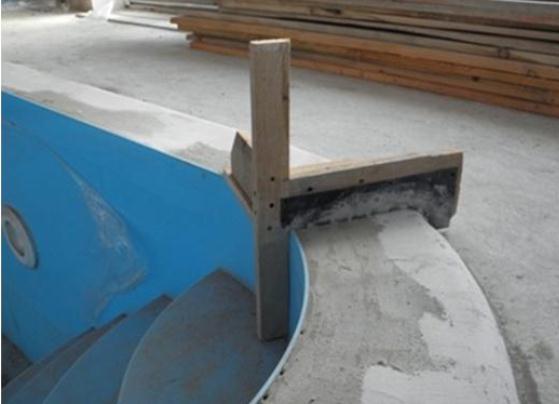
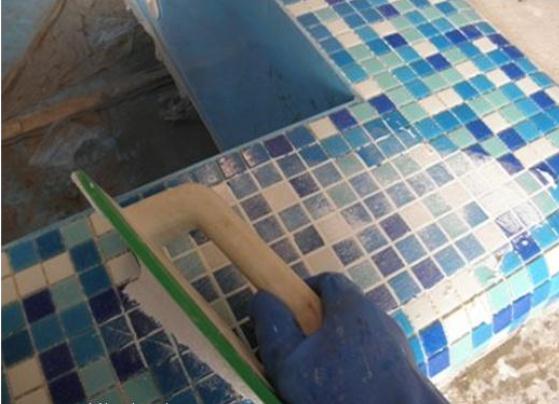
- We construct from a wooden slat and a small metal sheet such simple adaptation by means of which we extend a sandy-cement mortar along the entire perimeter of the basin, making the outer edge of the bowl of the pool rounded. Leave to dry for a day.
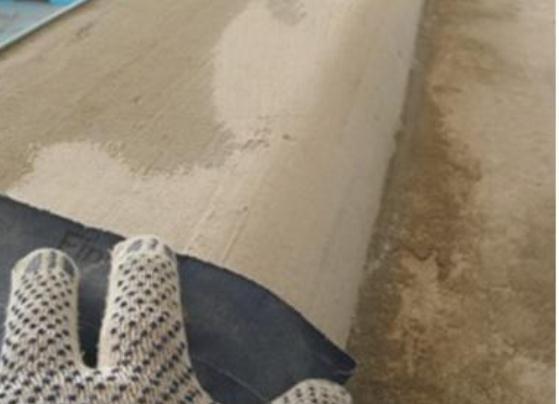
- After the solution has dried, cover it with white glue for mosaic. The glue layer will serve both to eliminate small unevennesses, and to primer the surface.
- Grind an absolutely dry surface with sandpaper.
- Finally, we glue the edge of the pool with glue. We give a good dry.
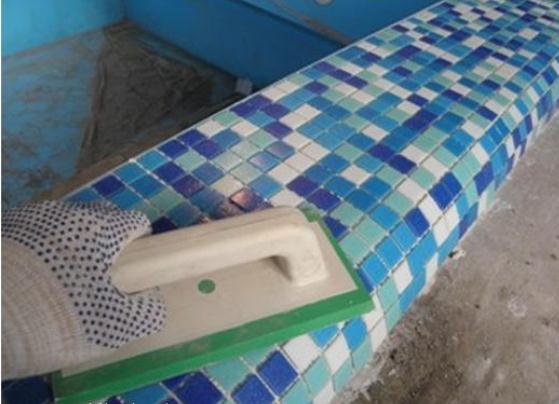
- Laying the mosaic. The crest, which has a tooth height of about 3 mm, is applied glue under the mosaic. Top of the page apply mosaic tile sheets.
- Gently slip the sheets with a rubber spatula.
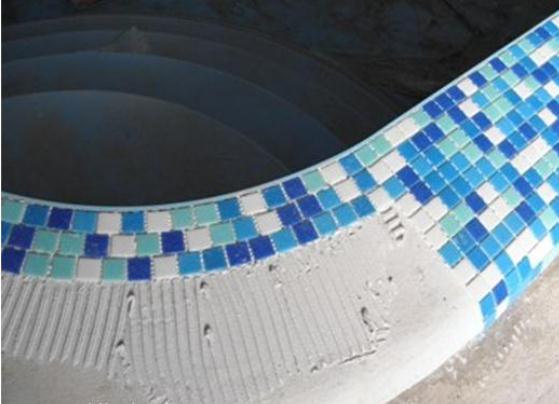
- Having reached the rounded section on which whole sheets of the mosaic do not fit, cut the tiles first into strips, and then into small cubes. Thus, you can lay out the rounding from the mosaic.
- At the end of the radial section, we lay entire sheets of mosaic tiles on both sides, and we place the middle with cut strips and cubes, while combining all the seams.
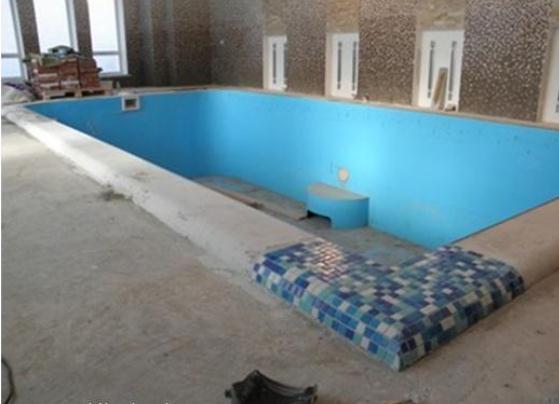
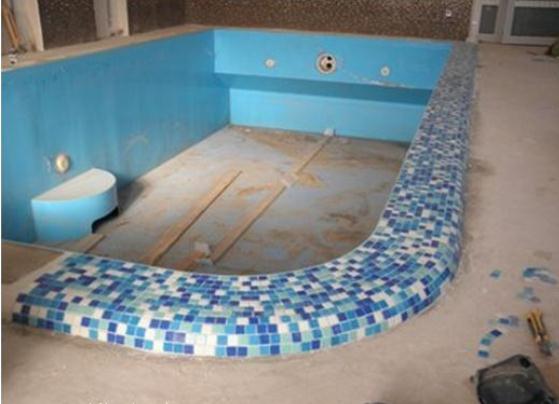
- We also lay out the mosaic on straight sections and radial roundings along the entire perimeter of the pool.
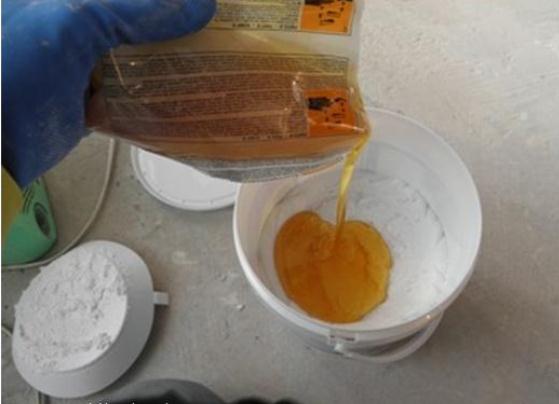
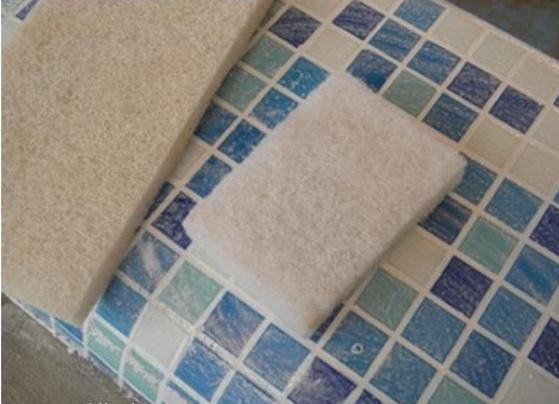
- Grout joints. This final stage of laying the mosaic is performed the next day, after the glue has completely dried. We use a two-component grout with an epoxy-based hardener. This hardener is poured into a pasty mixture of grout, everything is thoroughly mixed with an electric mixer.
- If the indoor pool is cool, you can moisten the glued mosaic with a wet sponge to facilitate further work. Using a hard rubber spatula, rub the grout into the seams between the mosaic.
- After that, special hard jaws need to soak the surface and remove excess glue by moving diagonally pasted mosaic. Wipe the surface clean. The grout dries out within 20 minutes.
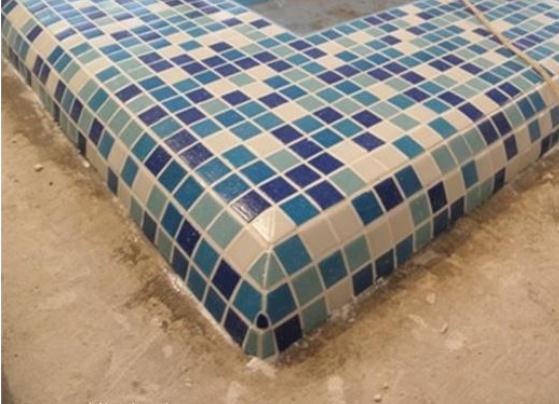
- So the mosaic decoration of our pool is finished.