If you want to give a house for your pet, you do not need to go to the store and pick up more or less suitable. Construct a box with his own hands is quite possible for a layman. Conditionally it is possible to divide this process into three parts: taking measurements, drawing a sketch and constructing.
Dog booth with our own hands: we remove the main dimensions
To your pet was comfortable in the new house, you need to correctly choose the dimensions of the booth. Now consider what measurements need to be taken before there, how to make a doghouse:
- the height of the walls is calculated as follows: to the height of the dog in the hall add 15cm (if you plan to lay a warm mat, its height is also taken into account);
- the width of the booth is equal to the sum of the widths of the vestibule (from 45 to 60 cm, depends on the dog's complexion) and sleeping place (distance from the tip of the dog's nose to its coccyx plus 10 cm);
- depth should allow the dog to lie down comfortably and pull out the paws (put the pet on its side and measure the distance from the withers to the tips of the paws).
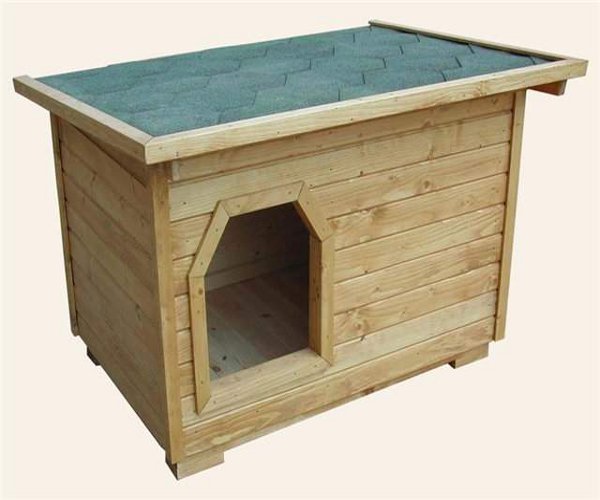
Booth warmed by own hands
Before making a warm house for a dog , you need to calculate and draw a sketch. A drawing for a dog booth with your own hands is simple and you can build it without special knowledge.
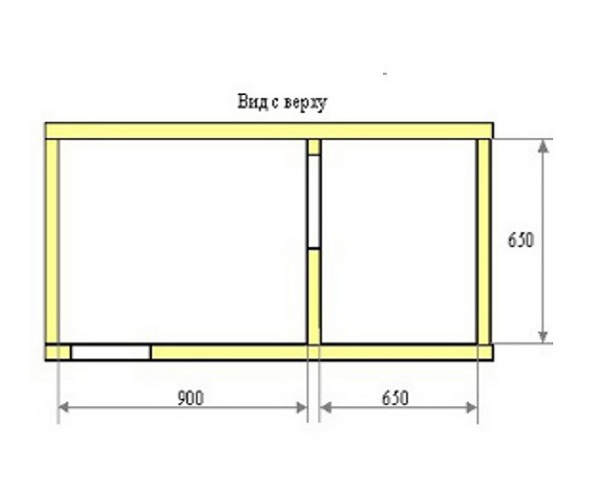
After you have made all the measurements, you can start drawing a sketch for building a booth. In this master class there is a variant of building a dwelling for a large dog . The top view shows how the pet house is arranged. An animal has an entrance and a summer variant of a bed. Then there is a special partition and the entrance to the second part, where the place for sleep is insulated.
We will build a doghouse with our own hands with a slightly modified design - the sleeping place is made in a square shape and reduced. This allows the animal to warm up more quickly, but to feel comfortable.
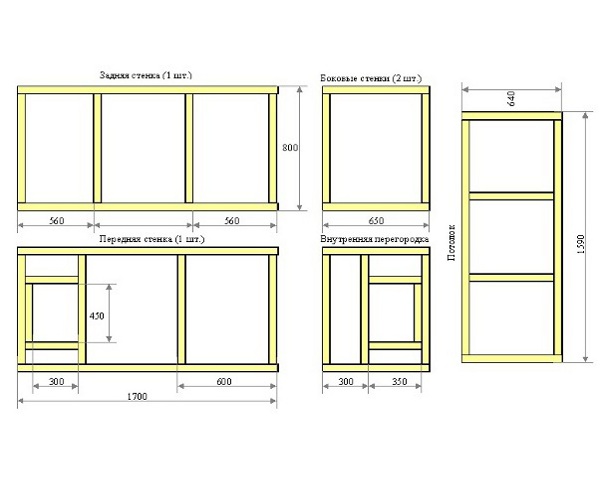
Now consider step by step how to make a doghouse.
- According to the drawings, we cut out parts of panels and collect them together. Bars with each other are attached to self-tapping screws. For work used bars of 50x50 mm (for the walls) and 50x25 mm (for the roof).
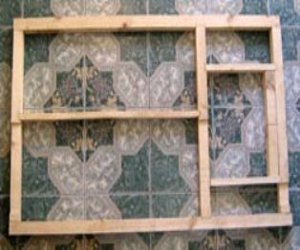
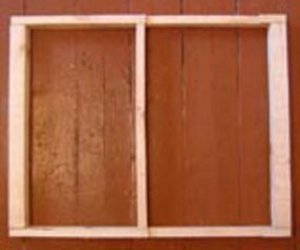
- That's what the front frame and side frame will look like.
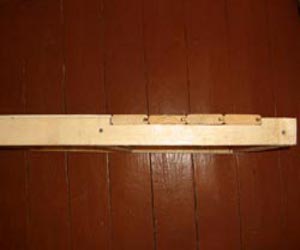
- On the inside you need to cover everything with plywood and lining. In the photo it can be seen that the board is recessed in the bezel flush with the plywood.
- Then we connect all the parts of the booth. Should be a rectangular box without a roof and floor.
- First we attach the floorboard to the lower bars using self-tapping screws. It is best to use the floorboard punctuated. Watch that there are no crevices and gaps, otherwise the claws of the animal can get stuck.
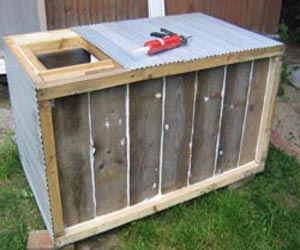
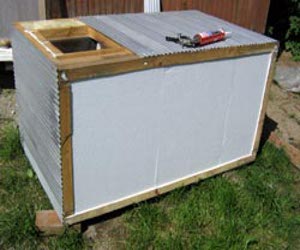
- It's time to assemble the ceiling frame. From the inside we sew the ceiling with plywood and fill the space with a wool or other insulation. Then cover all with a sheet of plywood or just lining.
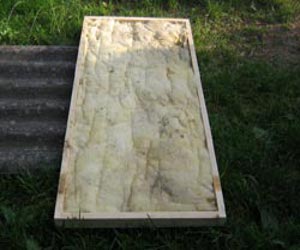
- This is how the ceiling looks like with a heater. In the future, it will be fastened to the hinges in such a way that you can flip the lid off and go into the booth.
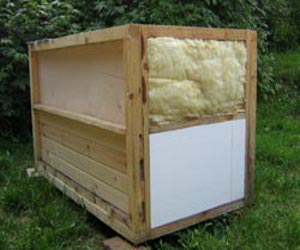
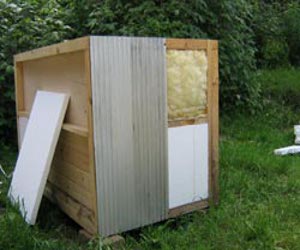
- Thus it is necessary to insulate the wall panels. From above we lay a mineral wool, and in the lower part it is better to use foam plastic. The foam sheet should be 2-3mm larger than the internal size so that it densely enters between the bars and no crevices are formed.
- The walls are lined with a lining made of plastic or aluminum alloy.
- To make the doghouse warm and comfortable for the pet, the floor should also be well insulated. We turn the structure on its side and lay a sheet of foam plastic. Then attach a sheet of plywood.
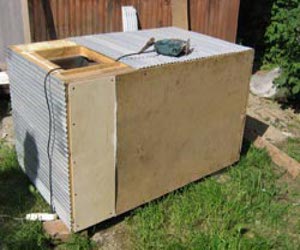
- Booth for the dog with your own hands is ready!