Any of the improvised materials for the child can be a wonderful toy or hand-made for the school exhibition. To do this, you only need to show a little ingenuity and use additional, no less accessible materials. You've probably tried to make a rocket out of paper or cardboard . In this article we will tell you how to make different models of missiles from a conventional plastic bottle.
Rocket from plastic bottles for the smallest
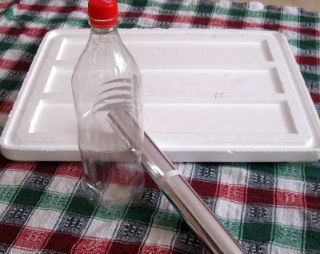
Let's start our master classes with the most simple rocket, which can be done together with the baby. For its manufacture we will need:
- an empty plastic bottle;
- small pieces of foam;
- stationery knife;
- scissors;
- foil for baking;
- paints, preferably acrylic;
- brush.
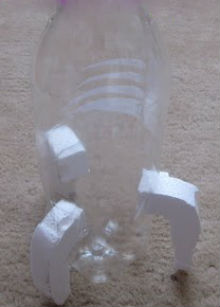
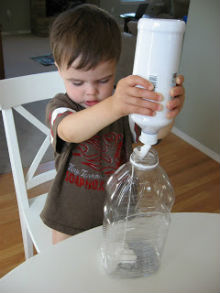
- First of all, we make the workpieces of foam. To do this, with a clerical knife, we will cut out three details that will become the supports for the rocket.
- In the bottle itself, make three holes, into which we carefully insert our workpieces.
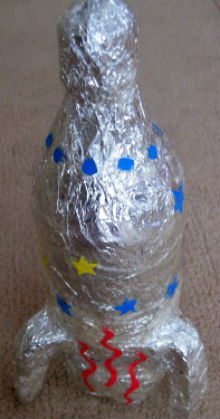
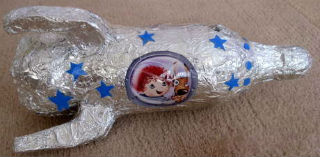
- Together with the baby we wrap the bottle and the supports with foil and, so that it keeps, press the foil as tightly as possible to the main parts of the rocket.
- Then the rocket needs to be painted with colors. The whole process can be completely entrusted to the baby. After the paint has dried - the rocket is ready!
Children's handmade "Rocket" from the bottle
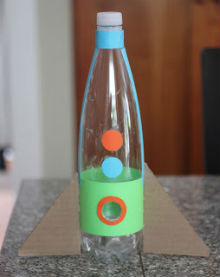
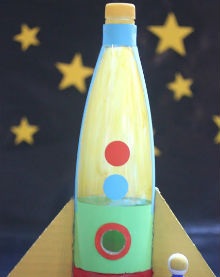
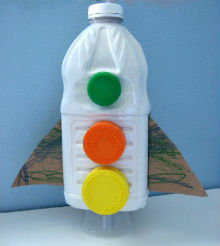
Another version of the rocket from a plastic bottle, which can be used as a craft for an exhibition, is also done with the child. In order to look more accurate, we will use stencils.
So, for a rocket we will need:
- a plastic bottle without a relief;
- acrylic paints;
- brush;
- dense color paper;
- scissors;
- stationery knife;
- Scotch;
- cardboard.
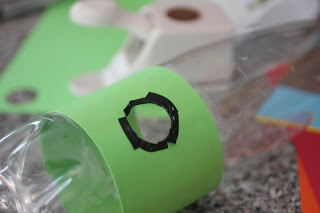
- From the colored paper, we cut out the strip and make a round hole in it. Next, we attach this stencil with adhesive tape and paint the illuminators of the rocket with colors, painting the rest at our discretion.
- From the cardboard we cut out two triangles. With a stationery knife, we make two slots, one that is equal to one side of the triangle. We place them on the sides of the portholes. In the slot, we insert triangles and paint the cardboard with paints. The missile is ready!
| | |
Handmade "Rocket" from a plastic bottle with your own hands
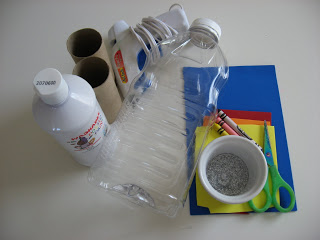
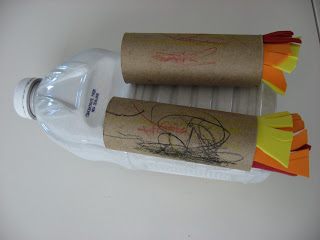
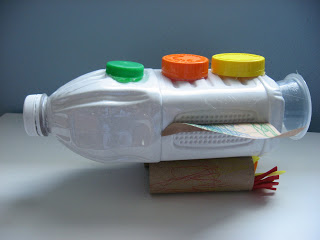
The original rocket can be done simply by slightly changing the manufacturing technology and adding a few more new elements. So, for the next version of the rocket we will need:
- transparent rectangular plastic bottle;
- white acrylic paint;
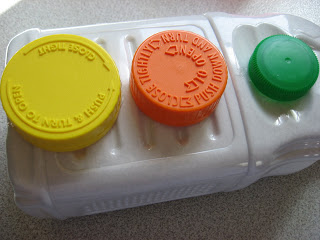
- three plastic caps of different diameters and different colors;
- a plastic cup;
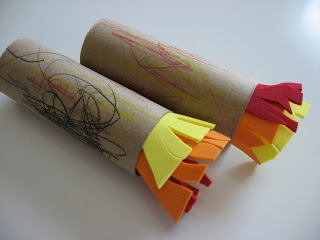
- two cardboard tubes;
- dense cardboard of red, yellow and orange colors;
- markers or pencils;
- scissors;
- hot glue.
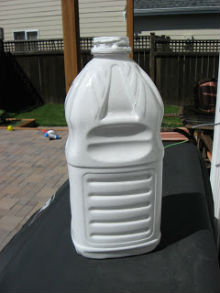
- For coloring the bottle, we will pour a little white paint into it and cover it with a lid, shake it well, so that the paint will evenly color the bottle from the inside. This process can be made less laborious if you immediately take a plastic bottle of the desired shape and white color. For this, a bottle of dairy products may come up.
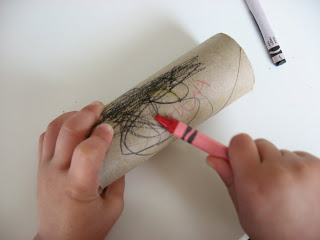
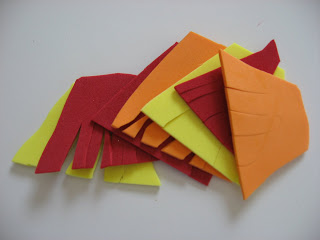
- Cardboard tubes are colored with pencils. From the colored cardboard we cut out the strips of flame and glue them to the tubes from the inside. The resulting nozzles with a flame of hot glue are glued to the bottle.
- From multi-colored plastic caps we make portholes. To do this, the back side glued them to the front of the rocket with a pistol for hot glue.
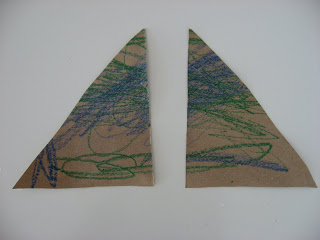
- From the cardboard we cut out two triangles, paint them with felt-tip pens or pencils and glue them on the sides of the rocket.
- To the bottom of the rocket with hot glue we glue an inverted plastic cup, which will be one more nozzle, and at the same time a stable rocket base. After the glue has finally solidified - our rocket is ready!
| | |
| | |
| | |
| | |