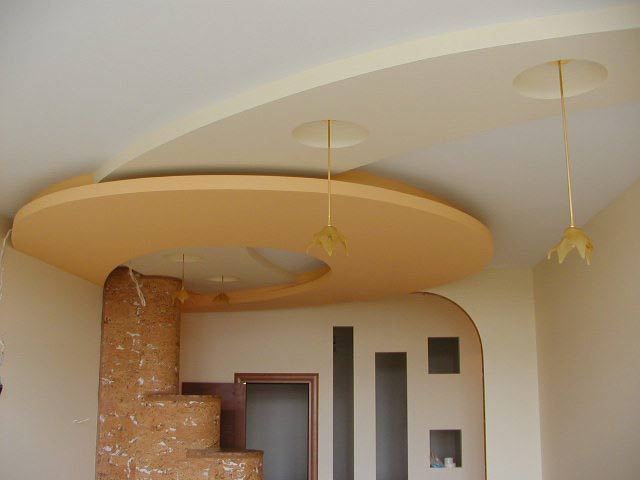
Gypsum cardboard is an extremely convenient material that allows you to get a perfect final result without much time, effort and expense. The most popular is the planking of the ceiling with plasterboard , as it becomes possible to decorate the surface with intricate and interesting designs. However, achieving a satisfactory result requires knowledge of some of the subtleties of handling this type of material.
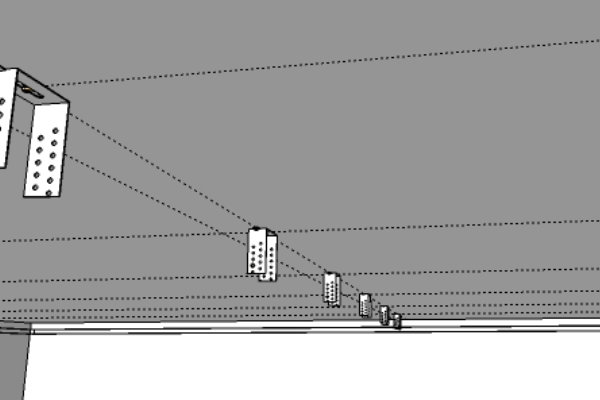
To begin with, you need to draw a sketch of the future often multi - level design, which is then transferred to the surface itself. To do this, you need to find the lowest point on the ceiling and move it to the corner of one of the walls in the room. Since the minimum thickness of the profile is 25 mm, then the distance from the low point to the bottom of the frame must be not less than this value. With the help of a water or laser level, we transfer the first point from the corner to all the others.
A prerequisite for how to make a ceiling from gypsum board is the designation of control lines. For their application, you should use a thread in blue or choklaine. Having thus broken the entire perimeter of the ceiling, it is possible to get the lower level of the whole future frame.
Next, you need to decide how the plasterboard slabs will be placed on the ceiling. Now it is necessary to make the same marking for the lines of suspension.
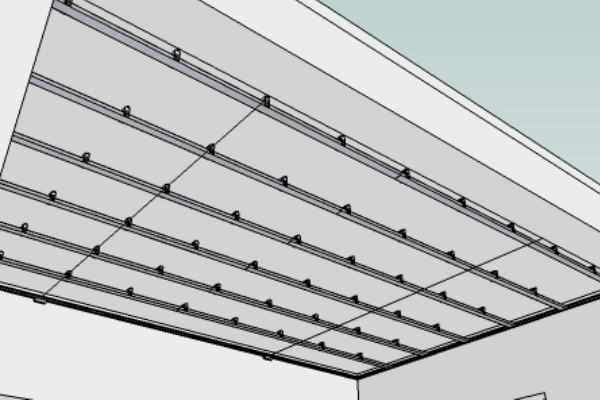
Then proceed to screwing along the circumferential lines of the profile UD, and its lower part must coincide with the marks. For its attachment, plastic dowels and screws are used, the length of which depends directly on the thickness of the overlap.
The next stage of the installation of a false ceiling from plasterboard will be the attachment of U-shaped hangers along the lines designated for them. It is better to screw them not by the ears, but by the holes located inside the fasteners. This will make it possible to avoid sagging of the structure of the plane violation.
Now you need to trim the CD profile to the desired length and insert it into the already-permanently attached UD profile. In order for it to enter easily, it is necessary to cut it 5 mm shorter from the nominal distance. Then each middle hanger is bent under the profile, pulling it up, therefore, just above the level.
The next step in the arrangement of the frame for the ceiling of gypsum board will be the bonding of gypsum plasterboard profiles to the suspensions themselves, the excess "antennae" will be cut off or bent. Now you can start placing the wires, which should be hidden in the corrugated cable channel.
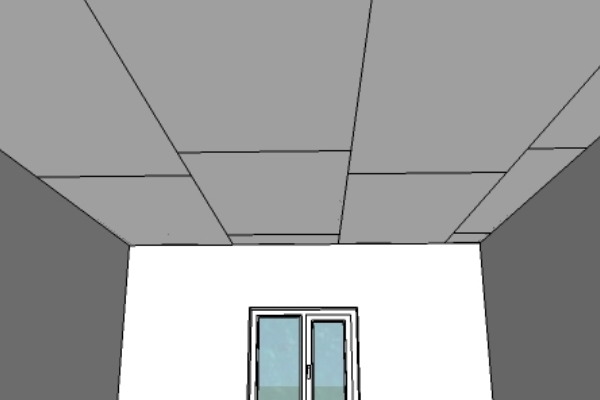
Before installing the drywall on the ceiling, it is necessary to enlist the help of another person, since it is very difficult to connect the GKL plates to the ceiling alone. It's two people who need to lift a sheet of drywall up, after which one supports it, and the second one is screwed. You need to be extremely precise and understand that one CD profile serves for fixing two plates, so you should place them in the middle.
It is necessary to stock up a sufficient number of self-tapping screws, which must be flush, but not breaking through the plasterboard paper. A special nozzle will help to do this. At the same time it is necessary to take care of the holes for the leads of wires or fixing of the spotlights, which is better to do before installing the plates on the ceiling. Do not get upset if millimeter slits are formed between the sheets, then they can be filled with a fugenfueler or putty.
After all of the above manipulations have been made, putty all the screwing points and the joints of the plates themselves are sealed, which it is better to glue in advance with a sticky tape-mesh.
An indispensable condition is the existence of a calculation of the ceiling from plasterboard, which will allow you to purchase a sufficient amount of material for fast and high-quality work.