Bright tulips, strict daffodils and gentle mimosas - the appearance of these colors tells us that the long-awaited spring finally came into its own. Do you want to present your friend or mother with an article in the form of a mimosa flower? Or is this incredibly beautiful flower needed to give the last strokes of a greeting card? Then our detailed master-class on how to make your own hands a twig of mimosa or a bouquet, using the available materials, for you!
A branch of mimosa
We will need:
- wire;
- threads of yellow color;
- green corrugated paper;
- skewers;
- glue;
- scissors.
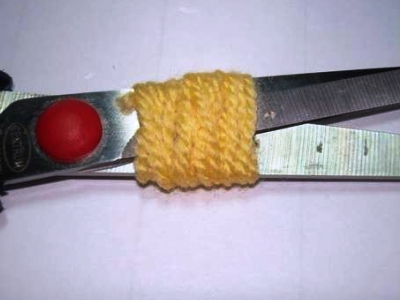
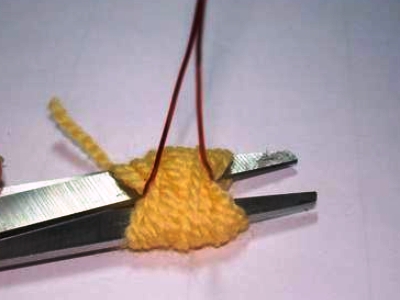
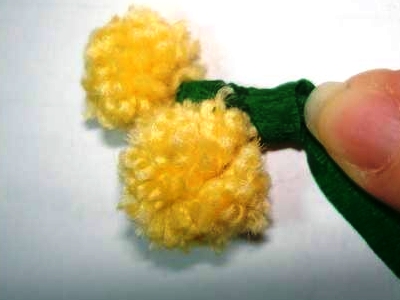
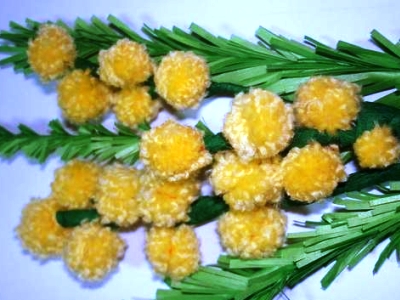
- On the scissors wind the thread, slide the hank to the edge of the blade, thread the wire and tie in the center. Then remove from the scissors and cut the thread at the folding points. You will have a fluffy flower. Make a few more of the same flowers. Then one of them is wrapped with corrugated paper for one or two turns.
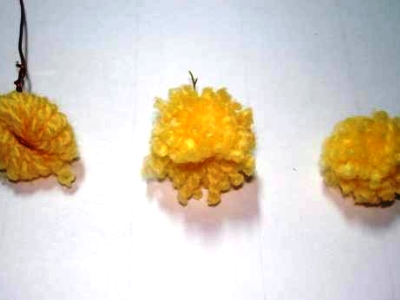
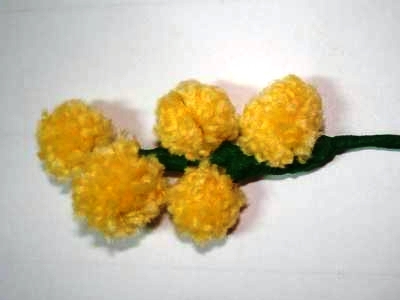
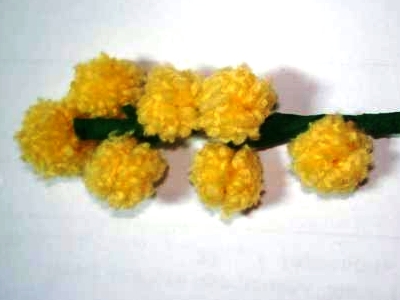
- Alternately add one flower, thus forming a twig of mimosa. It is desirable to reduce the lower florets a little in diameter, slightly cutting the thread with scissors.
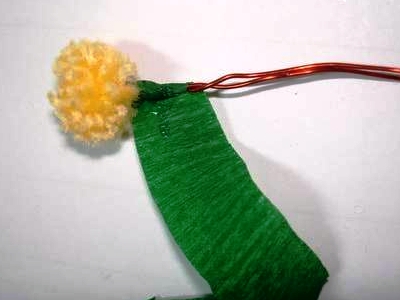
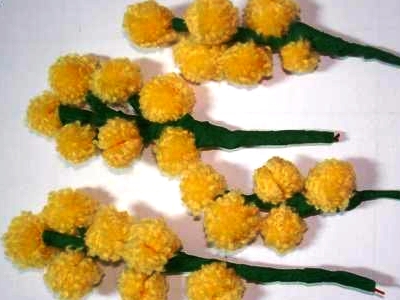
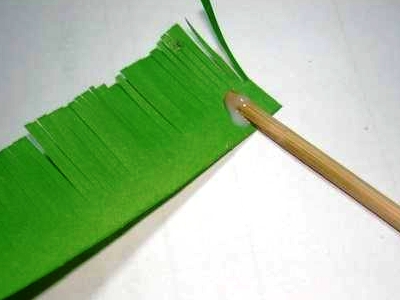
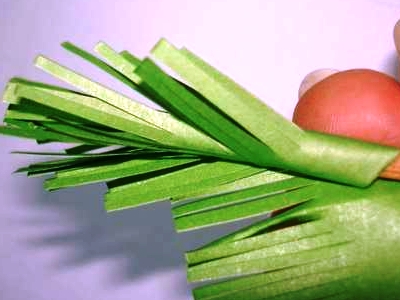
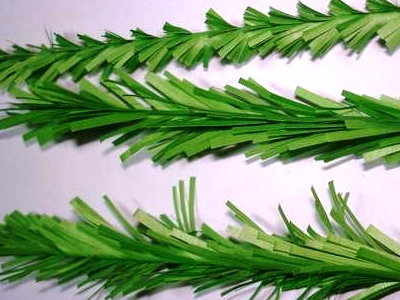
- With how to make your own flowers, mimosa flowers from yarn and paper sorted out, but still need to make branches with leaves. To do this, fold twice the strip of corrugated paper and from one edge, without cutting through to the end, make incisions. Lubricate the skewer with glue and wrap it in a spiral with this paper. A charming bouquet of spring flowers is ready to decorate your house.
| | |
| | |
| | |
| | |
| | |
| | |
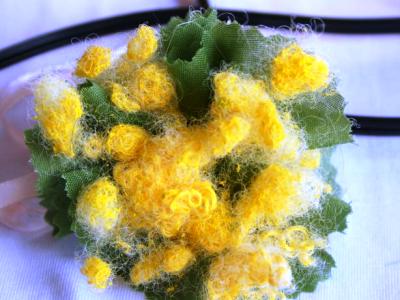
Spring bouquet
And in this master class we will talk about how to make a mimosa from cotton wool or synthepoo, having issued a hand-made article in the form of a spring bouquet.
We will need:
- green fabric;
- cotton wool (can be replaced by sintering);
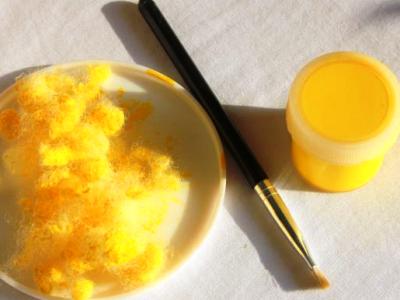
- acrylic paint yellow;
- glue;
- narrow satin ribbon for decoration;
- thread, needle.
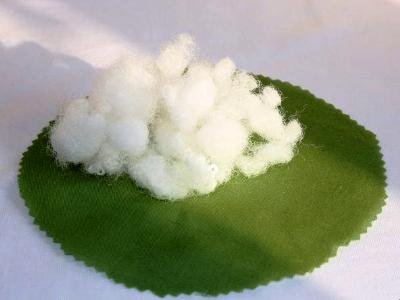
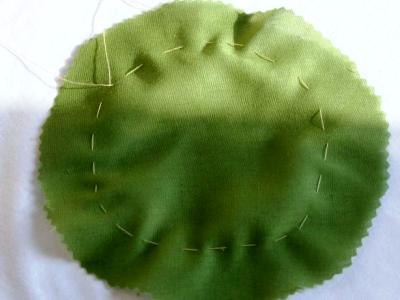
- The first thing that needs to be done is to cut a circle of small diameter from the fabric (12-15 centimeters). If you have curly scissors, you can decorate the edges with decorative denticles. Vatu divide into small lumps. For a small bunch of 15-20 pieces will be enough. After that, paint the lumps with yellow paint. With paint spray, this is easier. Wait until the paint dries completely. And while the future inflorescences of mimosa dry up, take a circle and at a distance of 1-1.5 centimeters from the edge make a line with usual stitches.
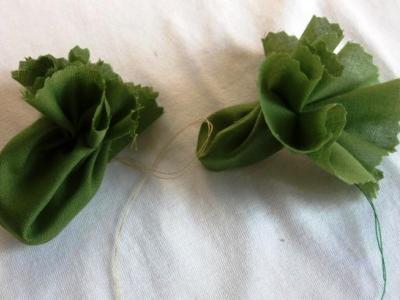
- Now gently pull the end of the thread, so that the circle turns into a kind of bag. Fix it in this form, making a few stitches with a needle. Spread the edges of the pouch to make it look like a bouquet and leaves. Next, proceed to assemble the spring bouquet. Gently lubricate the yellow fluffy mimosa inflorescence with glue and place them on tissue sheets in the center of the sac. In the process of working with glue the lumps are even more swollen, turning into beautiful flowers. To hide the place of the screed, you can use a beautiful satin ribbon, tied it on a bouquet in the form of a bow. The resulting bouquet can be used both as an independent craft, and as a decorative element for a larger-scale hand-made masterpiece. For example, soft toys or dolls.
| | | |
| | | |
Incredibly tender spring flowers of mimosa can be made from almost any material, and if you create a craft, you will enjoy your own creativity, then the result will definitely please you. In addition, you can draw to this lesson and your children, who will work with pleasure to create a small, but such a charming bouquet. Good luck and creative inspiration!
Also, a beautiful mimosa can be made from beads or decorated in the form of an applique .