Cosmetic or overhaul of the loggia can be done with your own hands, the main thing is to decide where to start. The amount of work and the amount of material depends on the condition of the premises and financial investments. If the loggia has plastic windows, its first priority will be its insulation, and only then a beautiful decoration.
Step-by-step repair of the loggia with your own hands
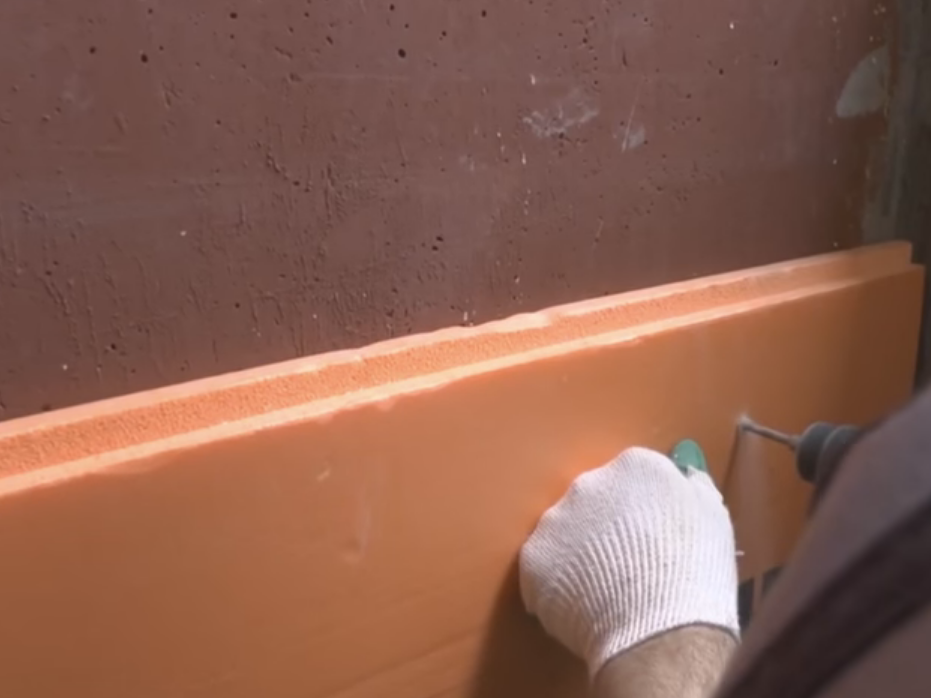
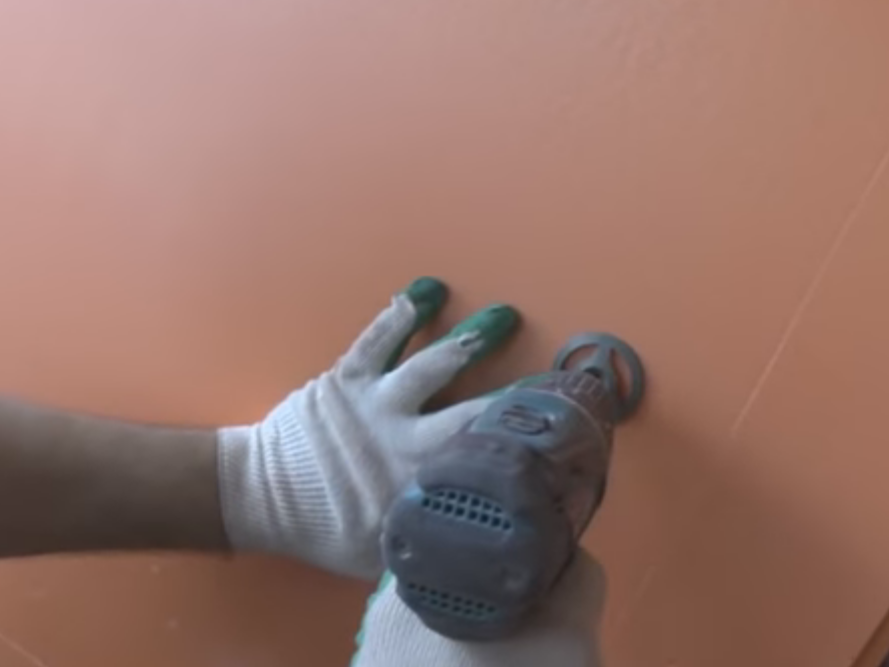
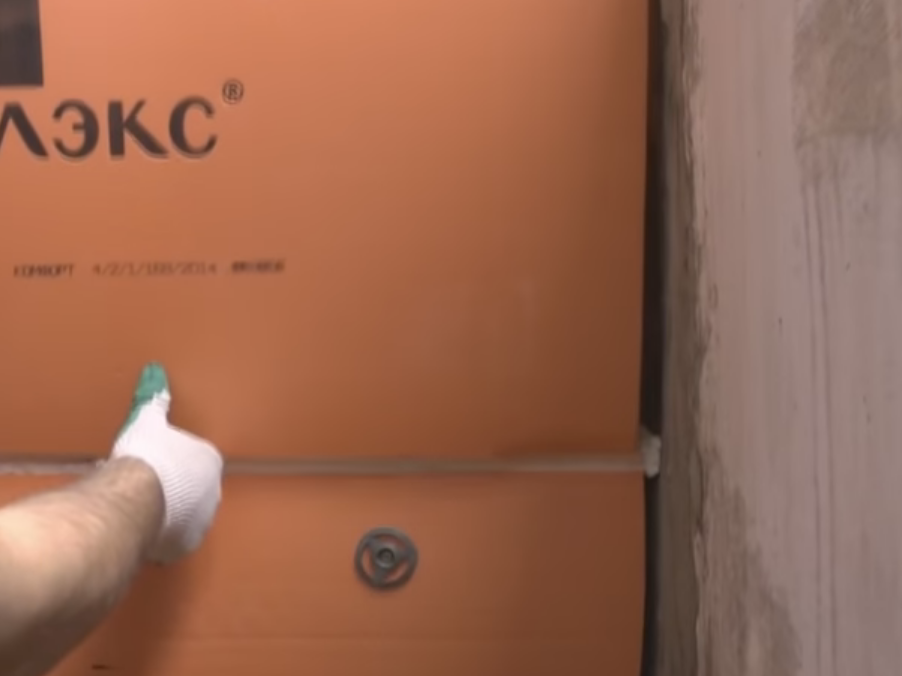
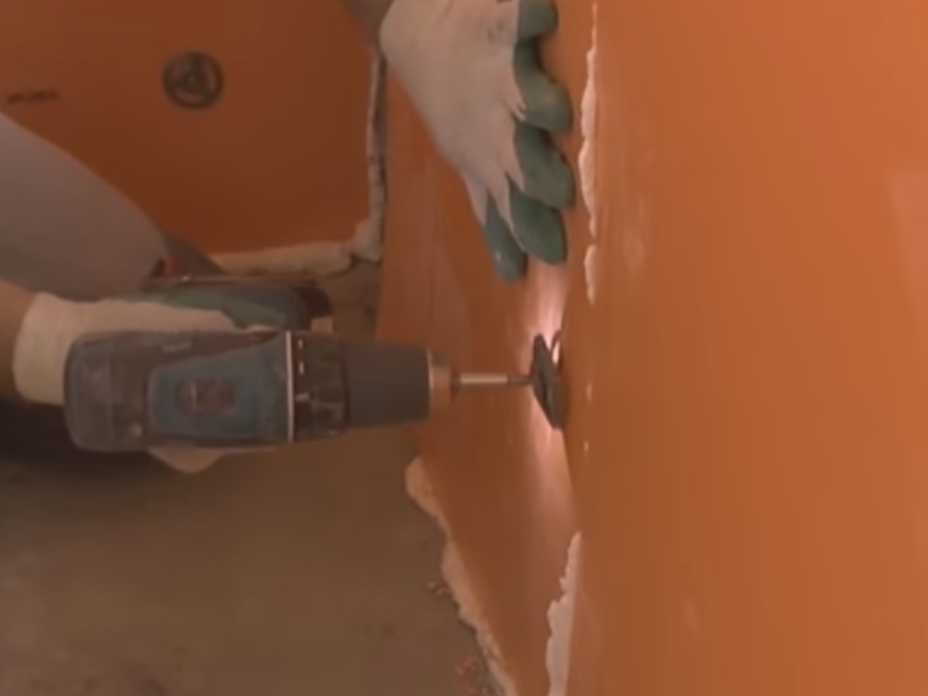
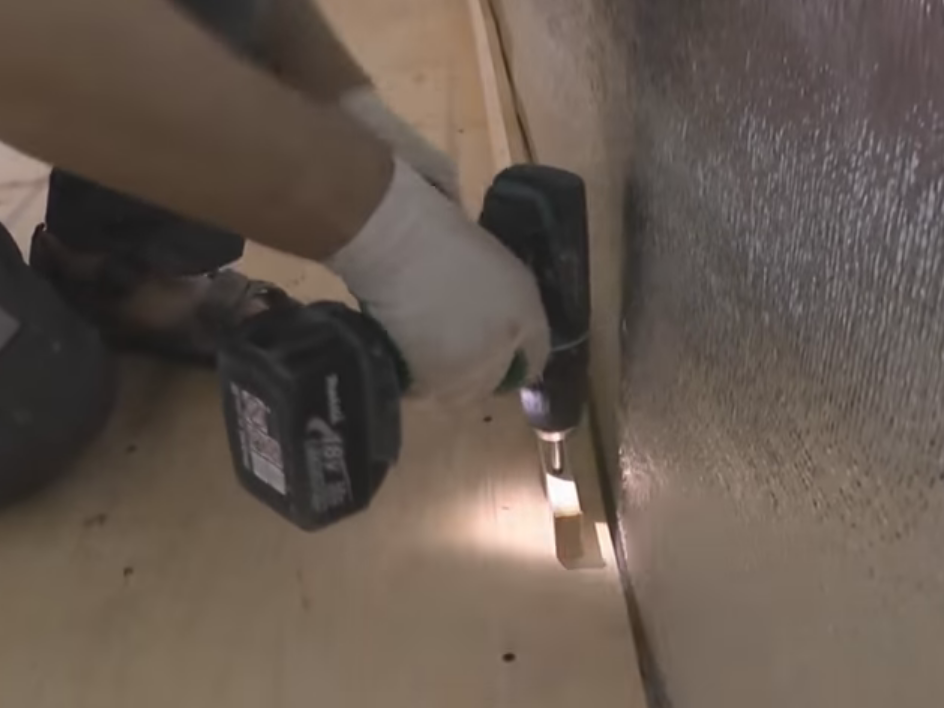
- We begin warming the loggia from the side wall. For what we cut a sheet of penokpaksa the right size and attach it to the wall. Drill holes of the desired diameter and install the dowel of the fungus with the subsequent screwing them with a screwdriver.
- On the top of the penopolix, apply a mounting foam and apply the next sheet of insulation, similarly fixing it.
- We finish the heat insulation of the side wall by preliminary applying the mounting foam to the wall of the loggia.
- We fix with a mounting foam the hole between the foam and the floor.
- We warm the second side wall.
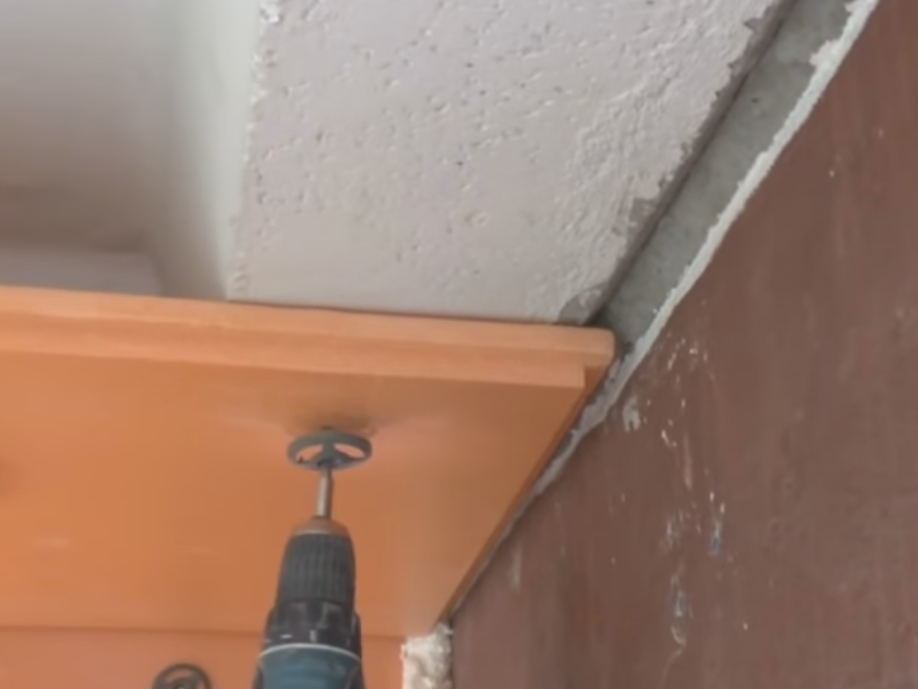
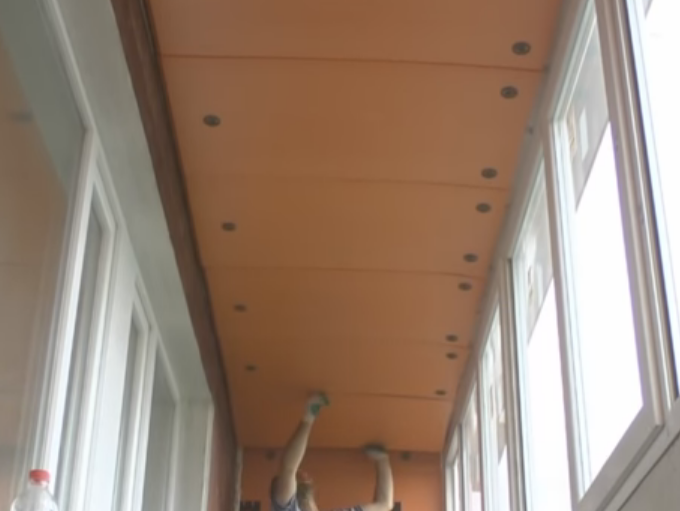
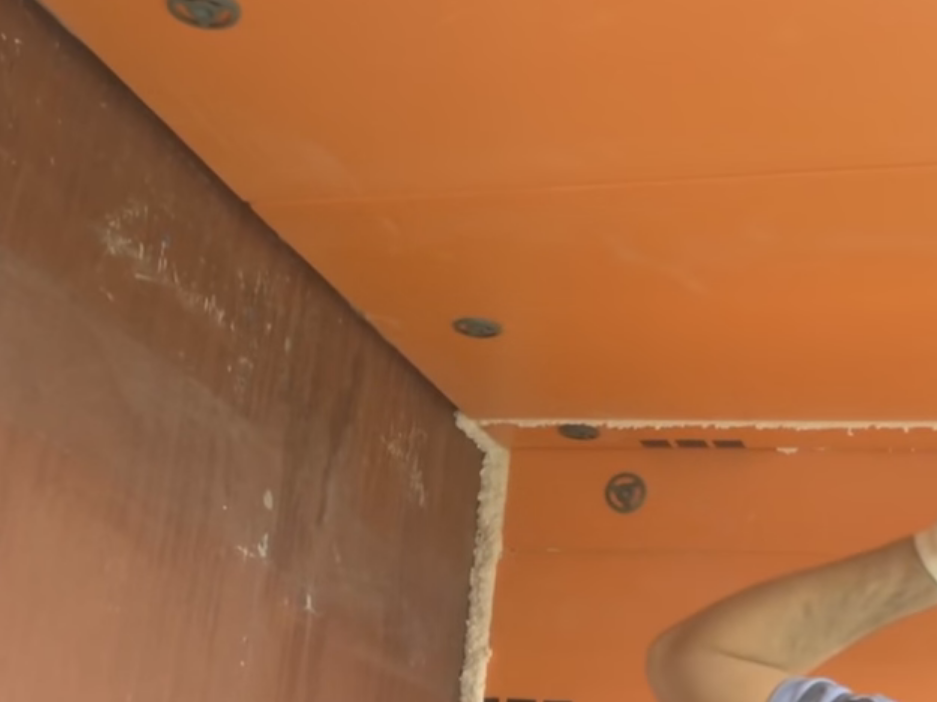
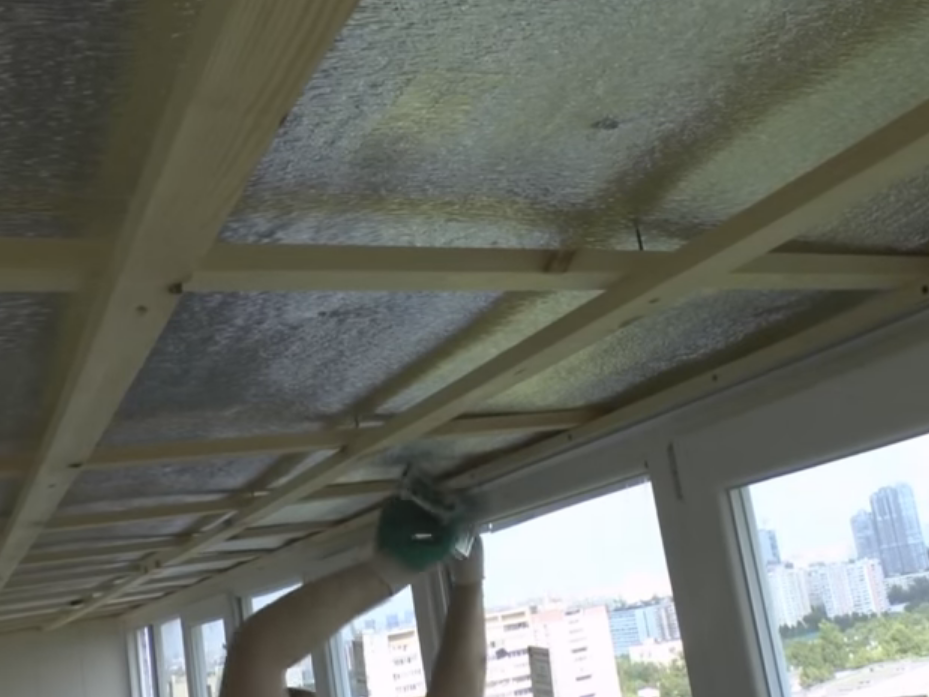
- We make the thermal insulation of the ceiling.
- All seams are sealed with foam.
- We heat the parapet. We expose the first sheet of the penoplex by the level, we fix it, then we apply the mounting foam to the floor and side, and apply the next sheet.
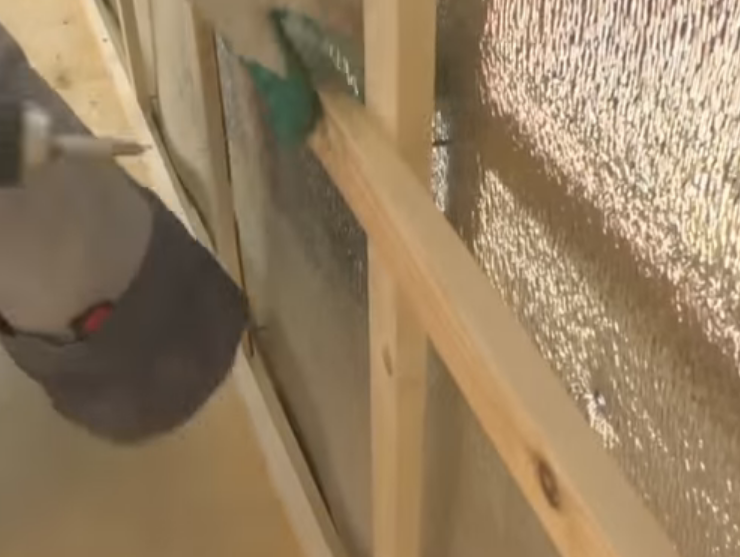
- Apply a layer of foamed foam to the ceiling, side walls and parapet, cutting off excess material.
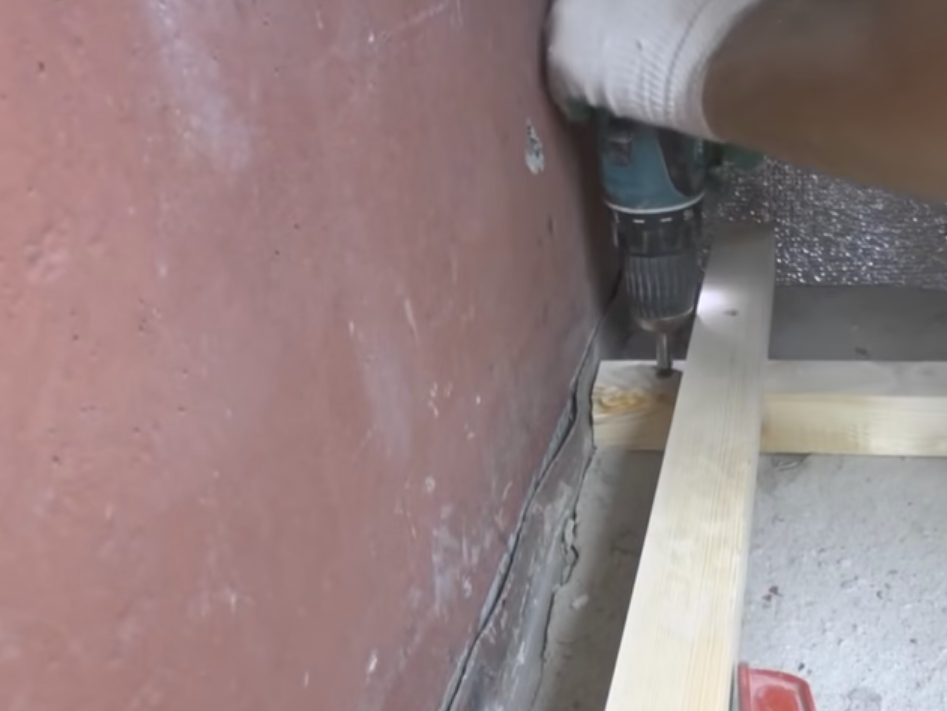
- On top of the foam on each of the side walls we mount a crate of wooden beams at a distance of 50 cm. We fix the beam, making a hole in it, inserting the dowel and wrapping it with a screwdriver.
- We fix the bar on the inner wall at a distance of 5 cm from the ceiling and continue to make the crate with the help of a dowel of nails.
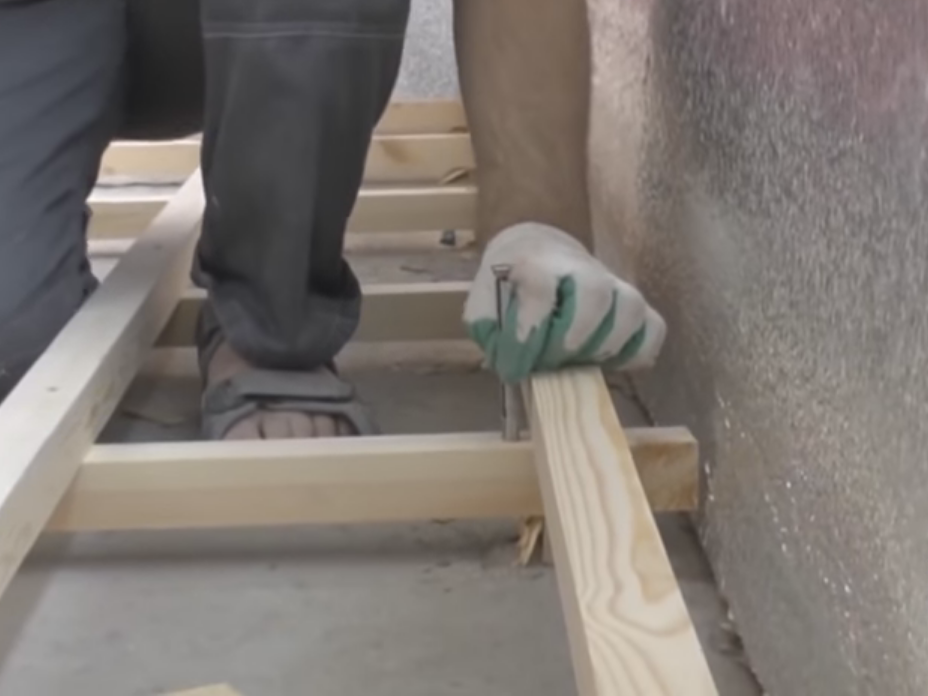
- Mount the crate on the floor. Bars together with a self-tapping wood. We fix the lower timber to the floor with an anchor. We make a hole in the beam, we hammer the anchor with a hammer and turn the screwdriver to the stop.
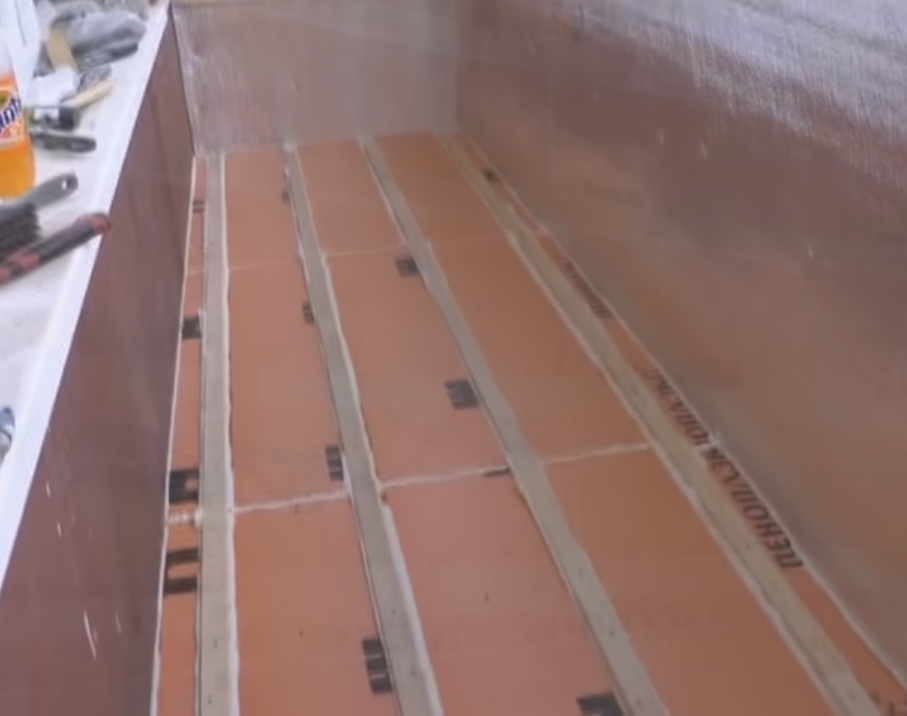
- We warm the floor with foam, laying it between the beams.
- Seal the mounting foam joints and joints.
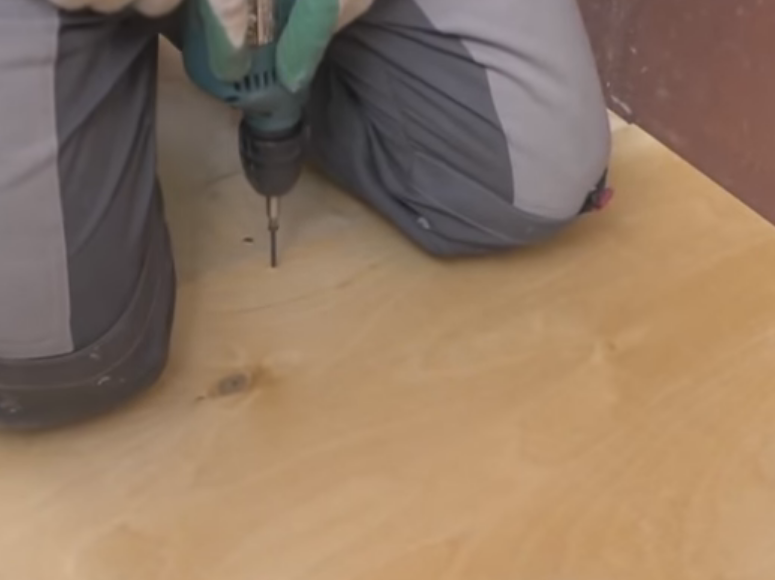
- At the top of the heater on the floor we lay a sheet of moisture resistant plywood of the correct size, fasten it to the crate with screws every 20 cm.
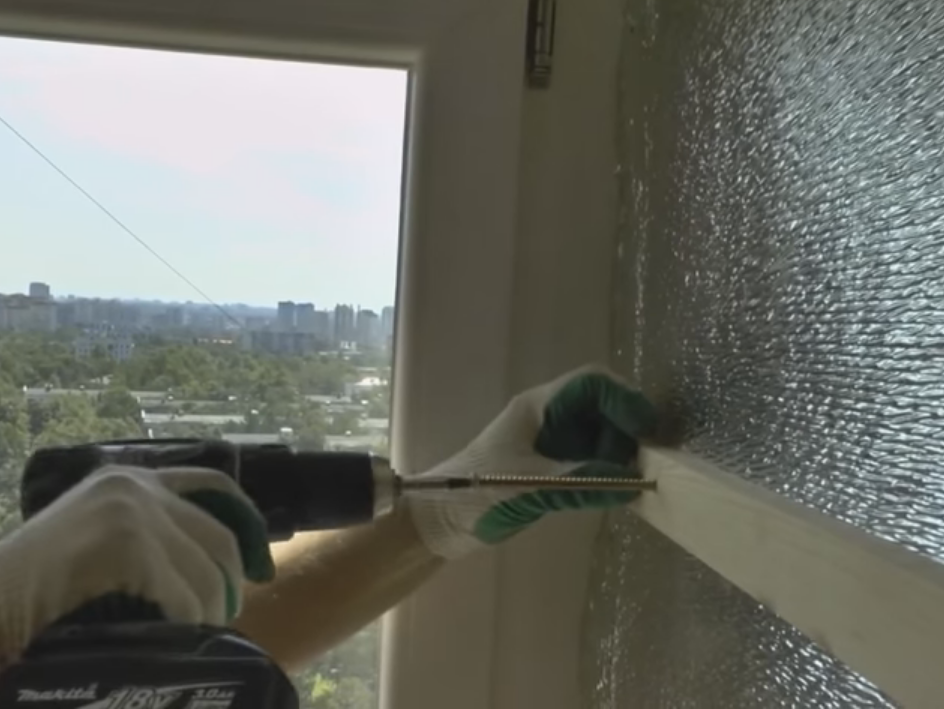
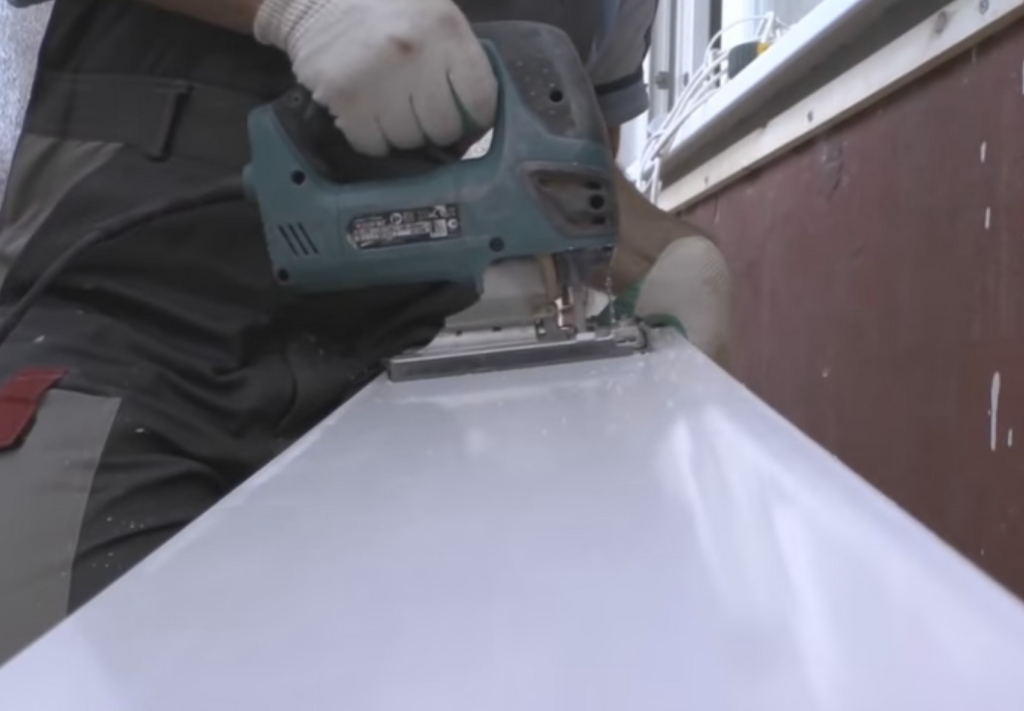
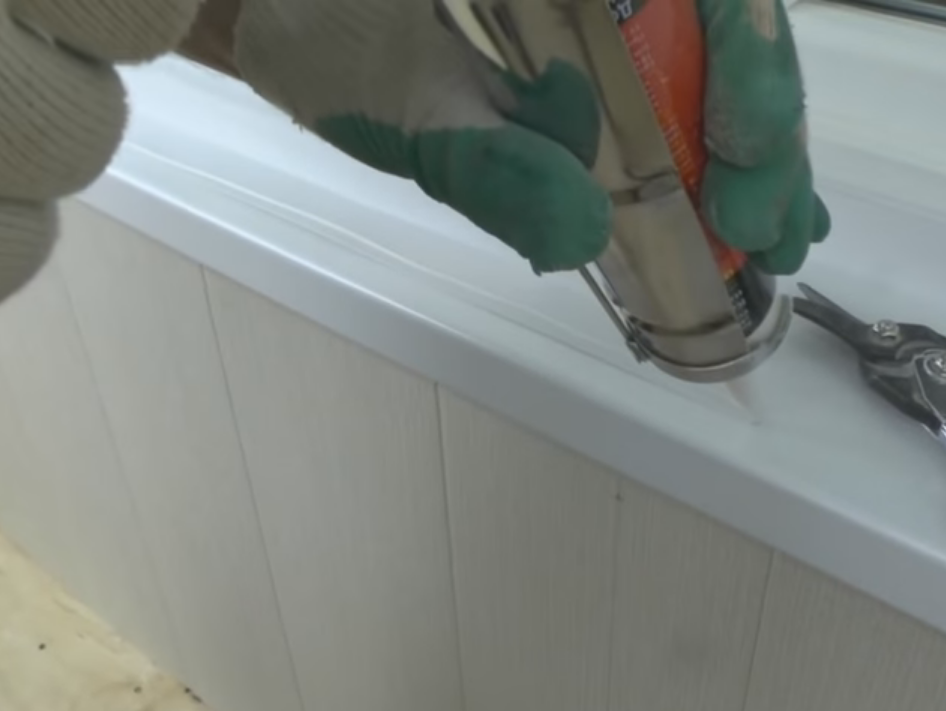
- Cut out the plastic window sill.
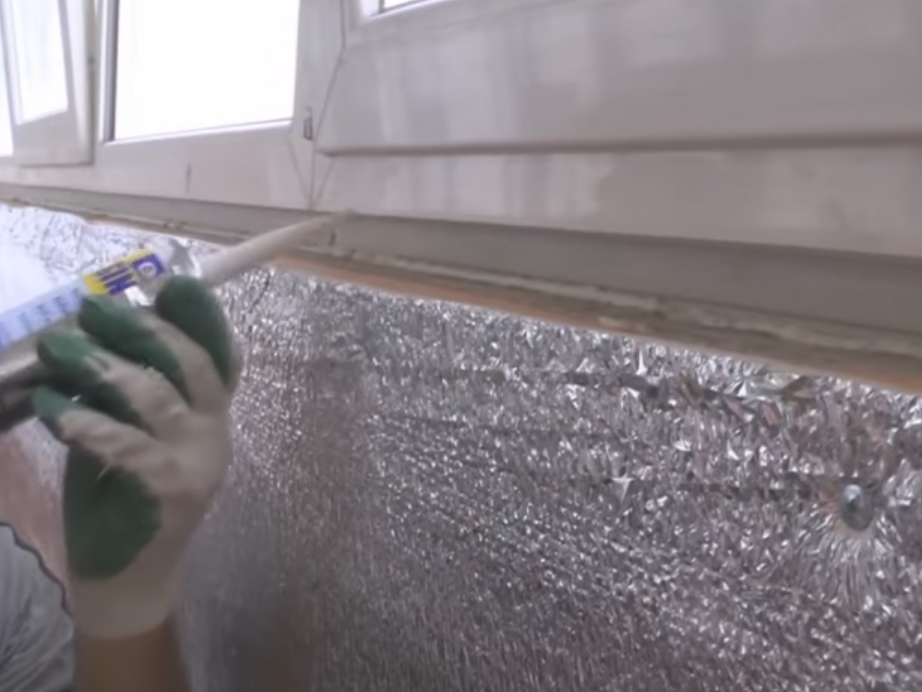
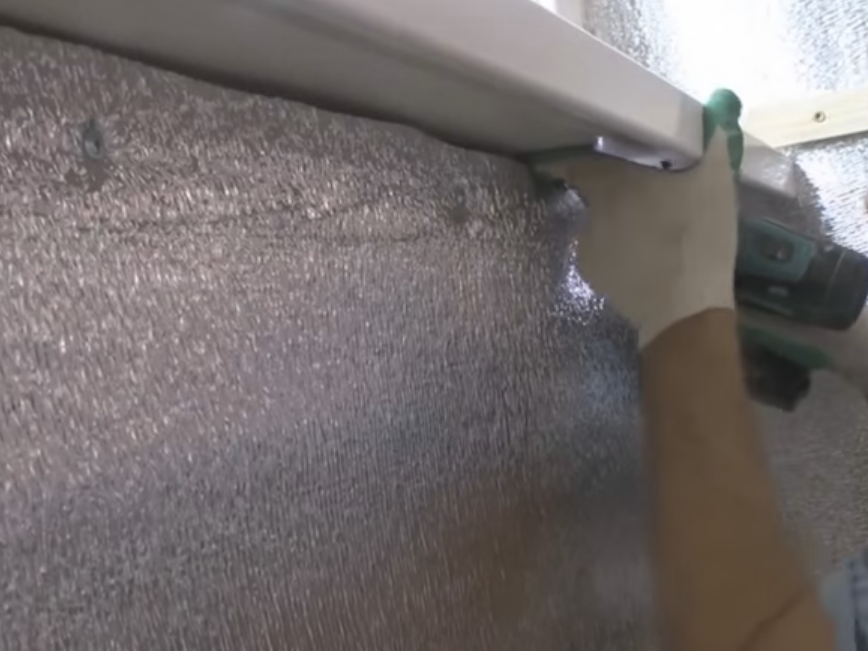
- Blow the mounting foam between the frame and the parapet.
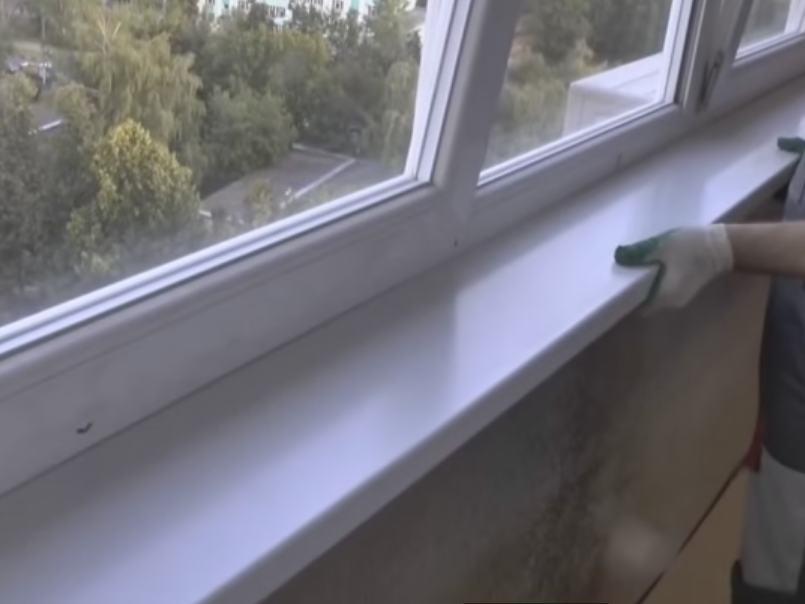
- We install the window sill under the window frame with the help of screws. The quality of work is checked by the construction level.
- The joint between the heater and the window sill is sealed.
- We do the crate on the parapet. The first bar is attached to the windowsill, the second to the floor, retreating 5 cm from the parapet.
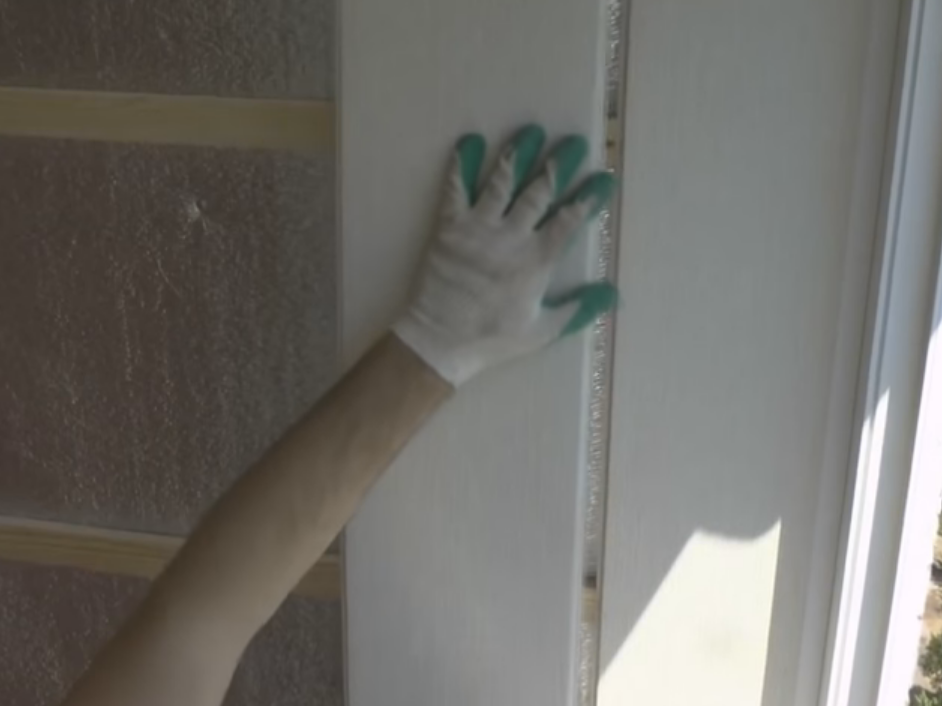
- On the crate walls fix the wall plastic panels, starting work with the measurement, pruning and installation of the starting bars near the window frame. Fasteners of panels and panels are made by building braces.
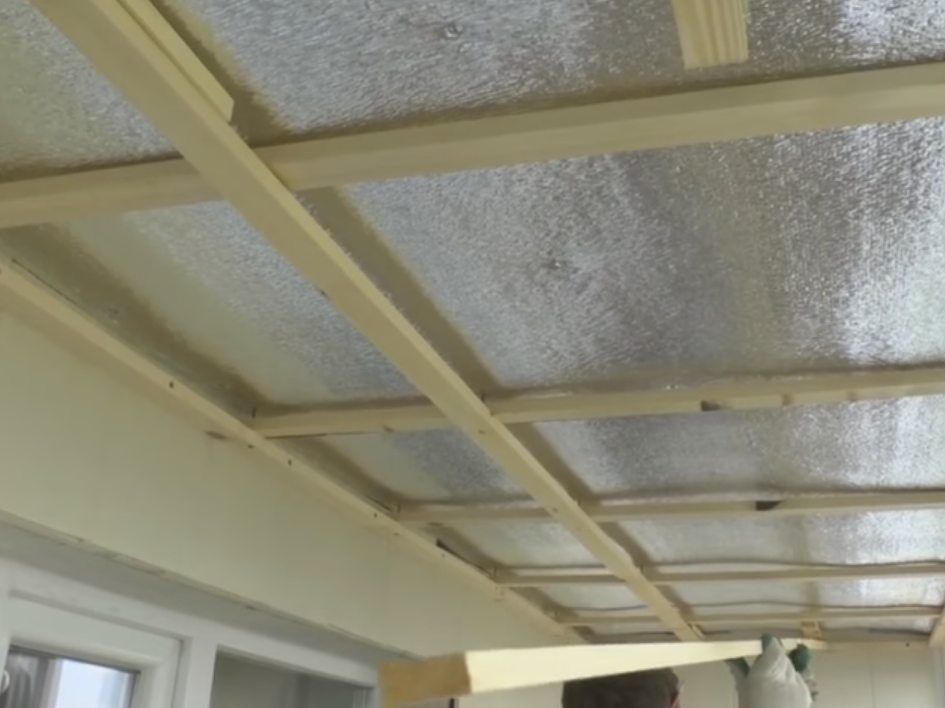
- We do the crate on the ceiling.
- To the beam above the window frame and at the inner wall we mount the U-shaped bar.
- We cover the ceiling with panels, we put them into the grooves of the bar and fix them by clamps on the outside.
- We panel the parapet.
- Cover the glue on the inside with plastic corners, glue them on the joint of the panels and the slope.
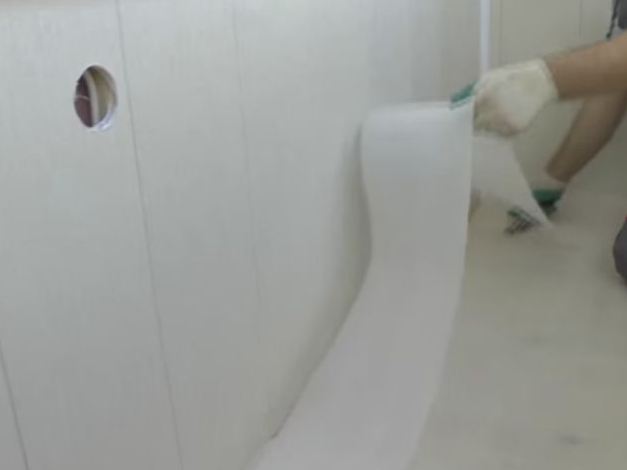
- We lay on the floor a substrate under the laminate , cutting off excess material.
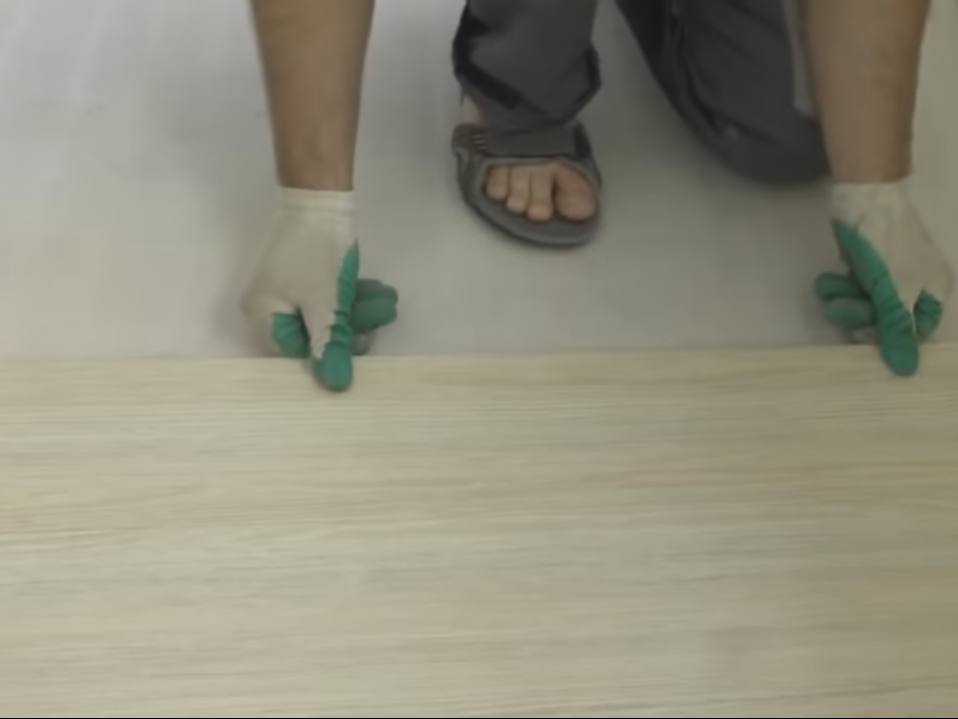
- We lay the laminate , beginning the installation with one of the side walls.
- After the completion of the construction work we are engaged in electricity and furniture installation, as well as the decorative design of the loggia.
| | |
| | |
| | |
| | |
| | |
| | |
| | |
| | |
| | |
| | | |
| | | |
| | |