With the advent of spring, I want to be in the air more often. Almost all owners of dacha or private plots are actively involved in the garden and arrangement of the territory. In addition to the chic rose bushes and flower beds, one of the important elements of the site is garden furniture. The most organically fit is furniture made of wood .
Design of garden furniture by own hands
To begin with, it's quite problematic to acquire a really high-quality garden set, and its cost will almost certainly be high. In such cases, you can try to make wooden garden furniture with your own hands. In addition to bursa or boards, some creative individuals manage to make stools out of driftwood from stumps, even old furniture from home combined with natural materials can turn into an object of decor.
If with a bench or table things are not so bad, then with chairs or chairs have to tinker. The most difficult thing is to build garden furniture - the transformer itself . In any case, today you will be able to buy all the necessary materials and tools in the construction market. As for the drawings, the spaces of the Internet are simply filled with various instructions for making such furniture. In this article, we will look at how to make garden furniture using the example of a mobile summer kitchen.
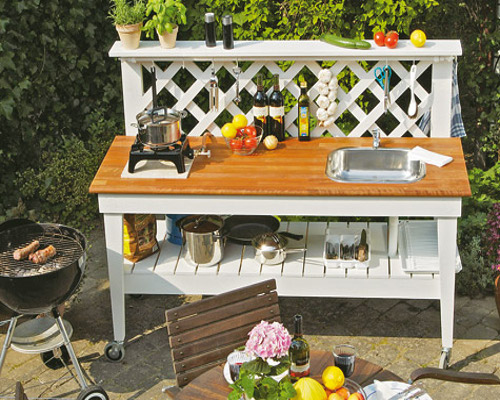
How to make garden furniture by yourself: a mobile kitchen
If the cost of a table with chairs is quite acceptable and you can purchase a ready-made set, then kitchens or alcoves are quite expensive. So it will do it yourself.
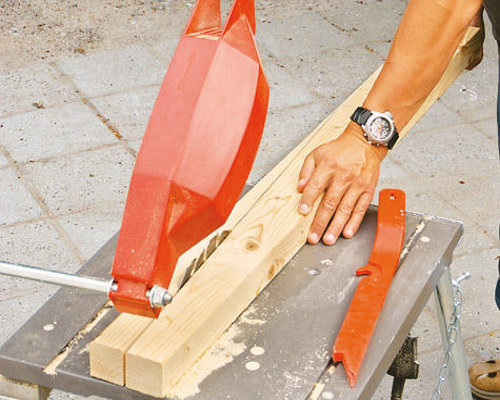
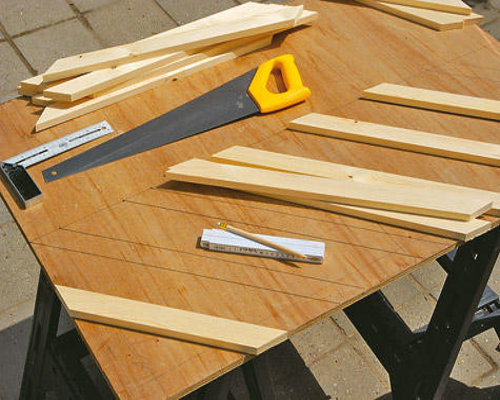
- To produce the basis of garden furniture with our own hands, we will use a standard beam. All dimensions and characteristics of the material will be indicated at the end. We cut the bevels on the feet of the kitchen.
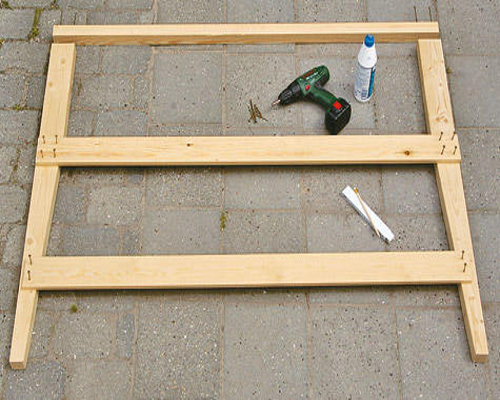
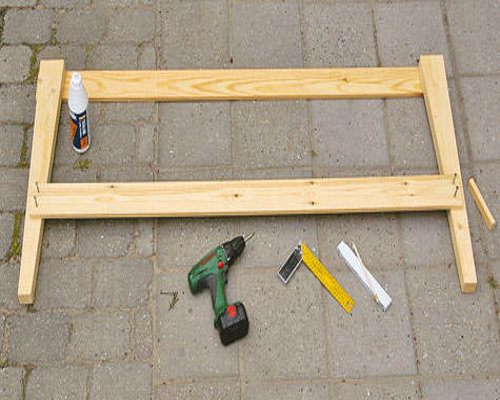
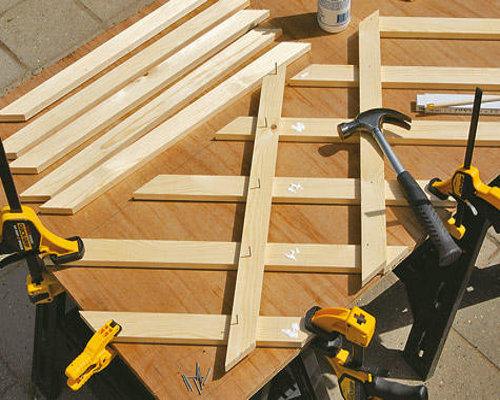
- Manufacture of garden furniture with their own hands begins with the gluing of the details of the rear part, then the structure is connected with screws for a more reliable connection.
- In the same way, we fix the details of the front part.
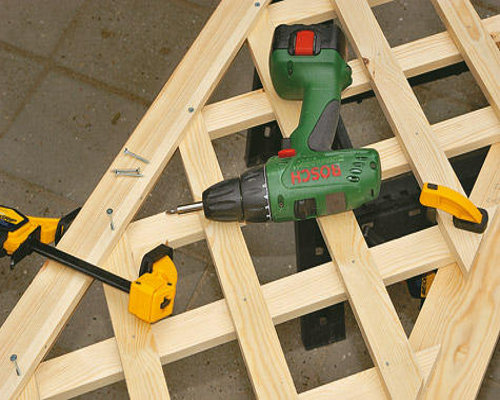
- On the desktop, mark the dimensions under the grille. The bevel angle is 45 °.
- First we fix the workpieces for the grating with glue, then with nails.
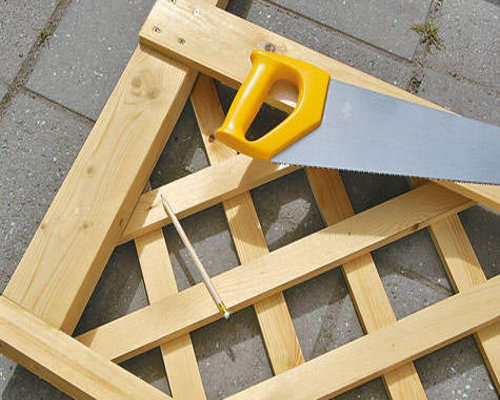
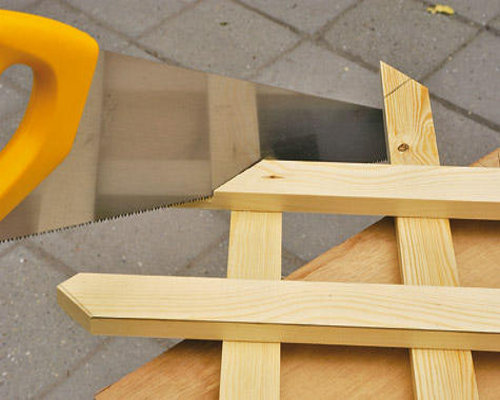
- Now we collect the construction. We apply the grate with the base and mark the necessary length of the blanks.
- We cut off excess on the outlined contours.
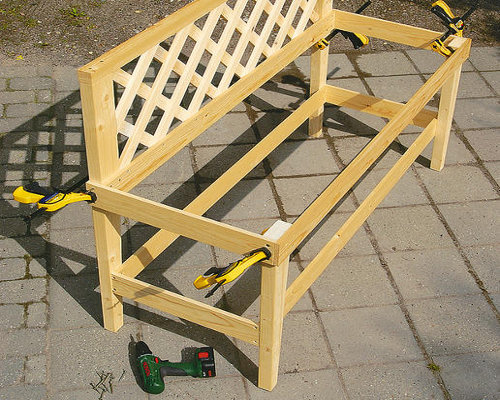
- It's time to assemble the first part of the kitchen. All connect with screws.
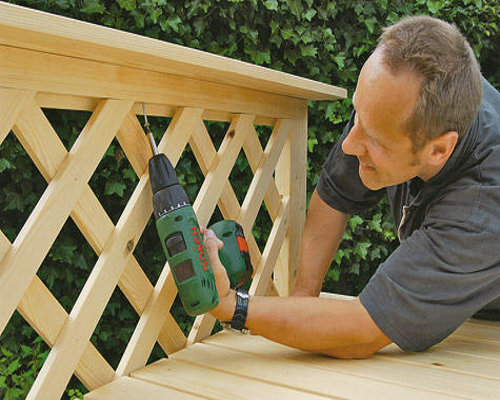
- The clamps fix the kitchen and begin to fix its parts.
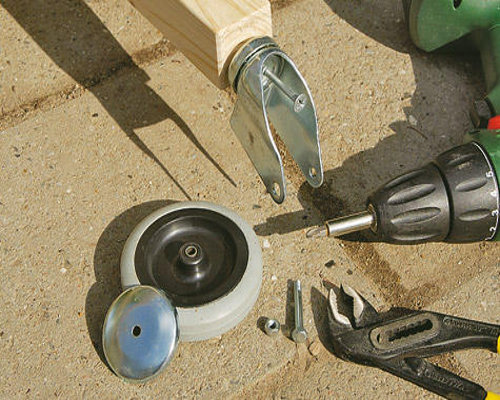
- We put the wheels on the legs. Their height should be about 120 mm. Two out of four with brakes.
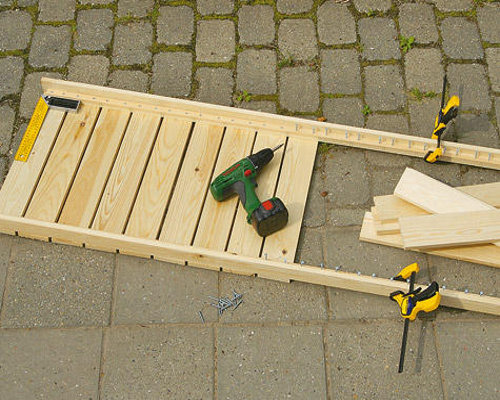
- To build the lower shelf, we screw the boards to the two wooden runners. The distance between the boards should be 10 mm.
- Now this shelf is attached to the kitchen counter using screws.
- To the grate you need to attach a protective shield. It is fixed by screws to the bar from the bottom side.
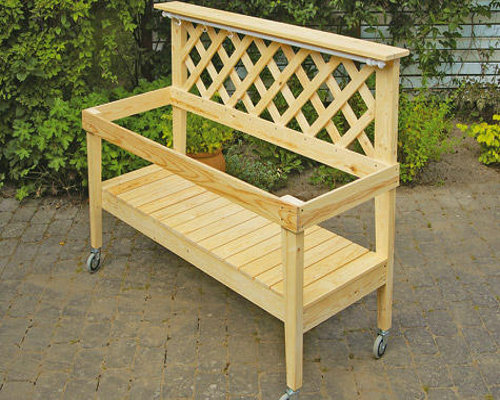
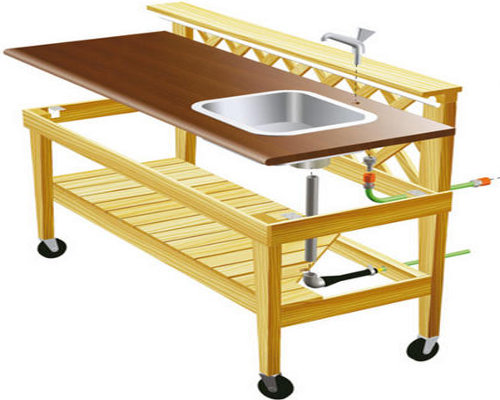
- This is how the finished garden furniture frame looks like.
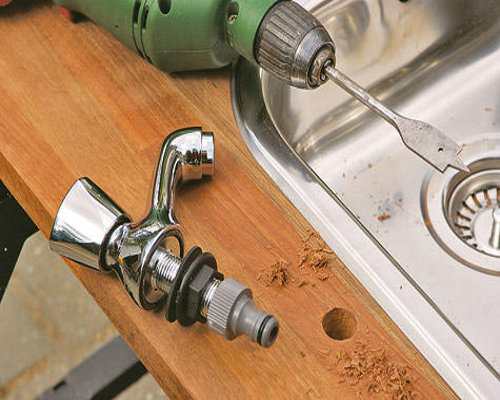
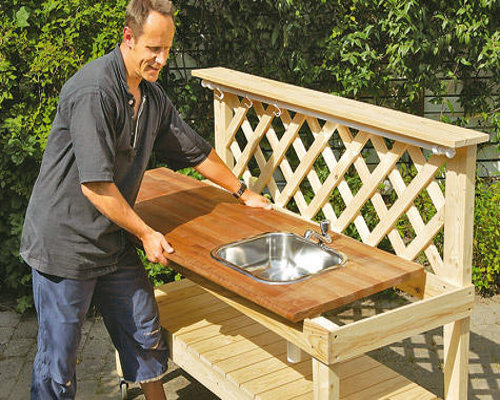
- Now it's time to set the countertop and wash basin.
- We put on the countertop a laver and mark out the contours in order to cut out a hole for it.
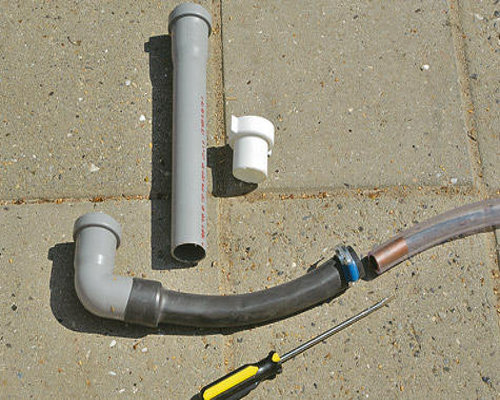
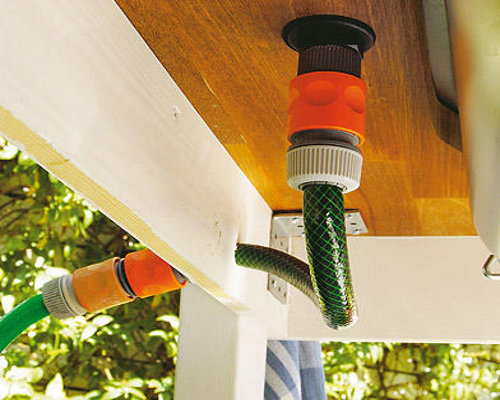
- We establish and next place a place for the withdrawal of the crane.
- As a rule, in a complete set with a crane there are different kinds of nozzles and adapters for a hose. Your task is to fix the tap and connect a hose with water to it.
- We set the countertop with a washbasin and fix the tap.
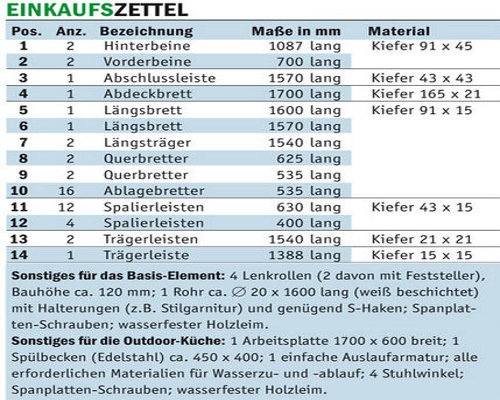
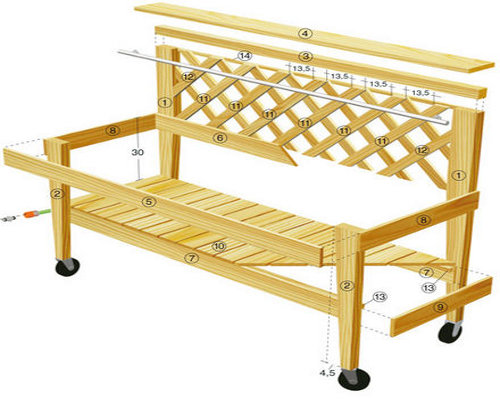
- Below in the photo you can see the design drawing and the dimensions of each part.
- Here is a cozy kitchen wooden garden furniture with their hands turned out. Due to the wheels it can be transported to any convenient place, and thanks to a faucet with a washbasin it is always possible to cook dinner in the fresh air.