Before the beginning of an independent arrangement of a ceiling from gypsum cardboard it is not superfluous to be stocked with a sufficient quantity of a material. In order to work quickly and without interruptions on trips to the building store, you need to purchase the following:
- guide profile;
- rack-mountable profile;
- direct suspension or "crab" (if the room is wider than 3 meters);
- self-tapping screws, dowels, screws;
- directly the drywall (moisture resistant or standard).
Calculation of the ceiling from plasterboard
The initial stage of the work will be the creation of a sketch of the future ceiling structure. This is equivalent to a "drawing" borrowed from the magazine, or a fictitious project. It is not necessary to do it on a computer, the main thing is that it should be understandable. On it it is necessary to note the places of fastening of bearing and guiding profiles, to make a layout of sheets and to specify the location of suspensions.
How to mark the ceiling for drywall?
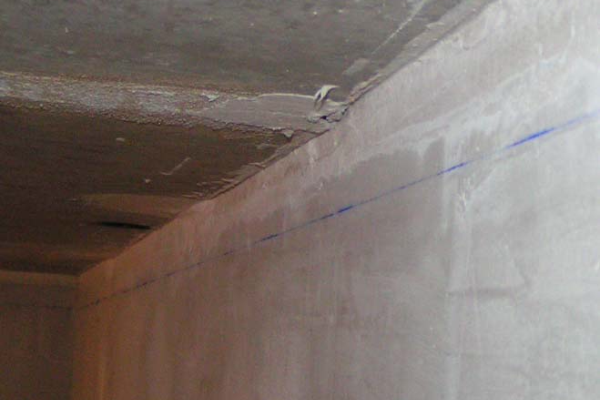
The next stage will be the delineation of the surface itself for the precise attachment of all the basic elements of the structure. To begin with it is necessary to be defined with an arrangement of directing on perimetre of a premise. To do this, it is better to use the water or laser level. The last device is the most convenient, since it does not require helpers.
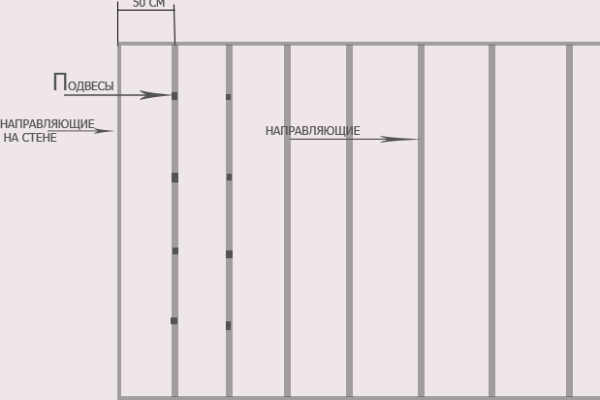
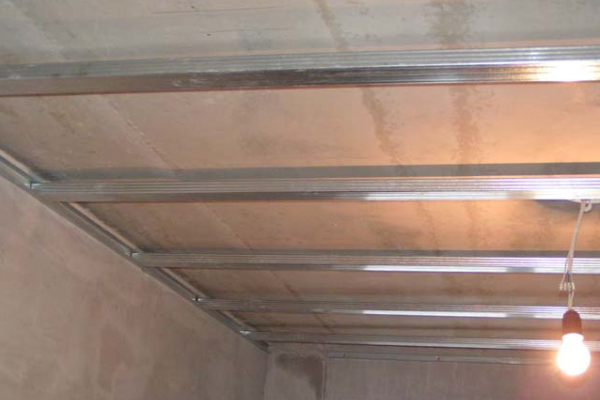
After the lines appeared on all walls, you need to start screwing the guide profile. This is done with the help of dowels, screws or screws, which depends on the material of the surface. Then on the guides you need to make a notch with an interval of 60 cm, indicating the location of attachment of the transverse profiles.
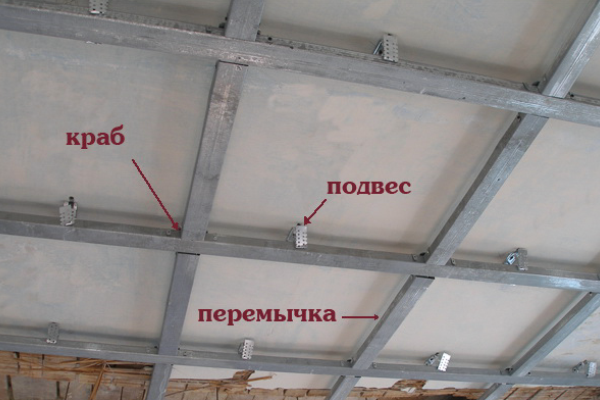
To fix the ceiling profiles? It is necessary to use direct suspensions, which should be placed at a distance of 40 cm and fastened with dowels. To maintain the required level, you should use the same laser, level or conventional cord.
To ensure that the structure is as solid as possible, care should be taken for transverse bridges, which are attached by "crabs" at intervals of 60 cm from each other. Jumper can be cut from the remnants of the profile. Such insurance will be appropriate in large rooms, whereas in corridors or bathrooms there is no need for it.
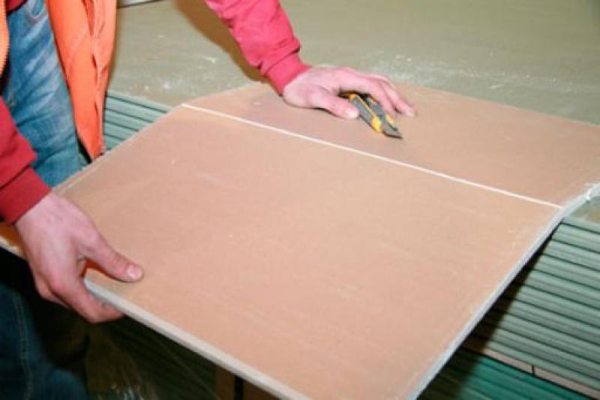
After all of the above was done, you need to proceed to the very filing of the ceiling with plasterboard. Before this, all the sheets must be adjusted to the dimensions specified in the sketch. You can do this with a regular clerical or construction knife. Hazel, formed on the ground faults, it is necessary to remove nazhdachkoy or plane. If you intend to install spotlights, you need to cut holes for them.
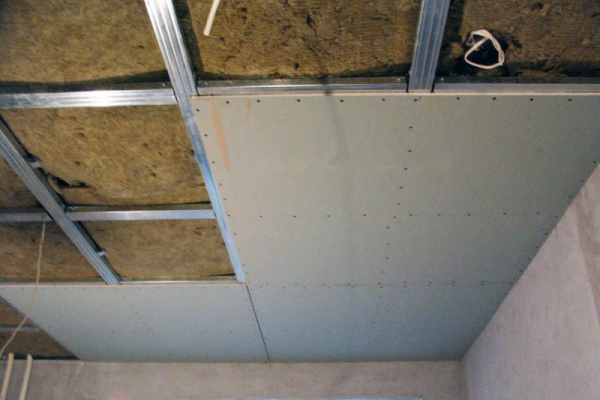
The next stage of the installation of the gypsum board ceiling is the attachment of the GKLK plates to the profiles, which it is better to do together. First you need to lay whole sheets, alternating them with pieces. This will make it possible to avoid sudden changes. For work, self-tapping screws for metal will be useful, which must be screwed in flush, but not spoiling the paper layer.
However, this is not all of the works that relate to how to fix drywall to the ceiling. Now you should start to puttying possible errors in the form of gaps, holes from fasteners, cracks and other things. Also, the filler needs to fill the gap between the wall and the GKL plates. All the sheets must be freed from dirt and dust, treated with a primer, and the slits should be glued with a special mesh.
Painting this design can be any paint, regardless of its basis. However, those who are puzzled by the problem of how to attach drywall to the ceiling for the first time, you need to know that matte paint well conceal errors in the work. But glossy make defects expressive and noticeable.