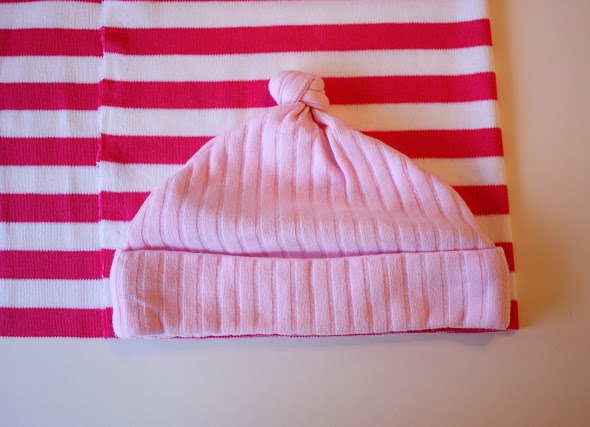
It is much easier to sew a cap of knitwear with your own hands than you think. To do this, you need a small piece of fabric, thread, sewing machine (preferably with an overlock) and fabric for decoration. Let's find out how to sew a children's cap out of jersey. So, let's get started!
We sew a cap from jersey
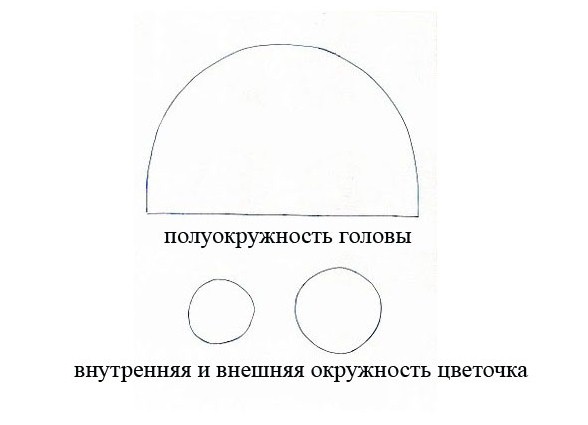
- Choose in the wardrobe of your child a hat that you like and that sits well on it. Attach it to the fabric from which you will sew, and outline the outlines of the pattern. Do not forget about the allowances on the seams! Also keep in mind that the main property of knitwear is to stretch, so the cap can initially be made slightly smaller than the circumference of the baby's head.
- For convenience, you can first make a paper pattern of hats made of knitted fabric, which you then transfer to the fabric. Small circles are contours of flowers that will be used to decorate the finished product. Their size will depend on the size of the cap. And if you wear it will be a boy, then instead of a flower you can use any application or even leave a hat without decoration.
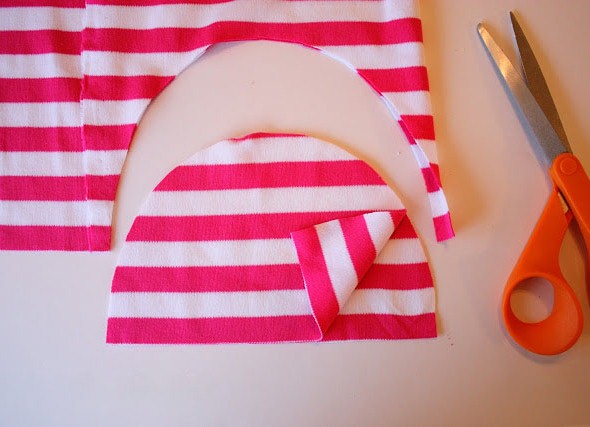
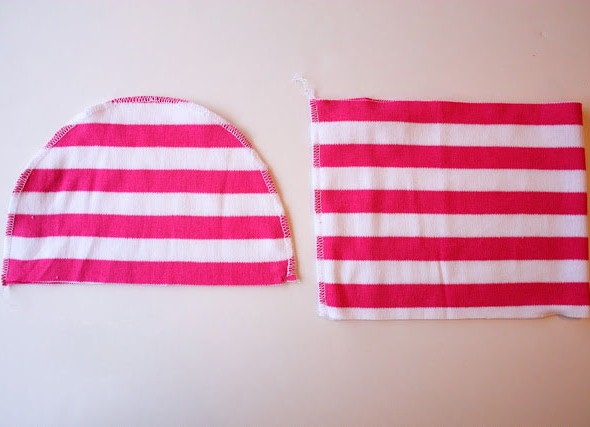
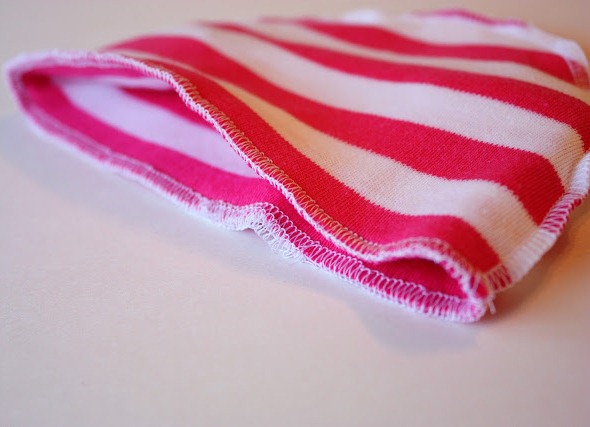
- From a double cut of a fabric cut out on a pattern two identical details is it will be so-called "depth" of a cap.
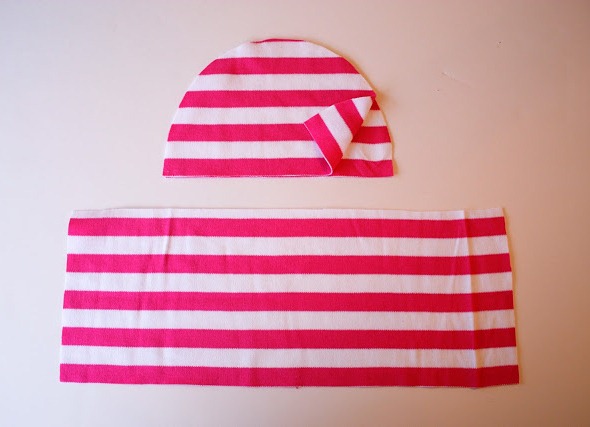
- Now prepare the cloth for the lapel. It should stretch well across the width, so that the cap is comfortable to wear.
- Fold the two details of the "depth" of the cap face-to-face and sew on the outer edge. Do the same with the lapel, sewing the short side of the rectangle with the stitch "zig-zag".
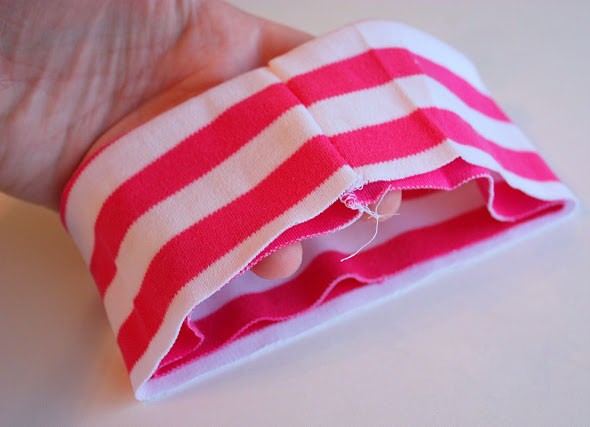
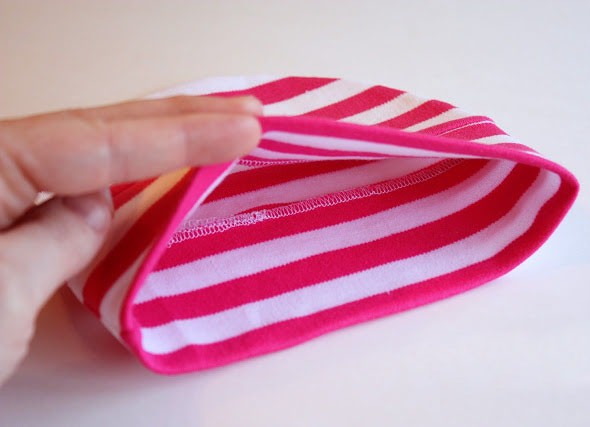
- Turn out the lapel to the front side and fold it in half - so that the folded fabric looks like a pipe in shape.
- Insert it into the main part of the future cap. Make sure that the parts are correctly positioned and that their rough edges are aligned.
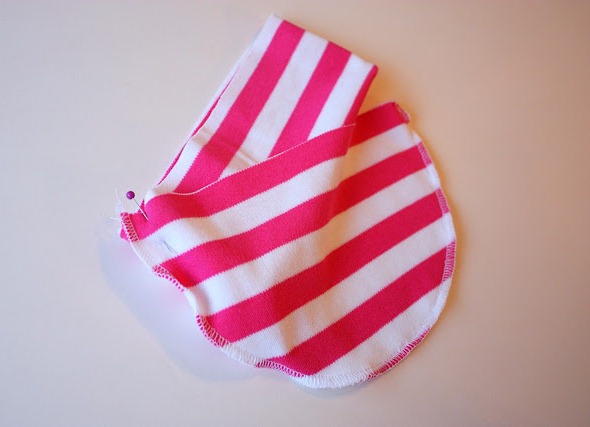
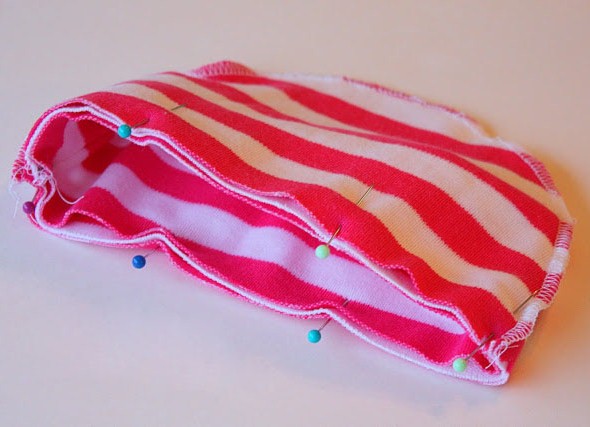
- Fix the bottom of the product with the pins.
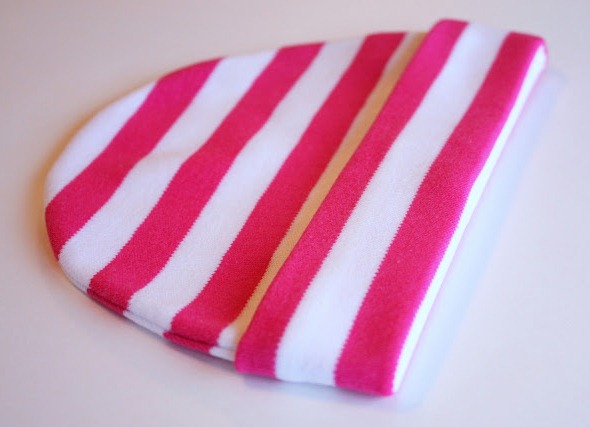
- Using the same seam "zig-zag", attach the chipped parts to each other.
- Ottuzhte the seam, directing its cut in the direction of the top of the cap.
- Turn out the fabric at the bottom of the cap at the desired length - this is the ready lapel. Be sure to steam it with an iron.
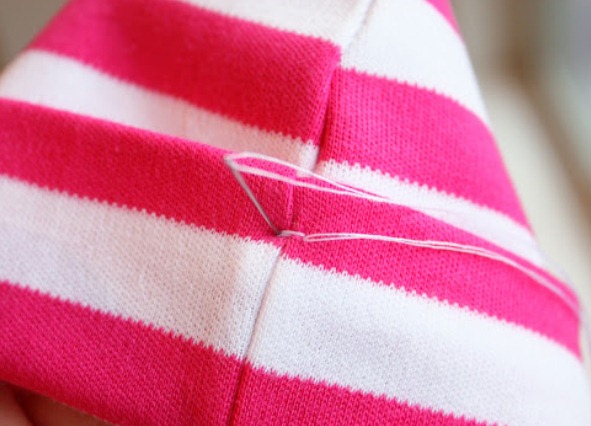
- If your hat is sewn from a thin jersey, then in order for the lapel to hold better, you can fasten it in two places, making a pair of neat stitches in those places where there is already a machine stitch.
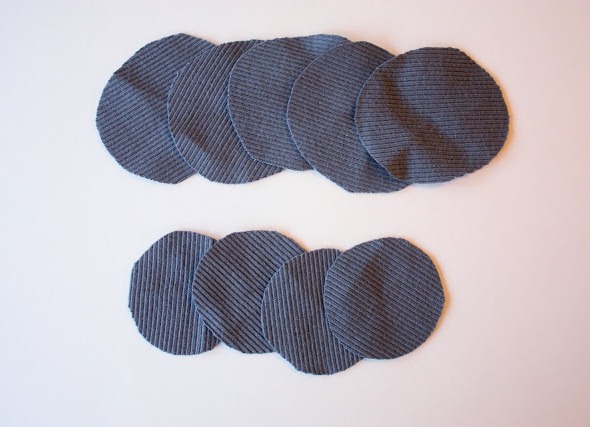
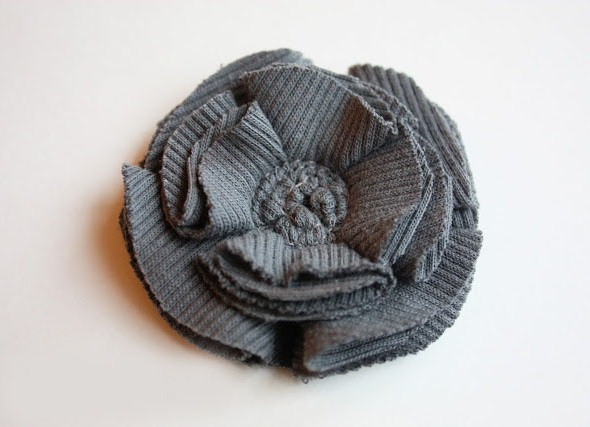
- For the decoration of the cap, we, as mentioned earlier, will use flowers. The tone of the fabric from which you will sew flowers, choose, based on the overall color scheme of the cap. For decorative details, a more contrasting color of the fabric is desirable. Cut five circles more and
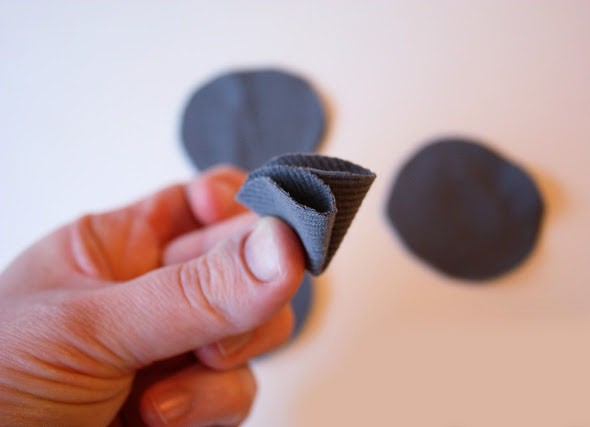
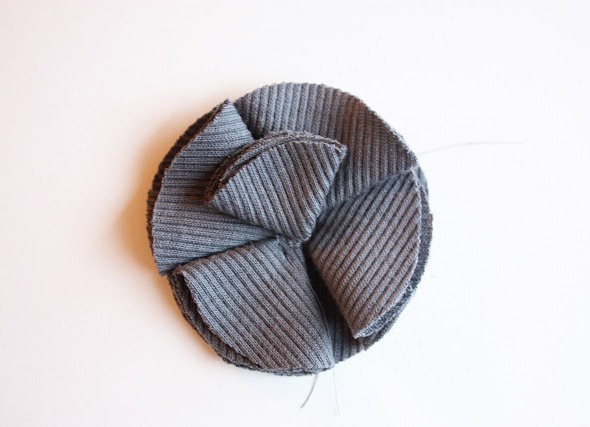
- We fold one large circle four times to the outside.
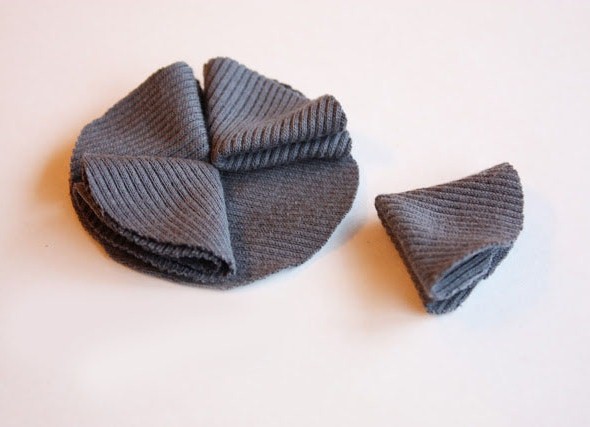
- Do this way with four large circles and carefully stack them on top of the fifth: it will serve as the basis.
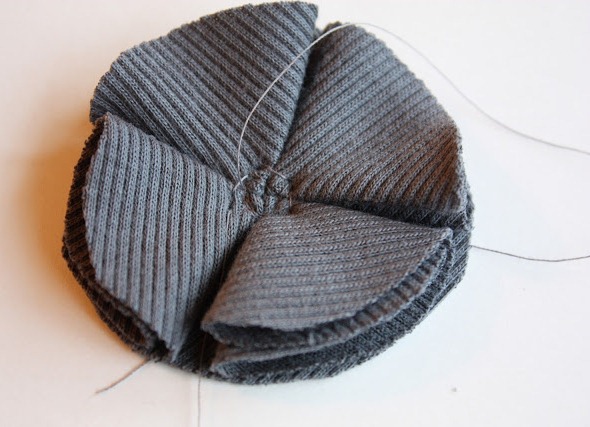
- Sew them in the center with a thread in the tone of the fabric.
- Now we begin to lay the upper tier from the folded four-fold small circles.
- We stack all four rolled circles and also stitch in the center.
- Sew a flower to a cap can be the same thread, while fixing the middle. Such an ornament looks wonderful from the side of the cap.
As you can see, you can sew a knitted hat with your own hands very quickly and easily, literally in an hour. Perhaps the first time this lesson will take you a little longer, but with time it will become easier. Sewing things to your child is very interesting, but also it makes it possible to change the wardrobe of the baby much more often. Learn simple sewing skills with the example of this simple hat!
And for the summer the child can sew a pretty bandana .