In addition, the night light is an important item in the interior of the children's room. By choosing a night lamp, your child will emphasize his individual unique taste, whether it be light pink butterflies or a soccer ball. But on the shelves of the store may not be what you will like for you both - how to be in that case? You can make a children's night lamp with your own hands, and your child will be happy to help you with this.
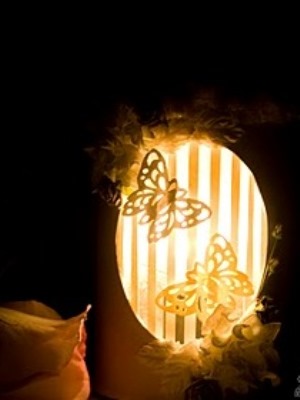
In the master class, we show an example of how it is possible to make a night light for a little girl who loves fairy tales, butterflies and good fairies easily and quickly from improvised means.
Children's night light with their own hands
In order to make a children's night light we need the following:
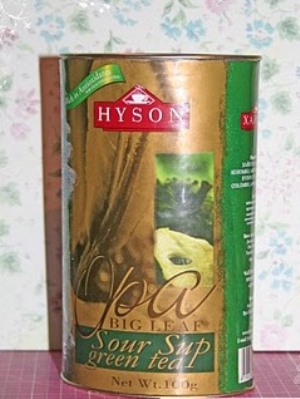
- a box of tea, it's not about the usual cardboard packaging, but about an oval jar of very dense cardboard of medium size, however, you can make a night light of any size;
- scrap paper, the sheet needs a small, its size is determined by the size of the jar of tea;
- clerical knife, it must be of good quality, as it will have to cut very hard cardboard;
- sandpaper;
- acrylic paint;
- glue "Moment";
- Painting tape;
- assembled power cord with a cartridge, bulb and switch.
Night light from the bank by yourself: a master class
So, let's get to work!
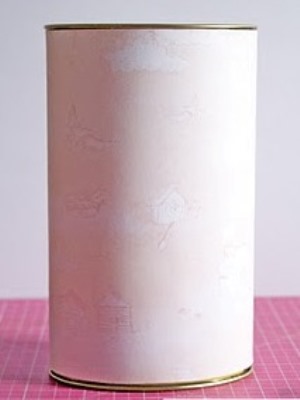
1. From the scrap of paper, cut out the rectangle by the width of the can, in our case the width is 15 centimeters, and we glue the jar. If the paper is thin, it is better to apply it in two layers. We will take into account that the bottom of the bank will serve as the top of our night lamp. This is important if the direction of the paper pattern is important.
| | |
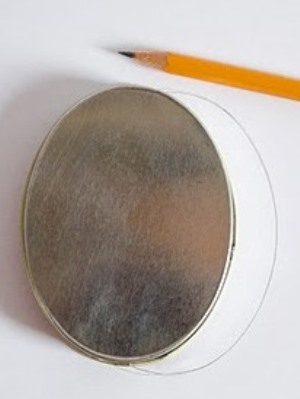
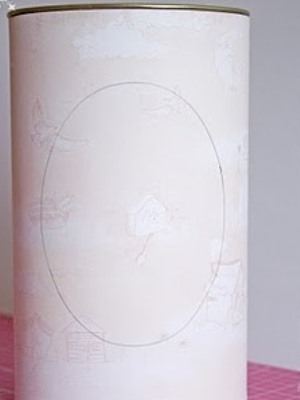
2. Now we make the workpiece for the eruption of the window in the bank, for this we remove the lid and outline its outline on paper.
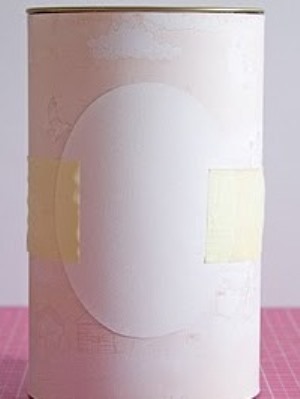
3. On the bank we place the cut out blank and paste it with paint tape. We circle the workpiece with a pencil, thereby indicating the location of our window.
| | | |
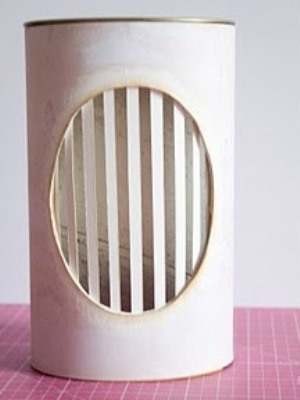
4. Now carefully cut out our window with a clerical knife. We will do this in three stages. First, we lightly squeeze into a knife, draw along the contour. So we leave a furrow. At the second stage, we press harder, as a result of which the oval of paper scrap and the label of the can disappears. In the third stage, we push already hard enough and cut the cardboard box itself.
5. Grind the edge of the window with sandpaper.
6. Paint the window with acrylic paint.
7. On a cardboard of small density we impose our preparation in the form of an oval. We draw a pencil. Draw the stripes and shade those of them, which in the end result should remain visible.
8. Now cut out the strips.
9. Then we slightly bend the cardboard with slots, depriving it of elasticity, and glue it with glue on the jar from the inside, closing the slotted window.
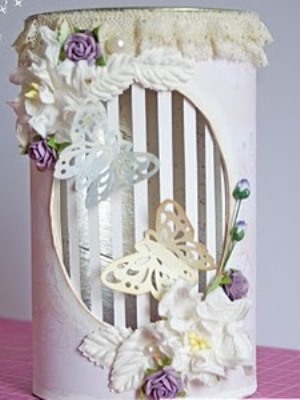
10. Now let's deal with the decoration of our night-light - a great opportunity to show all your imagination!
| | |
11. It's time to do the hardest. On the reverse side, we make two holes, into which we will pass the cord.
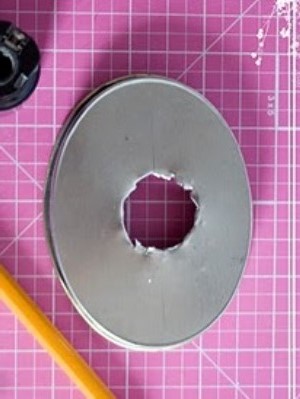
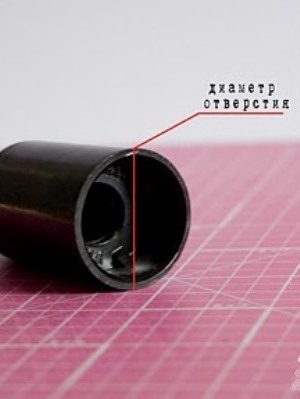
12. Now cut the hole in the bottom cover. This is very difficult to do, for this purpose a sharp kitchen knife is suitable. The radius of the hole should correspond to the radius of the cartridge.
| | |
13. Now, in the hole made, we pass the power cord, in our case it was purchased immediately assembled with a switch and a plug.
14. Pull the cord into the hole in the lid.
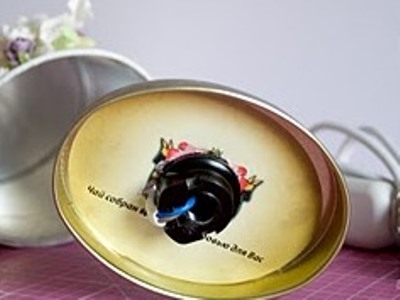
15. We connect a wire to the top part of a cartridge and we insert a cartridge in an aperture.
| | |
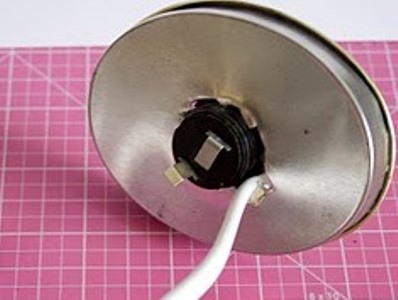
16. We fix the whole of this construction with the lower part of the cartridge.
17. Twist the bulb, it should not be more powerful than 25 watts.
18. We put all our electrical structure in the finished box.
19. Paint with black acrylic paint the bottom.
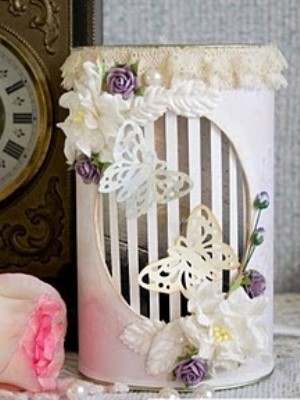
20. Our night light for a little fairy is ready!
| | |