Stylish and original decoration can be made by hand, if you have some free time and with half a meter of satin ribbon. A bracelet, woven from satin ribbons with your own hands, will fit any of your along and complete your image, you just have to think carefully about the style and color scheme.
Weave bracelet from satin ribbons
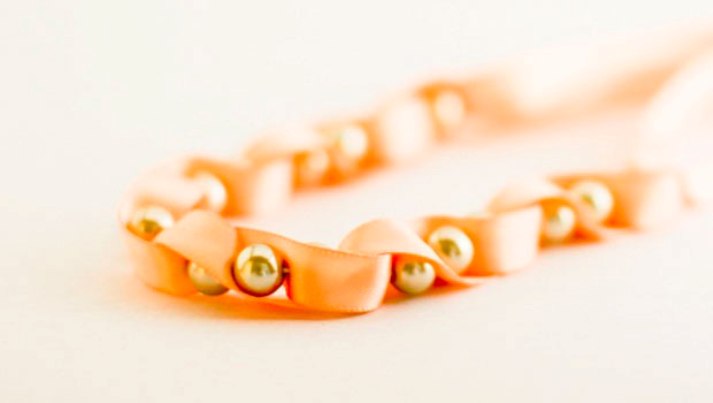
In the master class we will show you how to make an original bracelet from satin peach ribbon and golden beads easily and quickly. Due to its sophisticated appearance and soft, non-intrusive color solution, it will perfectly harmonize with both the daily outfit, festive, office or evening .
So, in order to weave the bracelet from the ribbon, we need the following materials:
- one meter of peach-colored ribbon (most likely it will not all be wasted, but just in case it's worth taking with a stock), the width of the tape is chosen based on your preferences, the master class used a ribbon 1 cm wide.
- Strong, ideally nylon thread in tone with ribbon;
- one and a half to two dozen golden beads, the diameter of which should be 0.3 - 0.5 cm less than the width of the tape, the number of beads required depends on the volume of your wrist;
- A small piece (1.5 to 2 centimeters long) of a filament;
- thin sewing needle.
Having prepared everything necessary for work, we can proceed.
How to weave a bracelet from a ribbon?
- The first thing we do is cut the tape in half. Then we sew the two parts of the tape overlap so that there are two long, and two short ends. We will work with its long ends.
- In the place where the two ribbons are sewn, let's skip the nylon thread.
- Now take the first bead, pass the needle with the thread, then take the lower ribbon, wrap it with the bead as shown in the picture, and fix its position with a thread.
- Now take the second bead and put it on the thread again.
- We take the second end of the tape and wrap it with a second bead in the same way as with the previous bead. We sew the tape, fixing its position.
- We continue to string the beads on the thread, wrapping it alternately - then the first, then the second end of the tape.
- String and sew beads until we get the desired length of the bracelet. It should be several centimeters more than the wrist circumference. As a result, we will get an original and very nice weaving.
- Sewing the last bead of the bracelet from the ribbons, we need to fix it. To do this, wrap it first with one tape, as we did before, then overlap the second on top of the overlap.
- Fix the position of the tape.
- Now let's pass a needle and thread through the last two beads and tie an inconspicuous but sufficiently strong knot, after which we cut the thread.
- We will fasten the ribbon to the knots at the edges of the bracelet, then cut the ribbon, leaving small "tails" for beauty. The edges of the tape should be burned with candles or a cigarette lighter, otherwise they will rush and spoil the entire look of the bracelet. However, it is important not to overdo it, the edges should be melted down quite a bit and exactly along the line, there should not be any black edges.
- Now we need a bead. You can take a golden one, exactly the same as what the bracelet was made of, but we took a transparent bead of a much larger size. Carefully sew it to one of the nodules, it will be a clasp of our jewelry.
- From the thread-rubber we make a loop and hide its edges in the second knot so that the bead gets into it with an interference, otherwise, if the loop turns out too loose, the bracelet will be unintentionally unbuttoned and fall off the hand. Now we sew the elastic band to the nodule.
Bracelet made from satin ribbon is ready!