Many girls are engaged in needlework in their free time and work. Such skilled craftsmen can create any piece of jewelry from handy materials: ribbons , mulina, threads , beads , fabric remains, etc. You can try to make a fancy hand with the name written on it. This homemade bracelet was previously given as a sign of friendship.
A bracelet made of beads will look beautiful on the hand, but the use of a moulin is more practical, since such an ornament can be washed at any time. However, the technique of weaving the baubles with names from the mulina is more complicated and takes more time.
Baubles with names: schemes
Before you weave such a bauble with a name, you need to familiarize yourself with the schemes of its weaving and choose the most suitable option for you:
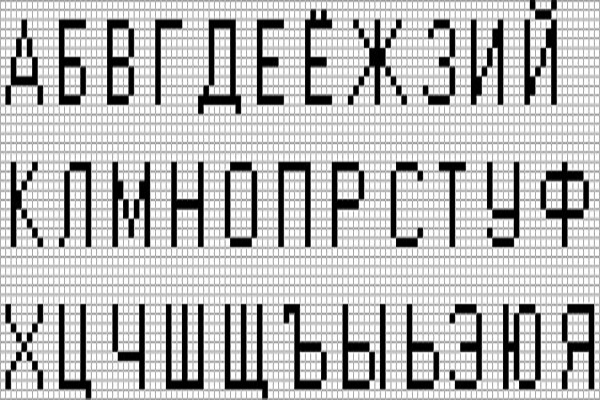
The scheme of weaving the baubles with names can be chosen either according to your preferences. But most of the needleworkers weave the capital letters.
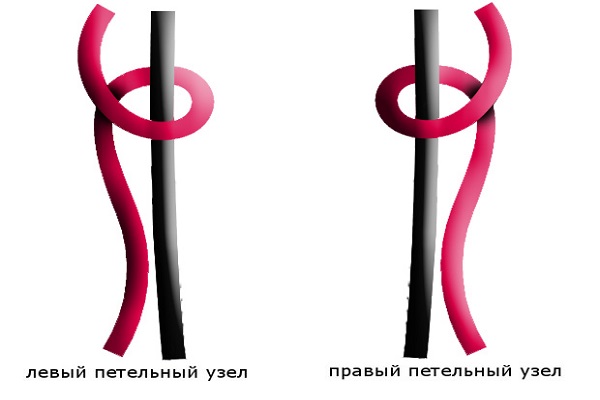
To weave a name bouquet, you need to know two types of nodes:
- right: the working thread is located to the right of the knot;
- Left: the working thread is on the left.
How to weave braces with names: a master class for beginners
To braid such a bracelet with a name you need to follow the instructions exactly. Then all the letters will be smooth and clear.
Before you write a name on the broom, you must prepare the materials:
- a sheet in a cage;
- a pen;
- markers;
- thread of a mulina of two colors;
- scissors;
- Scotch.
- On paper in the cage draw a scheme of weaving. Each cell on the diagram is one node. Felt the letters themselves and the background.
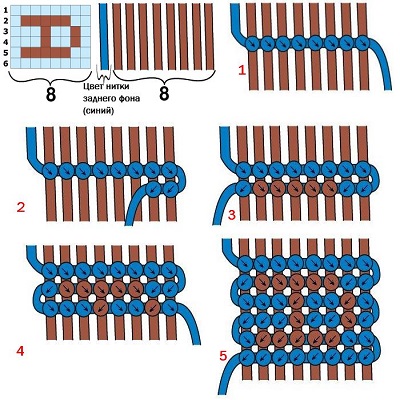
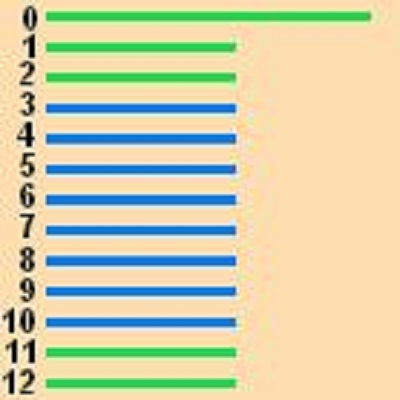
- To create banners with names, we use a direct netting, the diagram of which is shown in the figure below. It is important to choose the correct color of the thread, depending on whether it is a letter or a background.
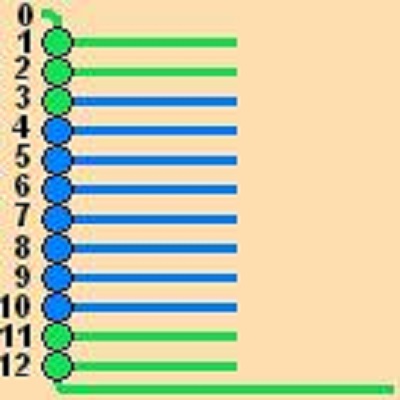
- Now proceed directly to the weave. We take 8 blue threads floss for letters and 5 green threads for background. One green thread should be longer than the other.
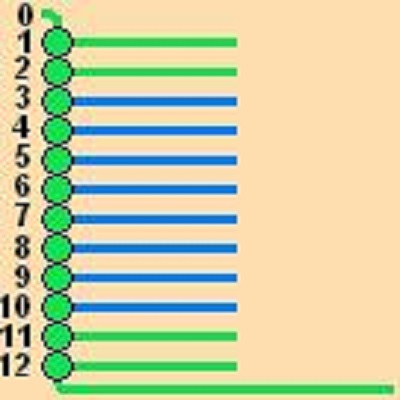
- We tie all the strands together into one big knot. We lay out them according to the picture below. For the convenience of weaving, it is possible to fasten a large knot on the table with the help of an adhesive tape.
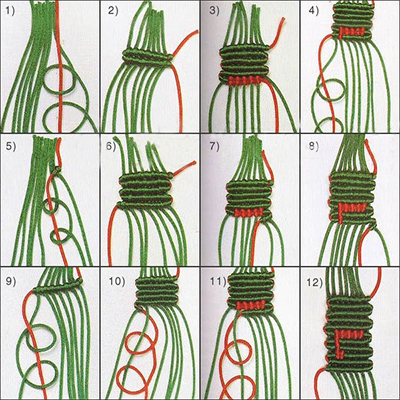
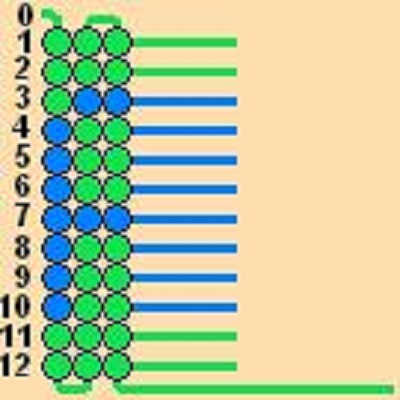
- Begin to make knots left, passing a long green thread down. In this case, each row of threads must be tightened more tightly. Then the letters will look more beautiful.
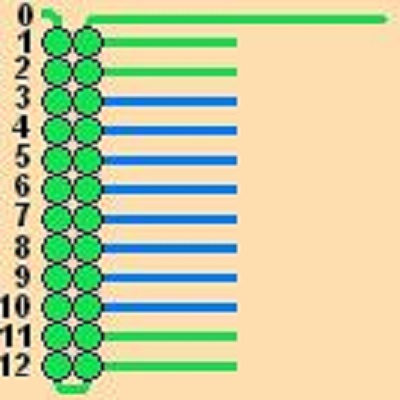
- Now we need to return the main thread up. On each thread begin to make a knot to the right. In this case, the filaments must lie flat, and not in a diagonal way. Otherwise, the inscription does not work. Green thread we create a background. It can be made any width: you need to weave a certain number of rows of the same color until the moment you begin to weave the letter.
- Let's begin to weave the letter "A" as an example. The main thread we make down three knots to the left (this is the background), 4-10 threads - the main thread to the right, then again two knots to the left. It is important to change the color of the thread according to the scheme, depending on whether it is a letter or a background.
- We start to walk again with a thread from the bottom up. 12-8 nodules to the right, 7 - to the left, 6-4 - to the right, 3 - to the left.
- We go from top to bottom. All knots plait to the left, 3 and 7-a branch to the right.
- It remains to finish the letter "A". From the bottom up we go the main thread as follows: 1, 2, 3, 11, 12 - nodules to the right, 4-10 - to the left. So, we got the letter "A".
- In order for the name to be easier to read, it is necessary to spacing the letters. For this it is enough to leave one or two empty passages with a green thread.
| | |
Such a bracelet can be used as a gift for any holiday. Especially since it is nominal - contains the name of the originator of the celebration. And a gift made by own hands is pleasant to receive doubly.