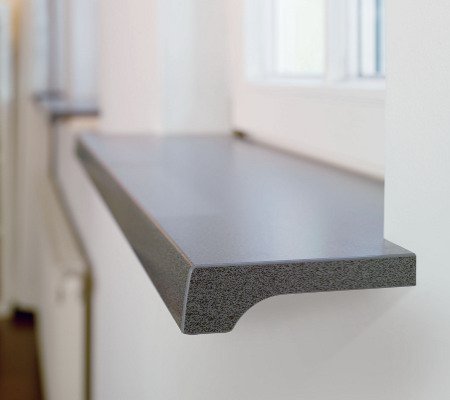
After installing the window, almost always the company's employees also offer the installation of a window sill. If for any reason you have to do it yourself, there should not be any special problems. The installation of a plastic window sill with your own hands (now it is with plastic that you have to deal with most often) does not particularly differ from the installation of other similar structures.
Installation of plastic window sills with your own hands
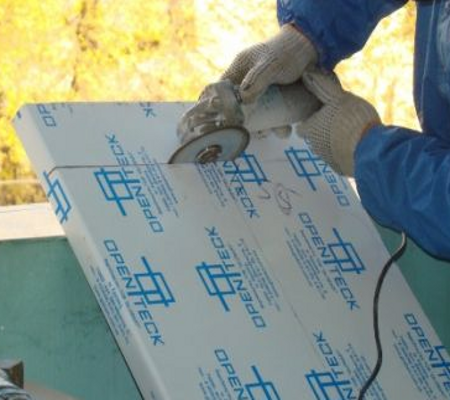
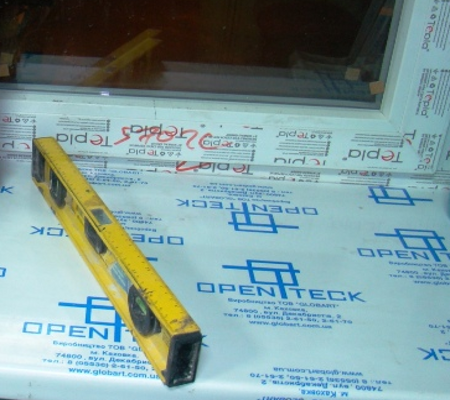
So, let's start with the preparation of tools and supplies. For work you will need a saw with small denticles or a jigsaw, if you want you can work as a Bulgarian. Also prepare a level to expose the windowsill.
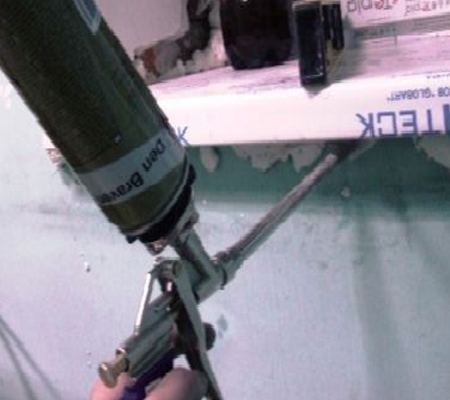
To install PVC window sills by yourself, it is necessary to prepare wooden blocks or even trimmed laminate in advance: they will be used to level the position of the slab. Suitable also pieces of EPS or brick . Of the consumables we will need assembly foam, glue time and silicone.
Now let's consider step by step the process of installing the windowsill with our own hands.
- Almost all models of window sills manufacturers today produce in standard sizes. This applies to length and width, for them make a small margin. Before installation, the excess length is cut using a jig saw or saw.
- Next, you must move the workpiece to the so-called sub-profile.
- The first stage of installation of window sills from PVC with own hands consists in exhibiting a design by level. To do this, we will use pieces of bars, namely, to put them under the plate itself until it is completely leveled.
- The ends of the structure are usually made with special plugs. They can be glued with a moment, since the silicone here will not work. Experienced installers recommend that these plugs be mounted in such a way that they completely enter the walls.
- After you have installed a plate on the supports, we check the reliability by pressing the hand: there should not be any drawdowns anywhere. You can make a small slope in the direction from the window. The angle of this bias should not exceed 3 degrees. Do it to ensure that in the future, when condensation forms on the window, moisture does not fall under it.
- The next stage of installing the plastic window sill with your own hands is to work with the mounting foam. It will blow out the entire cavity formed. Press the board with the load and leave for about 12 hours. We put the load, as the foam starts to lift the plate and bend it.
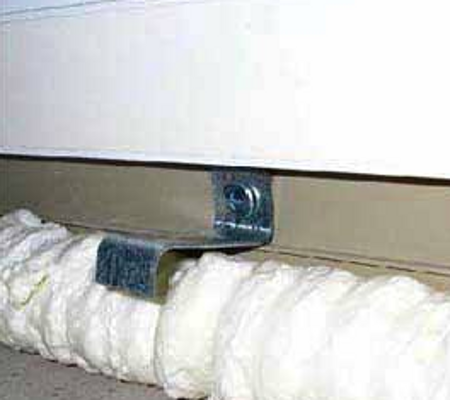
- When installing or replacing the window sill with your own hands, there may be a problem of a small gap between the window frame and the window sill itself. You can seal it with silicone, but after a while this place will begin to blacken because of the fungus. To avoid such trouble, before installing and zapenivaniem to the window profile, attach a Z-shaped bar of galvanized steel. This plate and leveling plate will simplify, and a snug fit will provide.
- After about 24 hours, the foam will dry completely and its excess can be removed. They make this a regular clerical knife.
- After installing the window sill with your own hands, the slopes and the wall under the window are worked over with the finish layer and thereby cover the foam. You can not leave it without the top layer, because in time it will become unusable.
- Further, usually with a plastic protective film is not removed and working with slopes, complete all the decorative finishing work and then wash the sill.
As you can see, there is nothing complicated in the installation. Here the main thing is to properly level the plate and work out all the foam so that in the future the so-called cold bridges are not formed.