Expecting the birth of your baby, we try to prepare everything in advance - a children's room, clothes, a stroller ... Of course, special attention should be paid to the room, because here the child will spend most of the time, and most importantly, it is here that the baby will sleep, after a whole day of new discoveries.
Let's talk more about the baby crib . All parents know that it should be spacious, made of natural materials, with the right pillow, a bed, and one of the most important accessory - the canopy - is often overlooked. He is able not only to turn an ordinary wooden crib into the bed of a little princess, thanks to him, your baby's sleep will not be disturbed by a bright light from the window or annoying insects.
Very often moms, preparing for the birth of the baby, make for the dowry with their own hands - someone knits children's clothes, someone embroider a bed for the newborn, and many like sewing. How can you easily and quickly make a beautiful and elegant canopy for a baby bed with your own hands, we show in the master class.
Baldakhin own hands - how to sew?
Having sunbathed with the idea to make a canopy for a children's bed by own hands, first of all we will select the necessary materials. First, let's define how our canopy looks. Well, if you already know, a boy you will be born or a girl - for a girl you can sew a canopy in pink tones, decorate it with lace, textile flowers or butterflies, turning the crib into a real bunk of a tiny princess. For boys, it is better to choose more reserved scenery in the form of machines or funny animals, the color can be taken as a traditional blue or neutral pastel shades. If you do not yet know who will be born to you, this is not a problem - you can sew a canopy of white, cream or lilac color, and after the birth of crumbs decorate it with butterflies or typewriters. There are many options!
So, for work we need:
- transparent fabric - chiffon, organza and other curtain textiles are ideal); the width of the fabric should be at least 1.5 meters, length 2-3 meters;
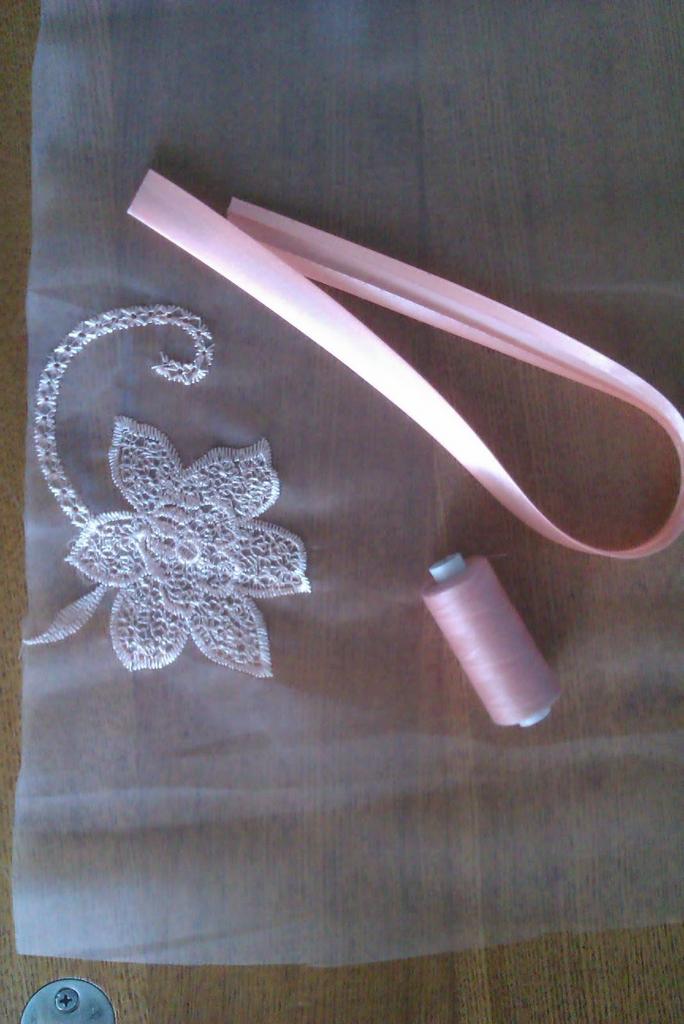
- decorations for the canopy to your taste - ruches, lace, frills and stuff;
- satin ribbon for border edging;
- frame for the canopy;
- thread, scissors, sewing machine.
How to make a canopy with your own hands?
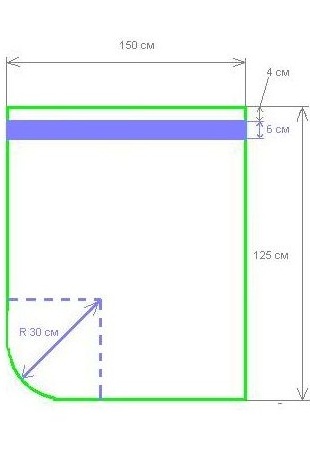
- The first step is to prepare a pattern of canopy for a baby crib. Let's use the ready-made template:
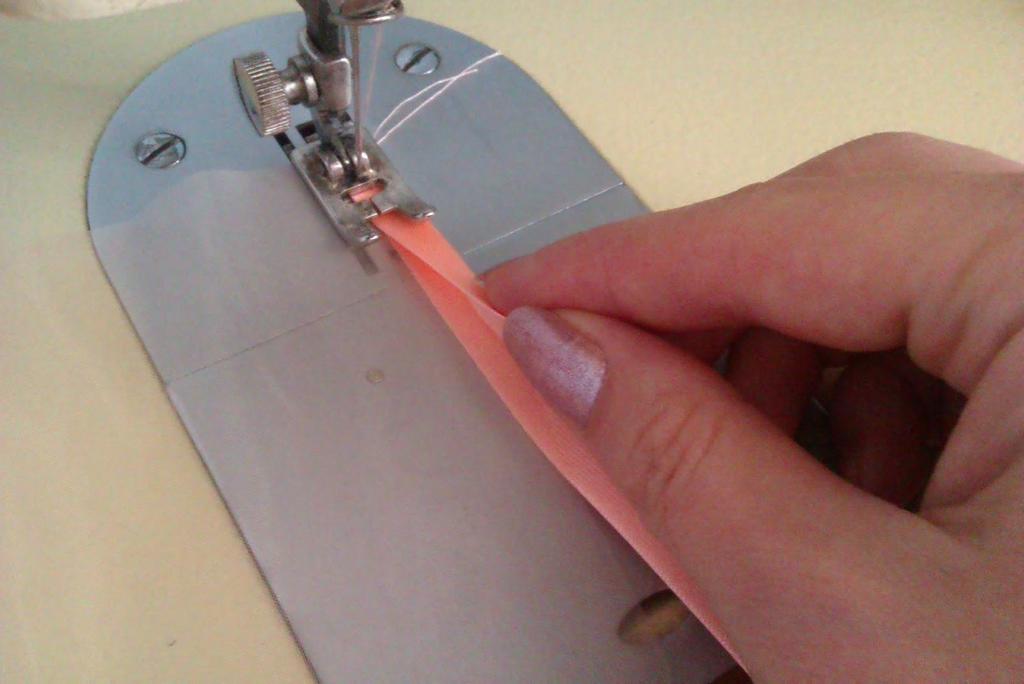
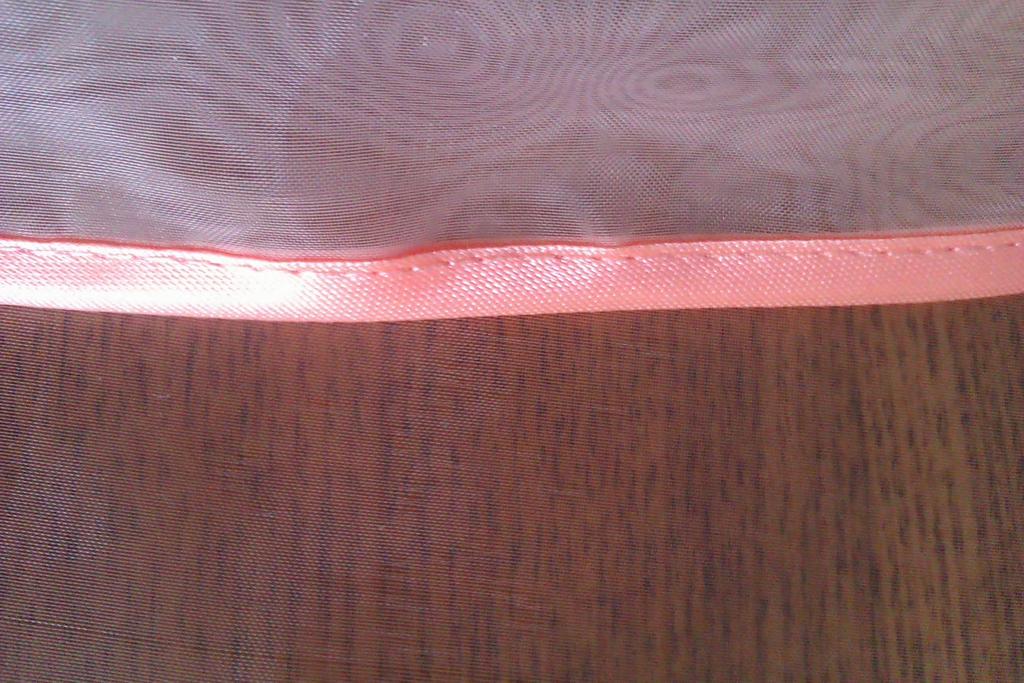
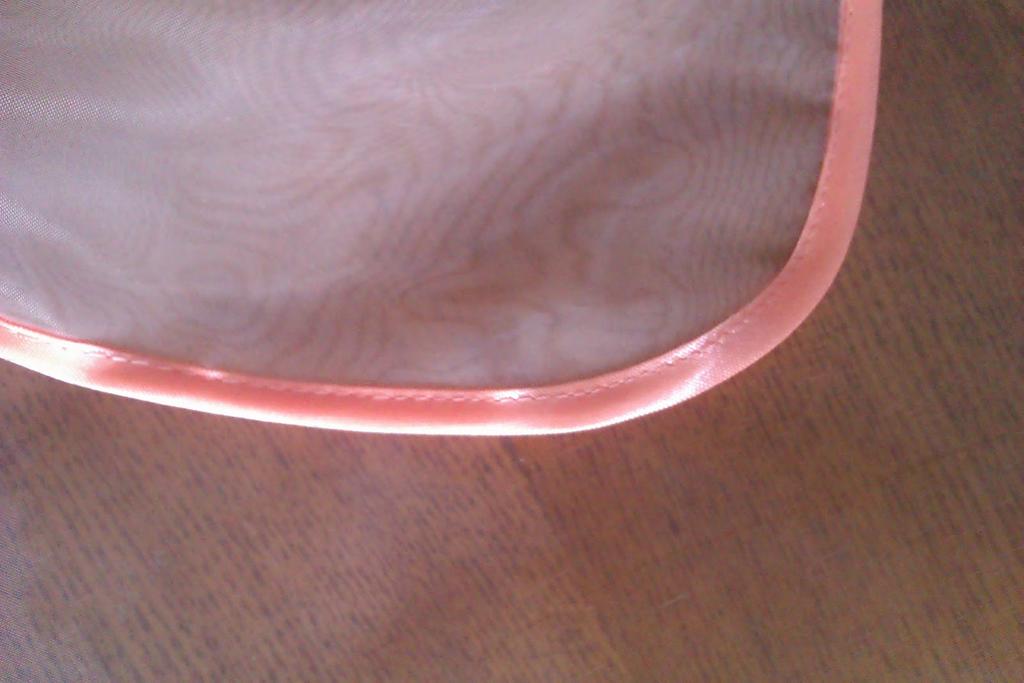
- Next, we process the edges of the canopy with a satin ribbon - carefully trimmed with a sewing machine and a thin needle.
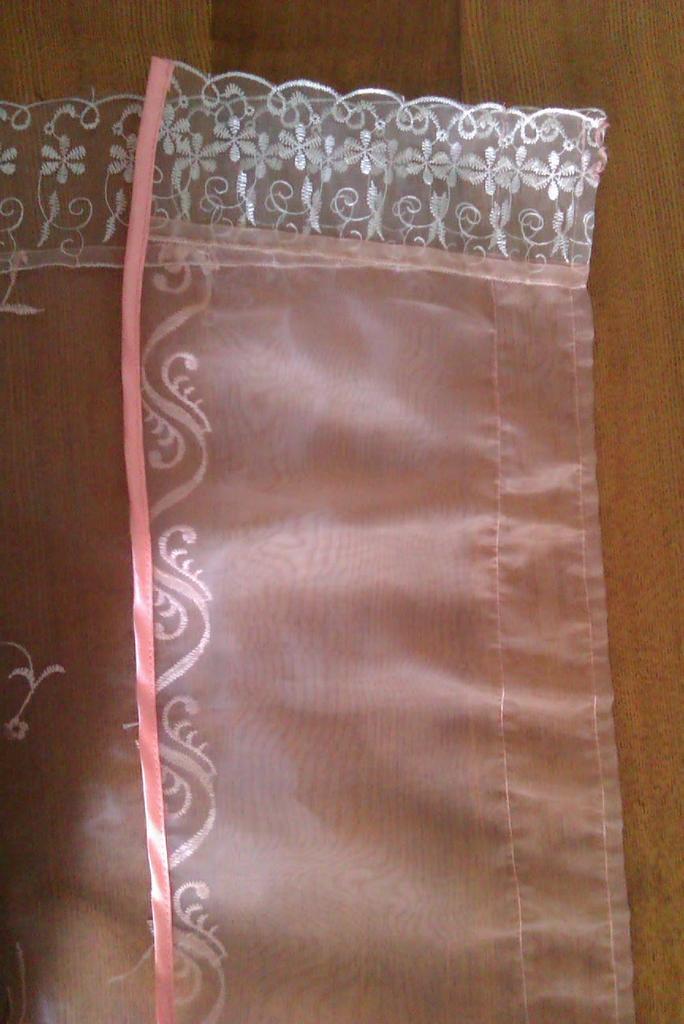
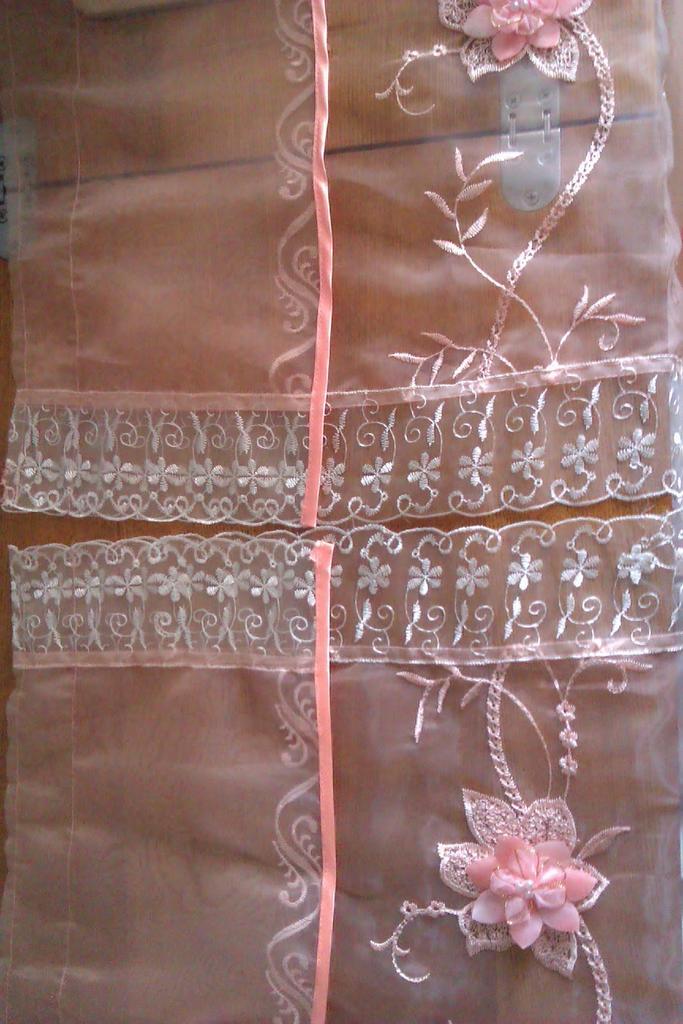
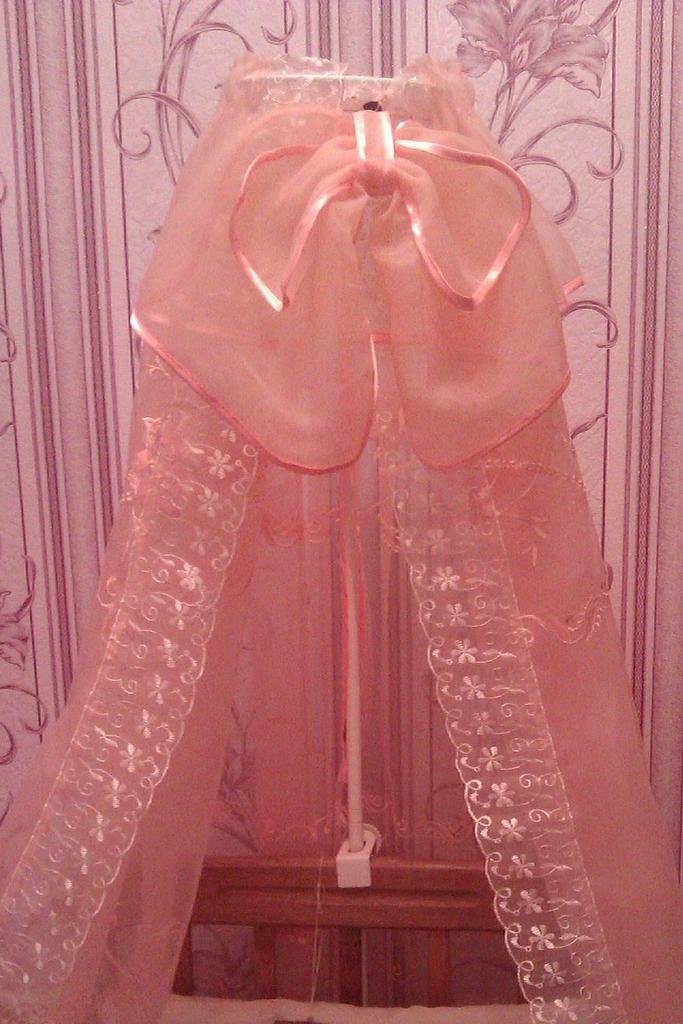
- The front edges of the canopy are treated with lace, if we sew for the girl, or with a cloth of a different color or a ruffle for the boy. At this stage, you can also sew various decorations of the canopy - flowers, laces, patches and so on.
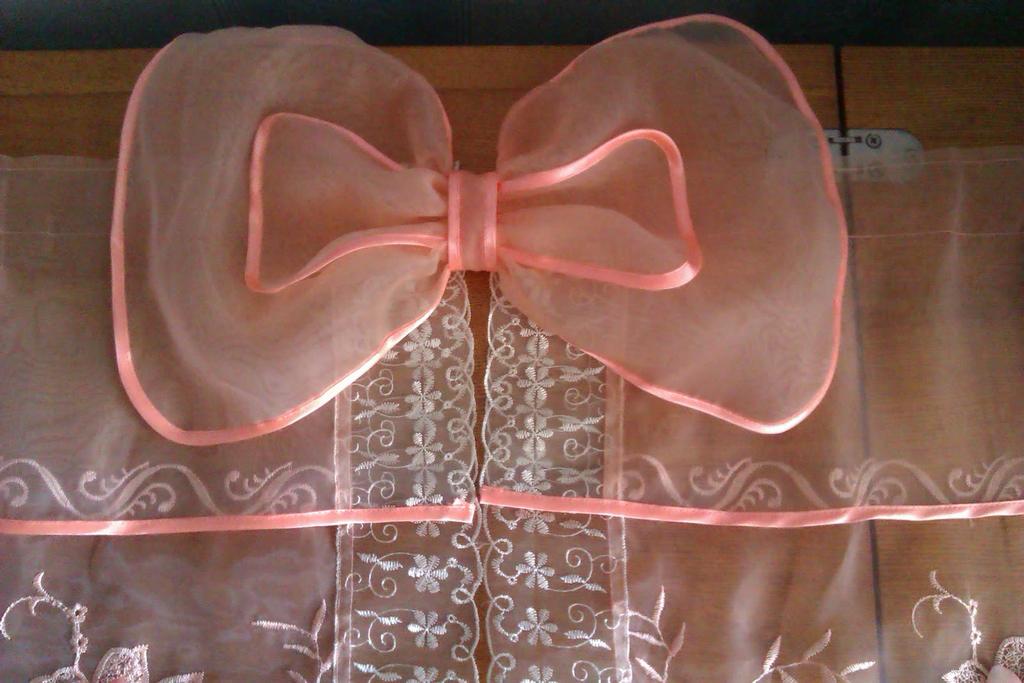
- Now, at the junction of the leading edges of the canopy, we make a large and beautiful bow.
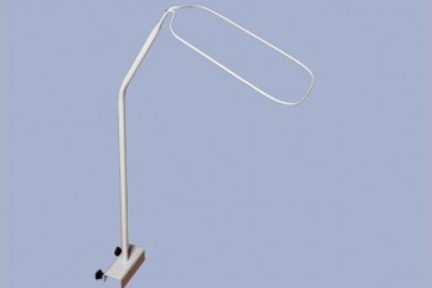
- Our canopy is already ready, but the question remains, how to strengthen it? To do this we will need a special holder, which can be easily bought at any children's store or made with your own hands from a thick elastic wire. To make the holder for the canopy with our own hands, we need to bend the wire with the letter "P", insert it into the metal tube and attach it to the crib with screws. That's how it should look.
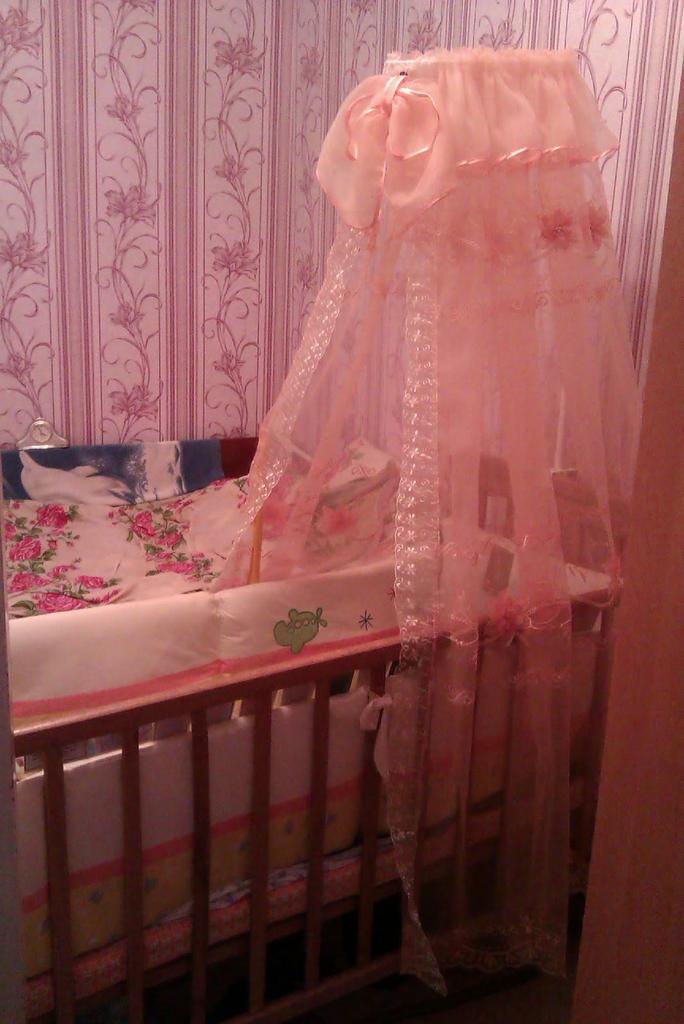
- Now our canopy is ready with our own hands. We fix the holder on the crib, then we put the fabric on the wire holder, distribute it evenly around the perimeter, straighten it, and our crib is transformed before our eyes!
| | | |
| | |
| | |