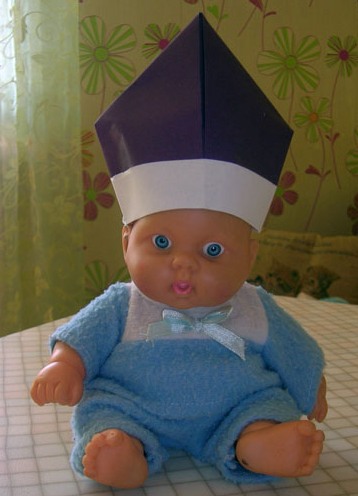
Summer is a wonderful time of the year when you can play outdoors from morning till night. The only problem that worries everyone and everyone is the summer scorching sun. Often, mothers complain that children do not want to wear hats, caps or beach hats . We offer you a simple, but very effective solution to this problem, which consists in making the self-made pylons from paper. The paper cup has proved its worth as a cheap and practical headdress. Several generations wore military caps in summer and labor camps, and the most interesting thing is that children always wear this headdress with great desire.
Probably not all parents remember well how to make a cap of paper. Today's master class is devoted exactly to how to fold a cap from a paper.
Soldier's Pylon from Paper
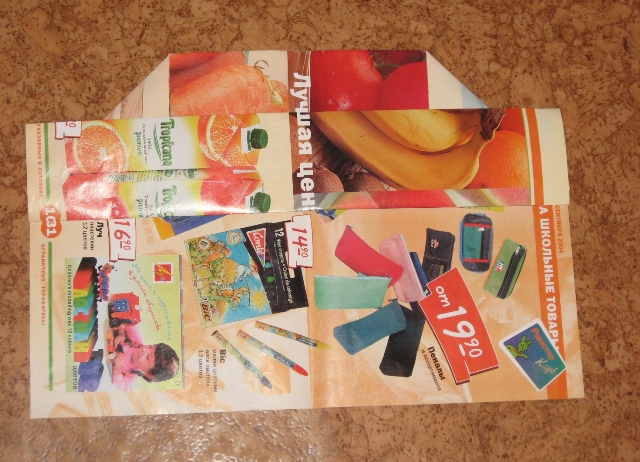
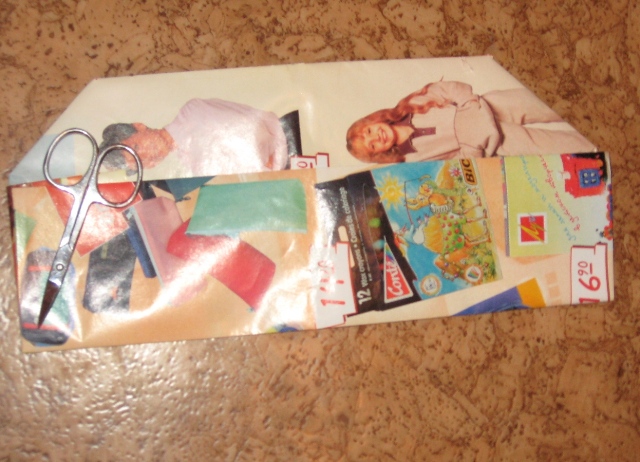
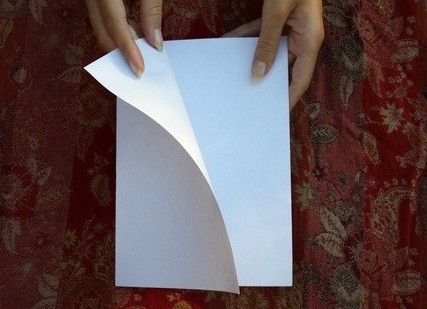
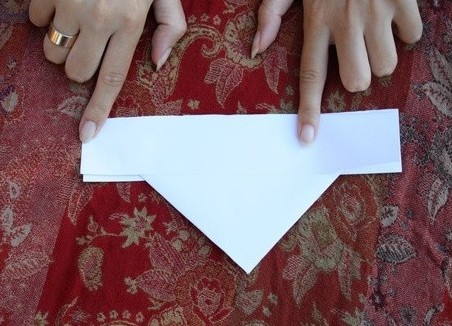
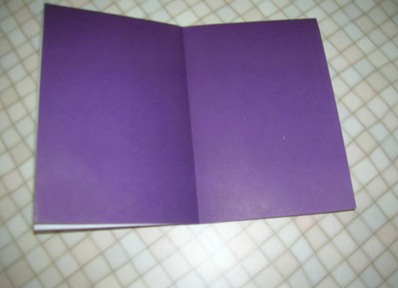
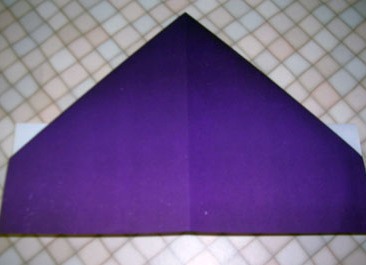
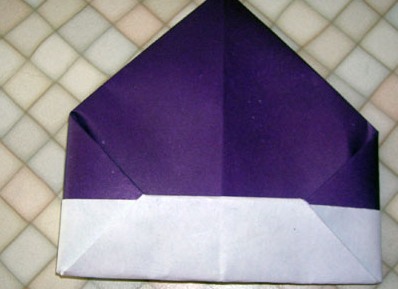
- We suggest you make a cap from a regular big newspaper. You can take a black and white paper from thin paper, but the child will most certainly like the color. First, take the newspaper and put it in half. Then bend the upper corners of the eye, approximately, like in the photo.
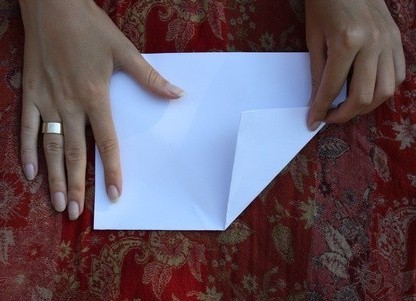
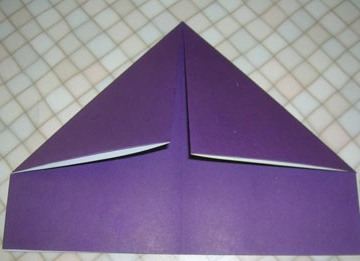
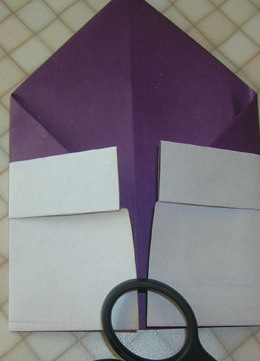
- Then bend the bottom of the strip about 1/3 of the newspaper wide. We fold the second time, applying a strip to the triangles. The higher you bend the second strip, the shallower will be the pilot's cap and vice versa. We turn our workpiece over.
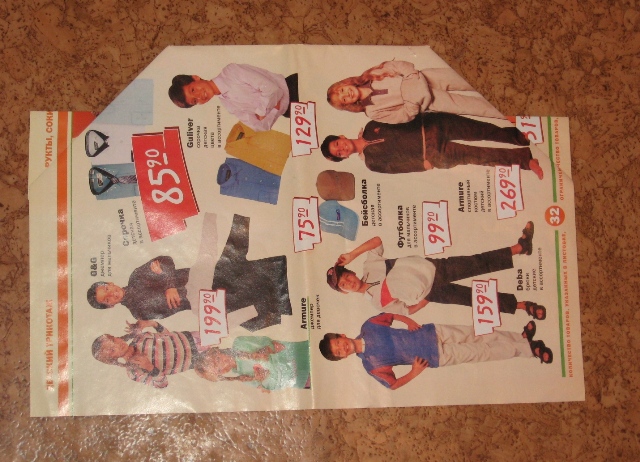
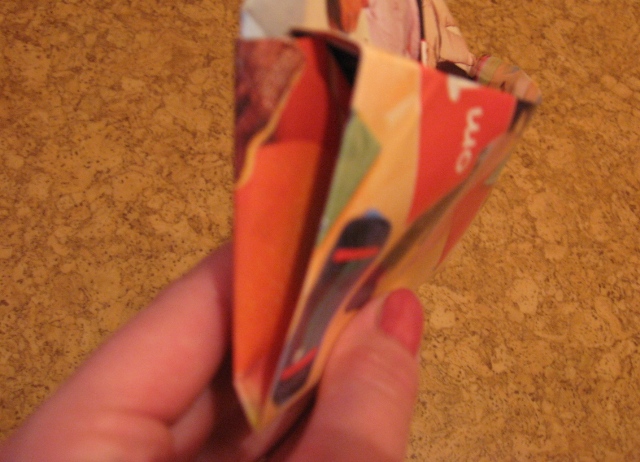
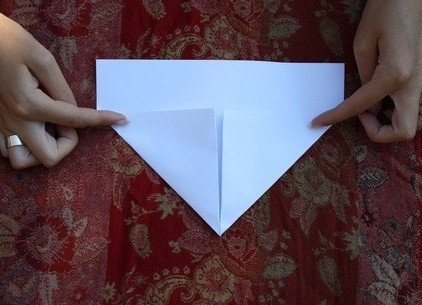
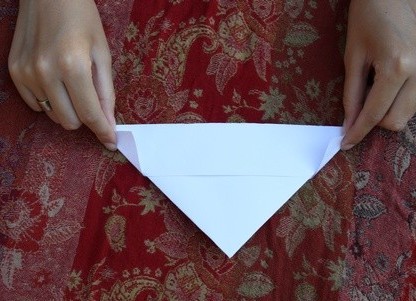
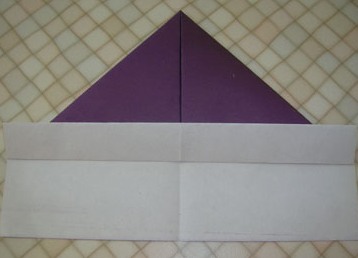
- We bend the symmetric bands on the left and on the right. The more you bend, the less the cap will be, so consider this, making a cap for children of different ages. Next, bend the two bands from the bottom and get the silhouette of the almost finished product.
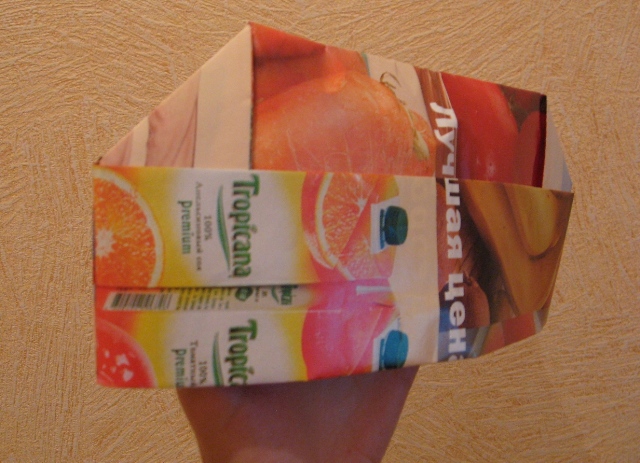
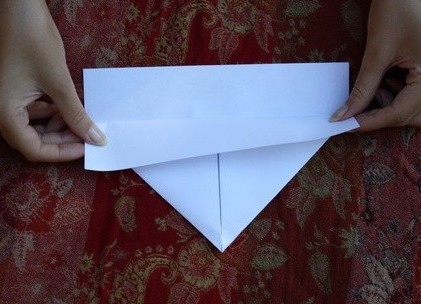
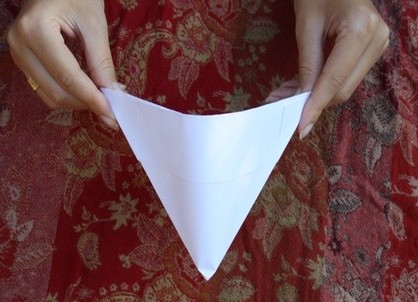
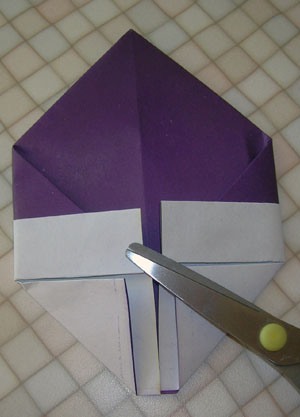
- Now the most important thing is that we wrap the strip behind the side pockets so that it does not fall apart on the head.
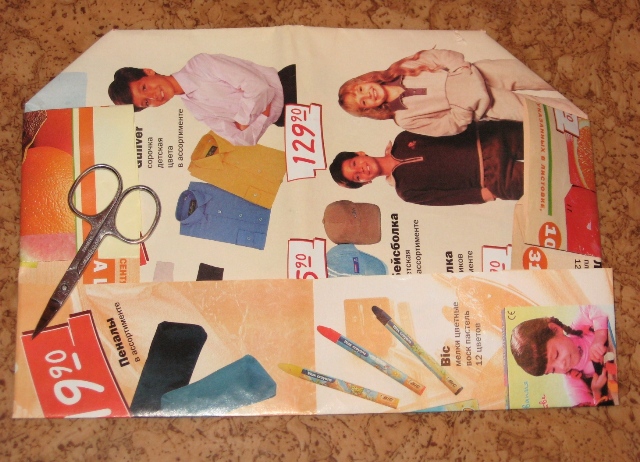
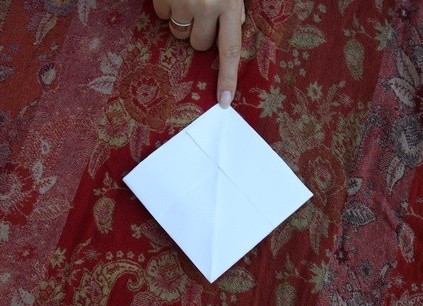
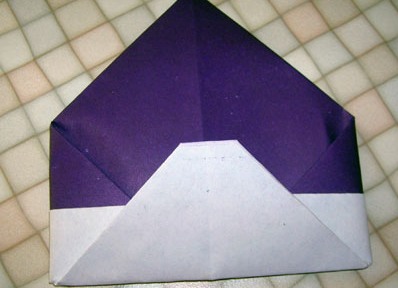
- Everything, our hand-made paper is ready!
| | | |
| | | |
| | | |
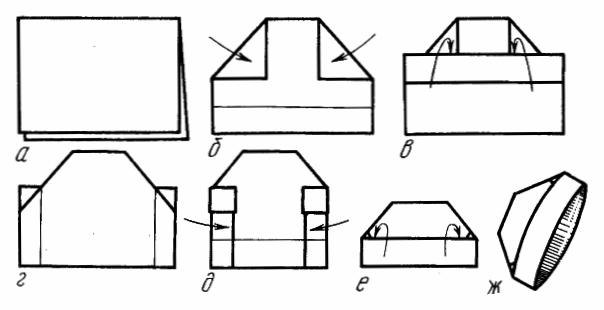
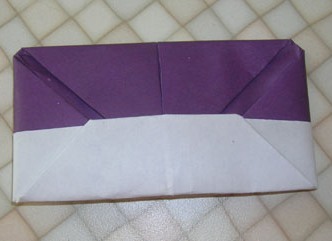
A soldier's paper can be made from paper according to this scheme.
How to make a cap of color or plain paper?
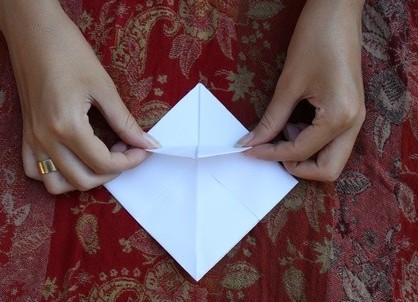
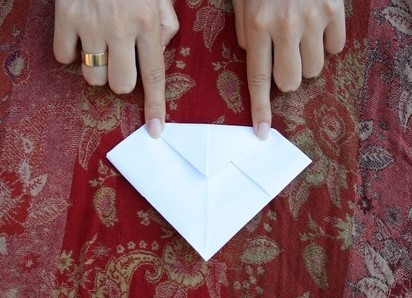
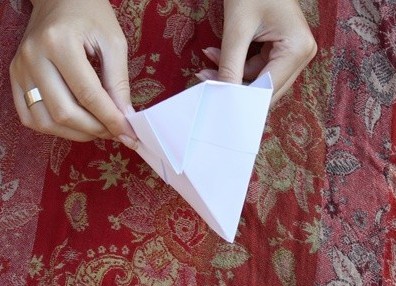
Making a pencil from paper is an interesting activity for children of primary school age. Once seeing how to make a pilot's cap, they can themselves repeat this simple task. So, take a sheet of A4 paper and bend it in half. Then bend both corners to the center, getting a pointed piece. Bend the corners of the strip from one and the second side of the cap. Now you need to bend the small corners around the edges of the workpiece from one side and the other. Now open the cap, turn and fold it into a rhombus. We fold the two lower corners of the diamond and go up and get a pretty cap.
| | |
| | |
| | |
| | |
| | |
| | |
| | |
We make a hat from the rain, a cap of the cook and a cap from one sheet of paper
Another option for making a color card. At first all actions are similar to the previous way of making a pilot's cap.
- Take a sheet of paper and bend it in half. Then bend the upper corners to the center. The bottom edges of one side of the workpiece are bent in the form of two strips to triangles.
We get the first version of the cap from the rain. - Then turn the cap over with the other side and bend the sides to the middle.
Lower corners bend in the form of triangles and raise them upward. Now carefully insert the angle of the triangle into the inner part, fastening the workpiece.
We get the second option - the chef's cap, which will give confidence to the cooking of any beginner culinary. - To make a cap out of the cap of the cook, you just need to bend the upper triangle inward.
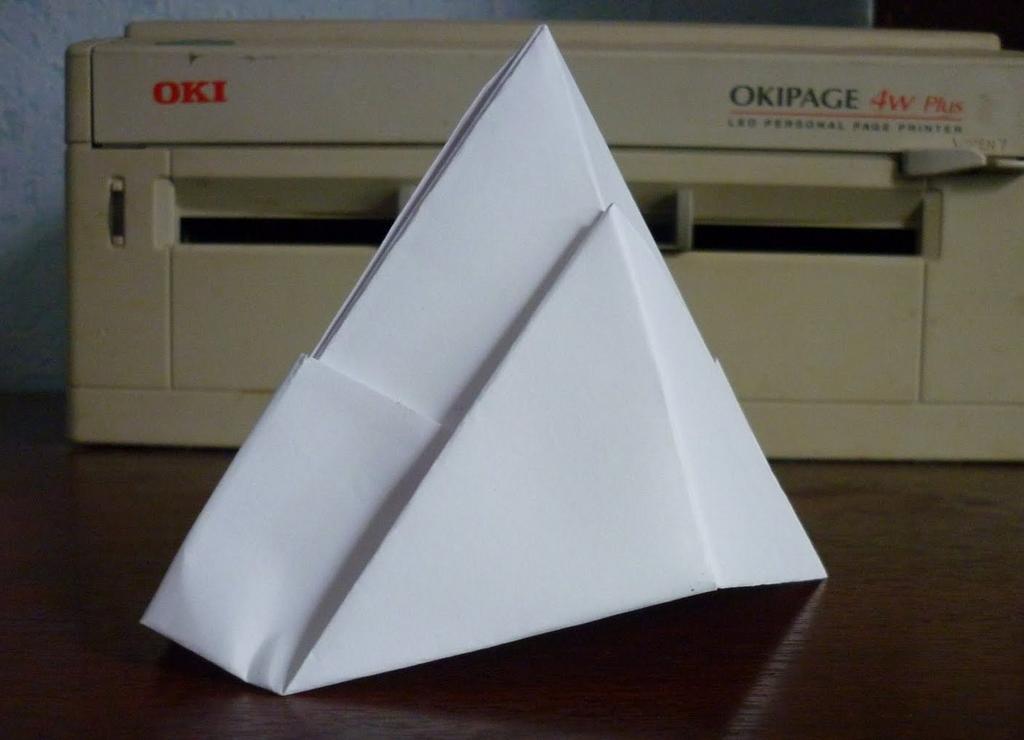
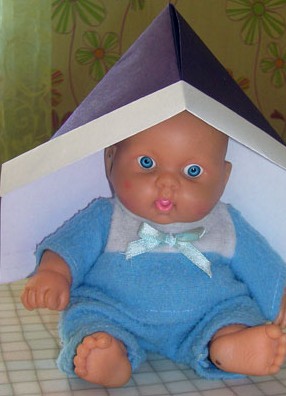
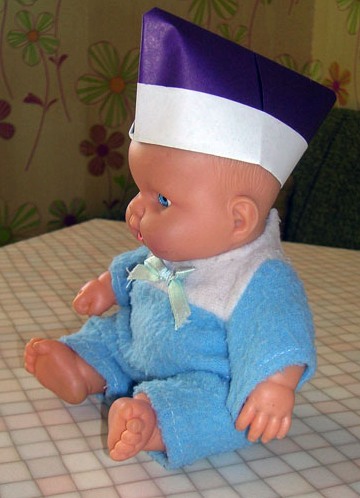
And it turned out a great pilot's cap!
A pilot is a very handy thing, if you forget to collect the entire list of what the child needs at sea , you can make it out of improvised materials if necessary, and remove it as a useless pocket. Try to make a cap with your children, and they will gladly wear such an original hat.