What is a casket? Anyone can answer this question, even the smallest man. Everyone immediately associates the casket with girls, girls, women. The whole beautiful half of humanity can not do without this subject. In the boxes you can store any expensive and valuable, both in direct and figuratively, things. These can be diamond rings or very expensive letters to the heart.
A very large selection of caskets can be seen in stores. They vary in shape: round, rectangular, square. And also the material from which they are made. It can be: plastic, wood, ceramics, ivory, fabric and even such unusual as pasta , plastic tapes or books.
If for you are not important tricks like double bottom, secret mechanisms and codes, then you need to focus on the question "can I make a casket myself?" The answer is unambiguous - of course, you can.
The casket, which you will create with your own hands, with love and soul, will become your favorite and very original piece of interior in your home. And how to make a box of paper, we now figure it out.
Origami Casket
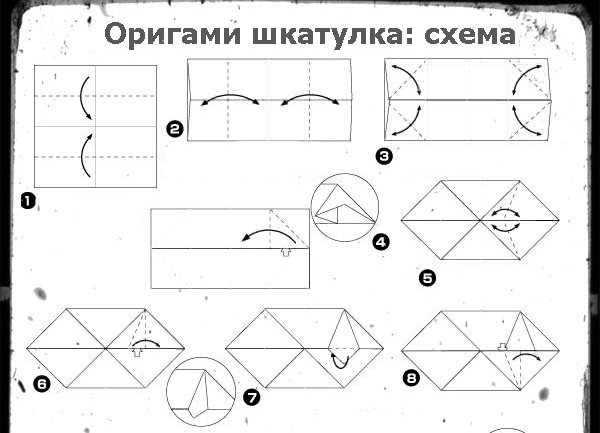
Chic and unique are the casket of paper in the origami technique. There are many ways and schemes for creating boxes of origami. But we picked for you a simpler one. For this we need very little. Great desire, patience, hands, paper and glue for fixation.
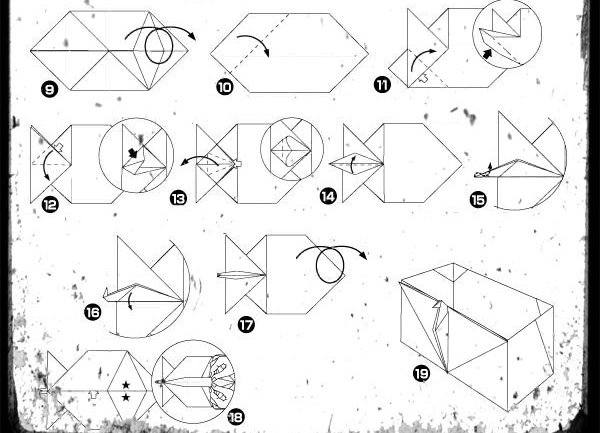
We have prepared for your attention detailed schemes, following which you can make a beautiful casket in the origami technique. To continue to store there what you think is expensive for you.
| | |
Of course, for people who are not familiar with the origami technique it will be difficult to make a casket. Beginning to make origami is necessary with the simplest elements. For such a contingent of people, we have prepared an easier way to make a paper casket.
Casket of paper - master class
An easier way to create a casket of paper is to make a casket from an already finished box. It all depends on its size.
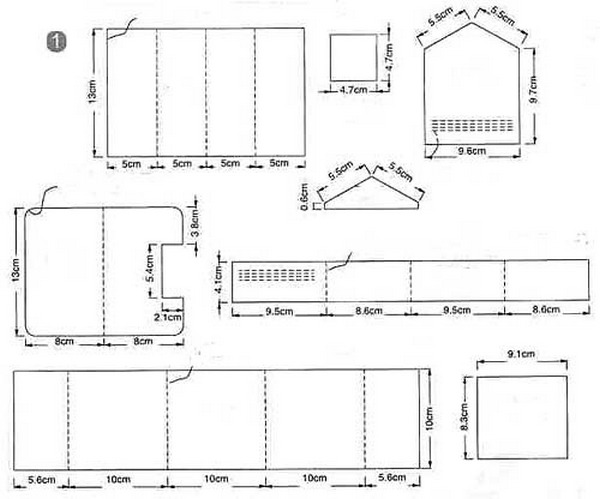
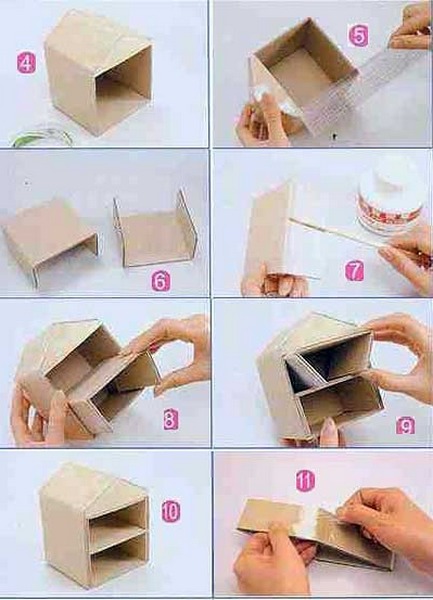
We suggest that you create your masterpiece from scratch. For this we need cardboard, paper, which we will glue our box (wrapping, color or remnants of wallpaper), scissors, scotch, pencil, and, of course, glue.
In order for your cardboard to bend well and correctly, before starting to bend it, draw along all fold lines, with scissors (only not with sharp ends).
In the photo below you will see a pattern of patterns of our casket with all sizes. Pencil this drawing on a cardboard. Then cut out.
After all the details are cut, proceed to assembly, first bend all the fold lines. Good grease glue and glue in the right places. All this is clearly visible on the assembly diagram.
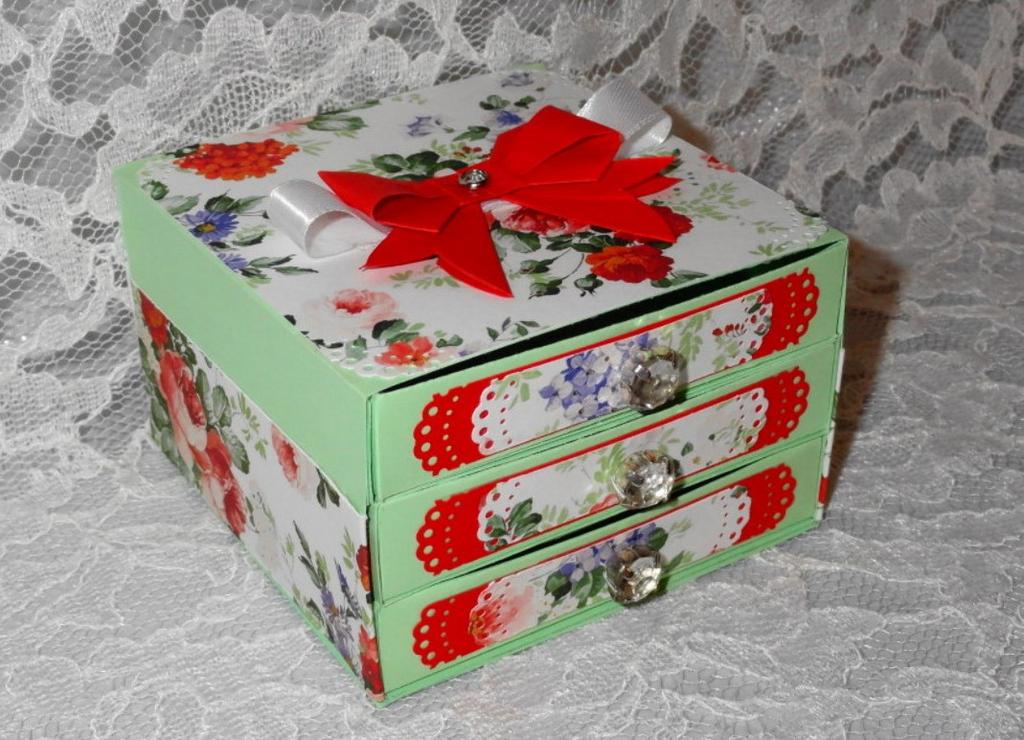
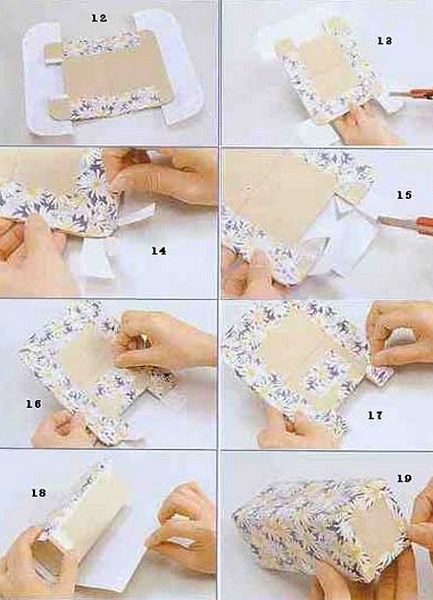
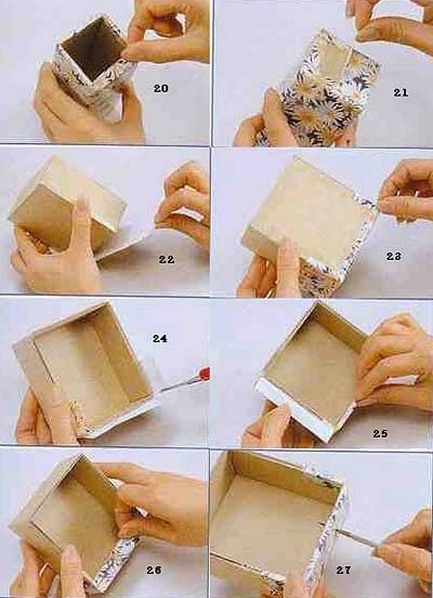
When the casket is assembled, we proceed to finish it. If desired, you can decorate the casket both inside and out. Again, by pattern, cut out our pattern of the casket from the material you are going to make the decor. We put the inside first (if we decided). By the way, from the inside is very beautiful to look velvet or velor.
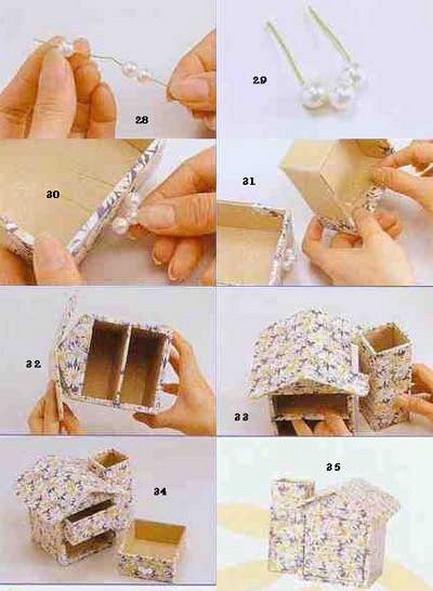
Then proceed to the "facade skin", very carefully, but at the same time, carefully lubricate the workpiece with glue. It is possible not to pasted paper, but to apply a drawing and cover everything with varnish. You can decorate the way your fantasy will allow. You can make decoupage or decorate with beads and beads - here you need to come to the rescue only stormy waves of your imagination.
| | | |
Well, the paper box, made with your own hands, is ready. You can leave it to yourself or give it to someone from your family and friends. Such a gift can not go unnoticed.