Our daughters are small women, who, like all of us, have a desire to dress up. And, of course, it's important to beautifully dress your best girlfriends - dolls. Selection of clothes and accessories for dolls is not just an exciting game, but also a way to instill taste, to teach a girl from early age to dress stylishly, to combine details of clothes and colors. In order to diversify the doll wardrobe, you can do the outfits yourself, in particular, to tie the clothes for the dolls with a crochet. In addition, this is an excellent occasion to teach the child to knit.
Of course, crocheting, even clothes for dolls - an extremely painstaking process, requiring certain skills. Therefore, at first, a small fashion designer can not do without your help. Start with a simple one - show your daughter how to knit a chain, loops, simple patterns. Explain how to navigate through the schemes. The first self-related products should be extremely simple - let it be a puppet scarf, flower or other decor element that can be adapted to crocheted doll clothes.
In addition, knitted crochet clothes can be a great gift. To buy a doll and the necessary attributes to it, by and large is not difficult. But it is much more pleasant for a girl to dress her toy in clothes, tied with caring mother's hands.
Clothes for dolls - dress: photos and schemes
We bring to your attention a simple step-by-step instruction on how to tie a dress for a doll with a sleeve of raglan.
We will need cotton threads of two colors, a hook at 1.75. The length of the dress is about 10 cm.
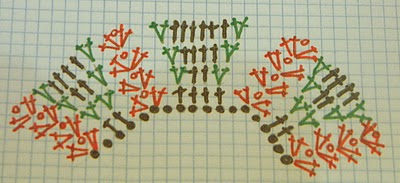
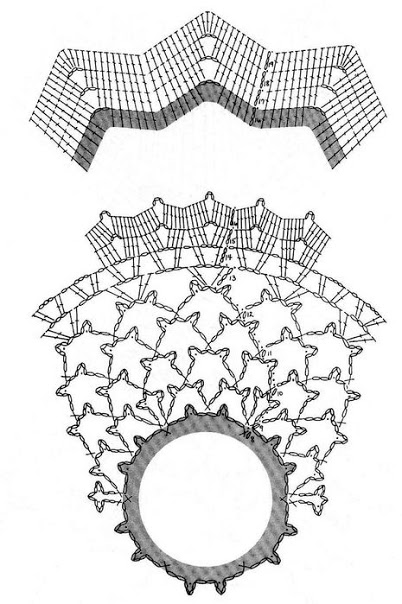
Begin to knit from above. To do this, we type the loops so that three identical parts are obtained - in our case three times four loops (for the shelf, the sleeves and the two parts of the back). Here we add three air loops for each line of raglan, three - for lifting the first row and two - for the buckle. We knit the columns with the crochet, and the lines of raglan according to the following scheme.
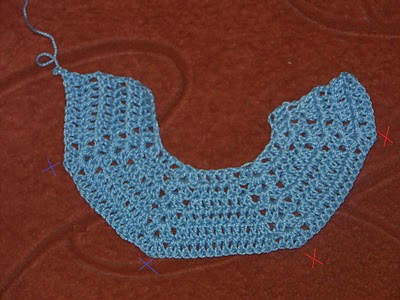
We knit the ranks so as to close the armholes next.
Having reached the closure of the armhole, we do the following: after connecting to the middle of the first line, immediately go to the next line of raglan. Similarly do with the other two lines. In the next row, in order to narrow the dress a little at the waist, we remove one post by tying two sticks together.
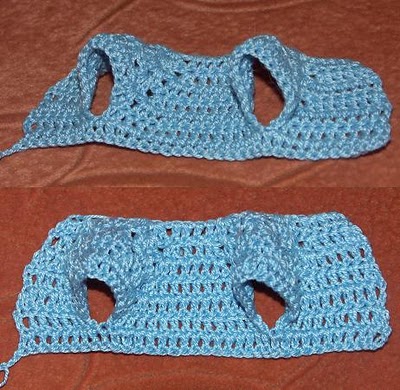
We make the necessary number of rows from the waist line to the hips. After tying the waist, you can add columns on the sides in order to extend the dress to the bottom and get the necessary number of loops for knitting the shuttlecock.
We begin to knit the first shuttlecock according to the pattern of knitting the napkin.
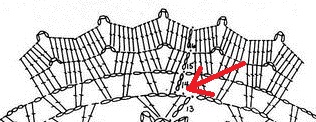
For this, the number of loops is calculated to obtain the required number of rapports. The pattern is repeated every 5 loops, hence the number of loops must be a multiple of five plus one border column. We begin to knit from the red arrow. The difference with the scheme is that we do not close the ring.
| | |
Having fastened the first shuttlecock, attach a thread of a different color to the outer column. We send several rows of color, then we knit a second shuttlecock and cut off the thread.
It turns out like this.
We fix the main color thread under the second flounce and according to the scheme we knit the third shuttlecock. We tie the neck and sleeves to other colors.
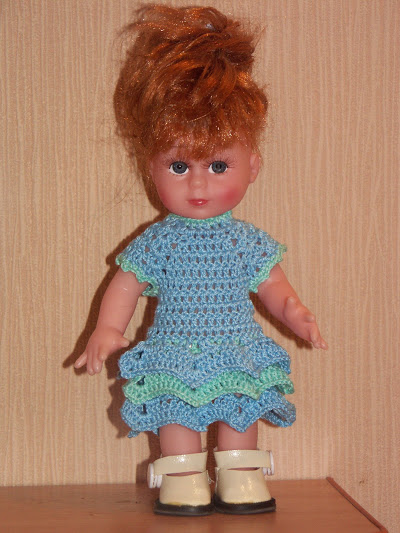
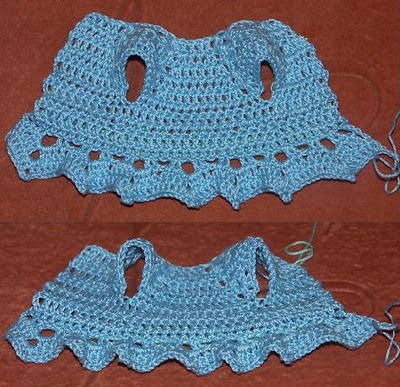
The dress is ready.