Do you want to make a real fairy-tale house from plasticine? There is nothing easier!
For modeling a house from plasticine, we need the following materials:
- plasticine bright colors;
- Heavy paper or cardboard for patterning;
- a miniature roller for plasticine (instead of it you can use any suitable object, for example, the handle of a thick brush);
- knife;
- a needle or an awl;
- metal brush.
So, let's find out how to make a house of plasticine!
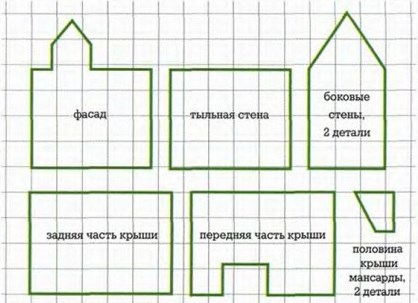
- First, draw or print on the paper patterns of parts of the house. Then roll out the clay to the correct size and cut out the details with a sharp knife. For a roof it is better to use clay in dark shades, and for walls - any color, as they are still waiting for "finishing works". Now we make a house from plasticine! Connect all the details, gently pinching the edges and smoothing the joints.
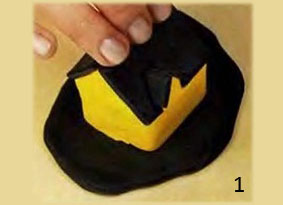
- Apply a light gray clay on the walls, spreading it thin on the walls on the outside. Shilom set the "brickwork". Form on the roof a round chimney.
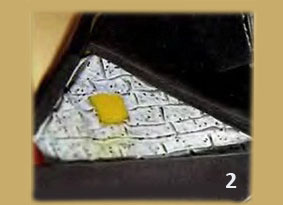
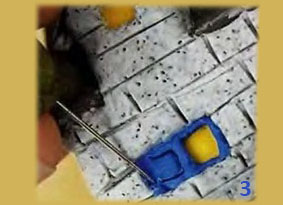
- Carefully separate one brick and glue in its place the window frame (blue) and the window (yellow). Make several such windows on each side of the house.
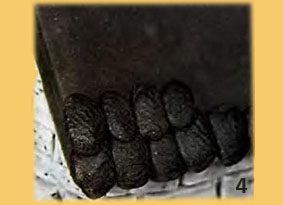
- Roof tiles are easy to make from a lot of plasticine balls, laying them in even rows on the roof slopes and at the same time slightly flattening.
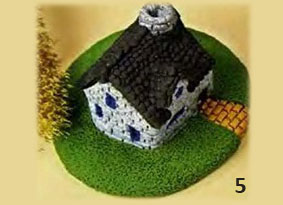
- Prepare a lawn on which there is a house. To do this, we must roll out a flat circle of green plasticine, then give this plane a relief with a metal brush or comb for the hair, and then install a finished house on it. Do not forget about the path along which fairy-tale characters will enter the house: let it be made of yellow brick, as in a fairy tale about an emerald city.
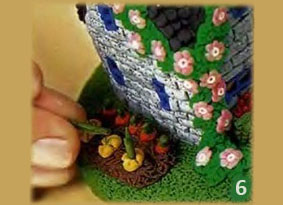
- Decorate the house with miniature flowers, flower beds or beds.
| | |
| | |
| | |
So our next work is made of plasticine - a house! With its help you can show to kids finger-like performances, for example, fairytales "Teremok", "Zaykina izbushka", "Gingerbread house" and others.