If you want to please your relatives with an original gift or take your child an interesting activity, we suggest that you try to make a plasticine rose. Those who doubt their skills, we are happy to reassure that we have simple options for "newcomers", as well as interesting suggestions for fans of creativity. So, let's begin.
How to sculpt a plastic rose in 3 steps?
This is the simplest version of a plasticine rose, which can be doued with a child of 2-3 years. For the craft, you will need a clay, toothpick, knife and board for modeling.
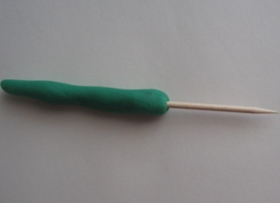
Step 1 . We take a piece of plasticine red or pink color, we roll from it a long sausage. We put the resulting sausage on a board and roll it until it becomes flat 1-2 mm. We twist the resulting flat rectangle into a "roll".
Step 2 . For the leg of the rose we take a piece of green plasticine and roll it from the sausage. Then carefully insert the inside of the sausage toothpick, so that the rose does not bend under the weight of the bud.
Step 3 . To make a rose for a rose, you need to roll a small ball of green color, slightly flatten it and insert a ready-made hand-made article into it. Our rose is ready.
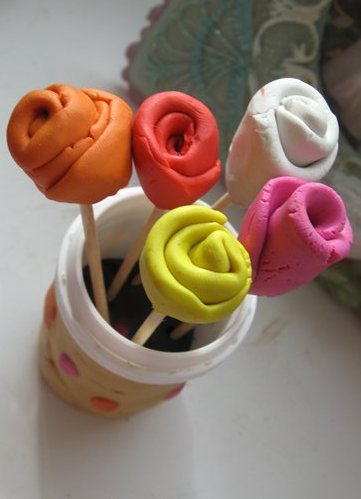
By this principle, you can mold several roses and place them in an improvised vase. This bouquet can "freshen up" a doll house or a children's shelf.
How to make a beautiful rose from plasticine?
Older children will probably want to mold a rose, each petal of which will resemble a real one. In fact, this is not so difficult if you follow step-by-step instructions. Such crafts of roses made of plasticine can be done with a child who has erased preschool and junior school age. Let's try!
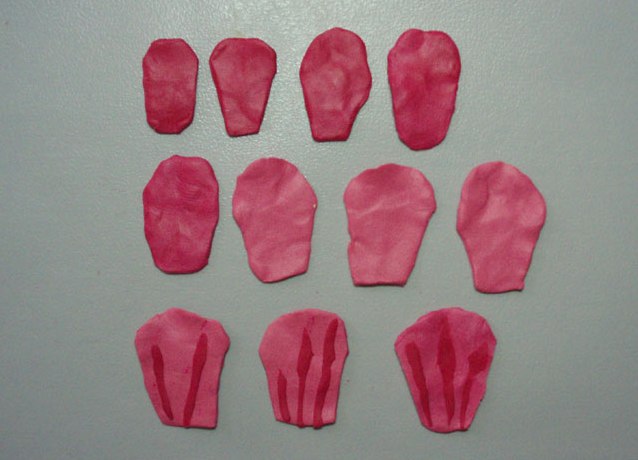
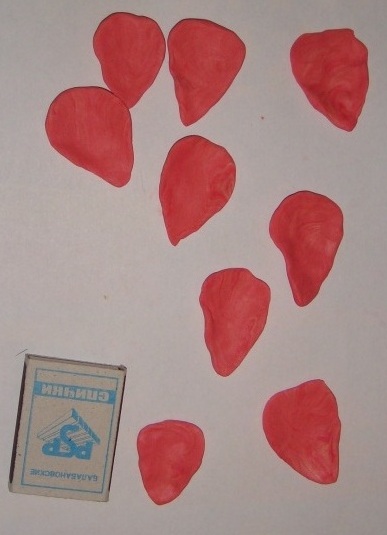
- We sculpt petals. We roll a layer 1-2 mm thick and cut it out drop-like petals. Remember that the petals of the middle should be a little narrower, while the most extreme ones are wide. Do not try to make all the petals perfectly even, even in a real rose, all the petals are different. You can make the middle of the rose a bit darker, for this in pink plasticine add a little purple.
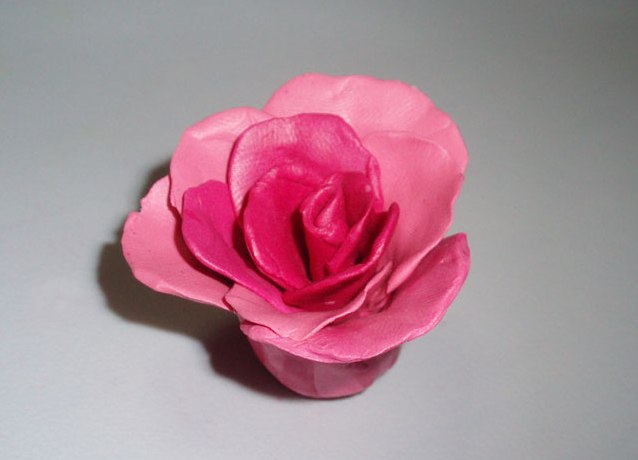
- We collect a flower. The first petal is twisted into a tube, which will be the core of the rose. A few subsequent petals tightly attach to the flower, not straightening them. Next, attaching wider petals, try to open the petals, making the flower "blooming." If necessary, you can stitch the petals, if the rose is not particularly lush.
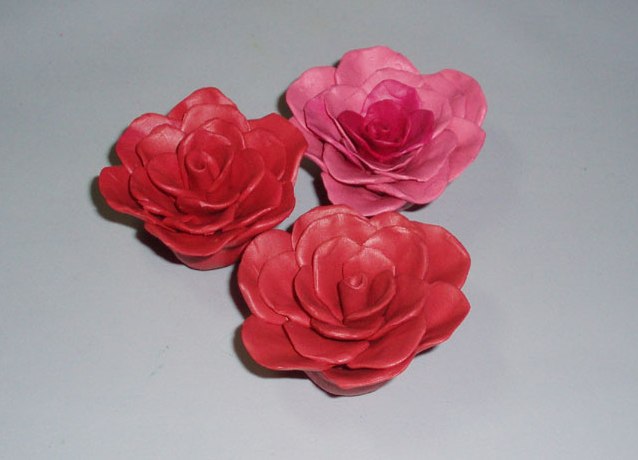
- We make a bouquet. For the beauty of the bouquet, on the same principle, we are making another pair of roses of a different color.
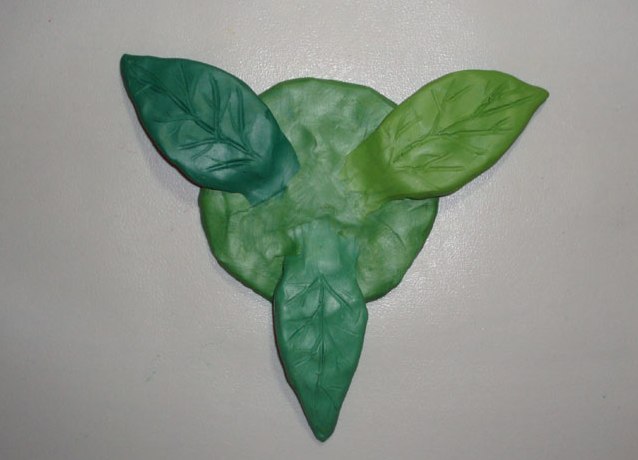
- We mold the stand. From green plasticine we roll a ball, then we roll out a layer 4-5 mm wide from it. From small pieces of green, we make petals: roll the ball, make an oval from it, then flatten it and put it into the desired shape. For verisimilitude, you can make incisions with a knife.
- We collect the composition. Gently attach all the roses to the stand, straightening them and giving the handicraft a beautiful look.
How to make a rose with a closed bud?
- From the softened plasticine we roll a layer and cut out on it 10-12 identical in size petals.
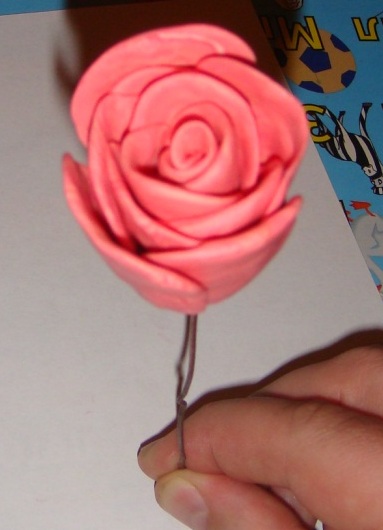
- Take a piece of wire or unbend the clip and wind the first petal on the paper clip.
- Then, by the same principle, we attach the remaining petals, pressing their lower part, and the upper one is simply twisted.
- Next, we make a sepals and a stalk. To do this, we wrap the green clay around the paper clip, making the petals wider.
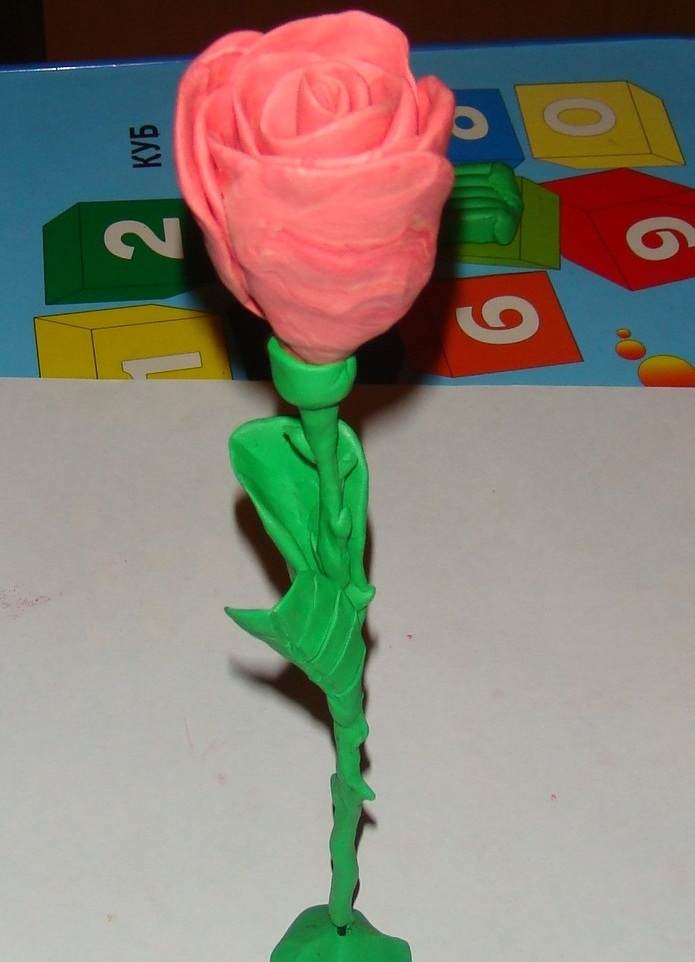
- In order for the rose to look even more natural, you can pull out pieces of plasticine from the stem, which will be thorns. From green plasticine we make leaves and fasten them to a rose.
- By this principle, you can dazzle several flowers and put them together in a beautiful bouquet.
Molding a rose from plasticine will not take you more than a few minutes, but everyone will be happy with this craft, who will be lucky enough to touch your creativity.