The art of creating boomerangs is quite an ancient craft. In the past in China, these exotic-looking flying products served as weapons, so metal or wood was used to create them. However, the history of this type of weapons began even earlier. Australian aborigines, who hunted for birds, noticed that some sticks simply fly, while others somehow come back into their hands. It would be strange if such an amazing aerodynamic property was left without attention, because hunting with a self-returning weapon was greatly simplified.
Today exotic-looking boomerang is an excellent toy for children. In shops where different groups of products for children are sold, one can often see boomerangs made of plastic in various colors. Such toys are inexpensive, but the creation of a boomerang by themselves will not take much time at home. In addition, the child will be much more interesting to play a boomerang, in the creation of which he participated himself.
Paper or cardboard - that's all you need for those who do not know how to make a boomerang with their own hands in a few minutes. This entertaining toy is very popular with the kids, and even with their parents, it's so interesting to watch her flight and return. You can even arrange a fun competition to throw in the house or on the street. All this will be available to those who read our article on how to make their own hands of paper or paperboard boomerang.
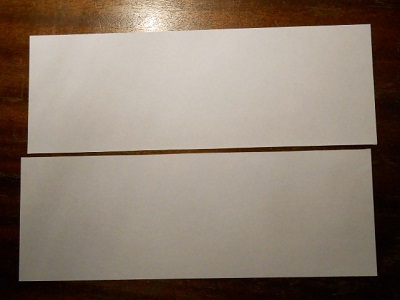
So, before making a paper boomerang, prepare an A4 sheet that needs to be cut in half. We need only one part of it.
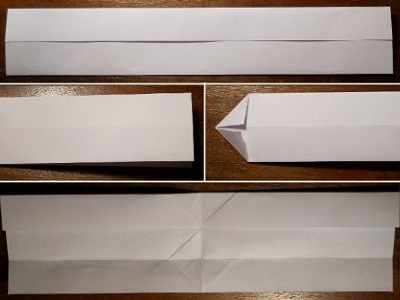
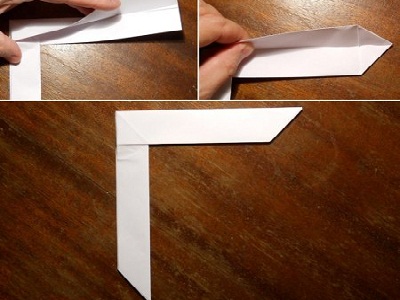
- Define the bend of the horizontal axis. We apply the lower and upper parts of the sheet to it. Then the entire workpiece should be bent, but already along the vertical axis. In the place where the corners are folded, bend them to the middle line. Now we straighten the corners and the strip, unfolding the lower part of our workpiece.
- Fold the detail along the diagonal lines that we got in the center, bending the bottom layer on the right side to the center. The left part is raised at an angle of 90 degrees to the plane, turning it counter-clockwise.
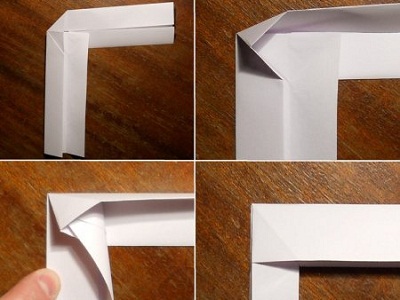
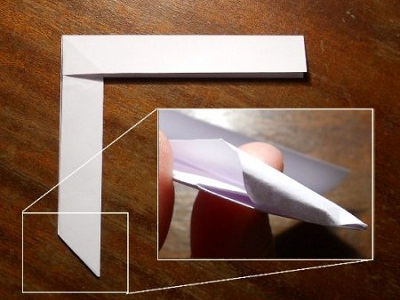
- Fold to the axis line half the sheet, and the bent part is lowered down to get a right angle. We also bend the upper layer of the upper beam of the boomerang. In the pocket formed in the center, we fill the corner of the layer of the lower part, pre-bent, the addition is ironed. The central part is now firmly secured.
- We unfold the folds on the end of the lower paper ray. Fold the corners inside and straighten the addition. Then we put the left corner inside the part, first bending it. A fold was formed on the workpiece. Now bend the right corner.
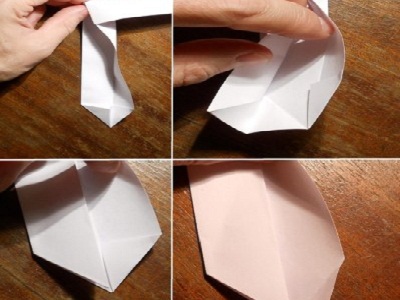
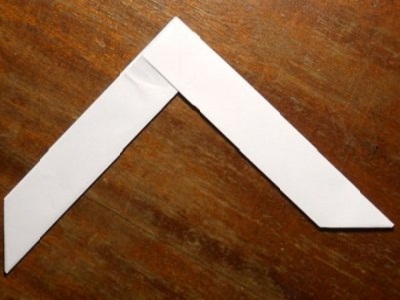
- We fill the right folded goal into the fold, which is formed by the left embedded valve. We get a beam of boomerang with an even cut. Similarly, we open the corners on the upper ray as well. Now our hand-made paper of boomerang is ready for flight!
| | |
| | |
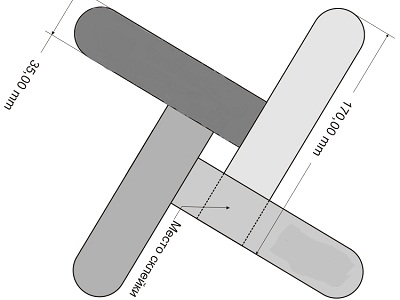
Now you know how to make a boomerang of paper, but its shortcoming is fragility. A toy made of cardboard will be more durable. Boomerang can be made with three, four and five blades. According to the scheme below, it remains only to cut out from the dense cardboard the necessary number of parts and glue them overlap. This is important, because it is necessary to take into account air resistance.
In addition, the angles between all the blades of the boomerang should be the same, because the running toy will not return. You can check this with a conventional protractor.