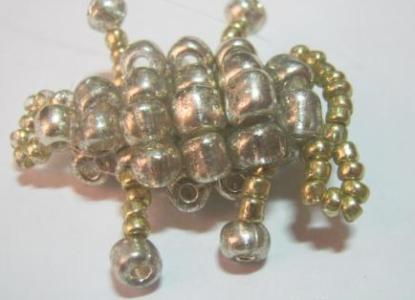
There is no better gift than that made with love and care with your own hands. And there is no better gift for the New Year than the symbol of the coming year made with love and care. It's no secret that sheep will become the patroness of 2015. Therefore, our master class is devoted to how to make a sheep from beads with our own hands. A small but very cute lamb, woven according to the scheme below, can easily be used as a key fob, ornaments for a mobile phone or even a pendant.
Lamb Bead
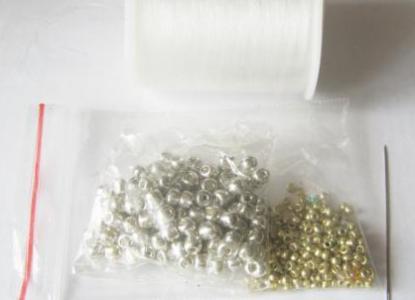
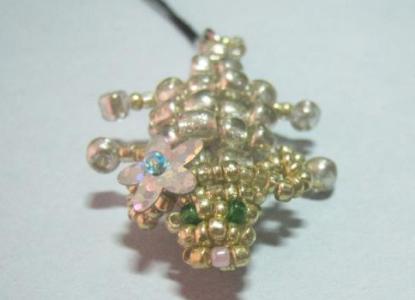
We will prepare everything necessary for weaving sheep from beads:
- a thin line or monofilament length of 1 meter;
- needle for beads;
- Golden beads of two different sizes - for the body and head;
- several beads of green and pink flowers for the eyes and nose of our lamb.
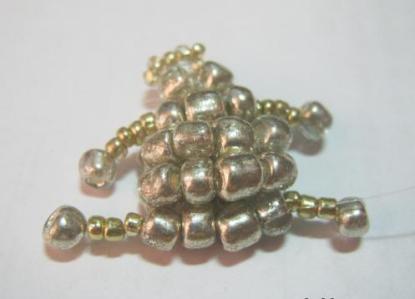
We begin to weave sheep from beads according to the scheme of parallel weaving:
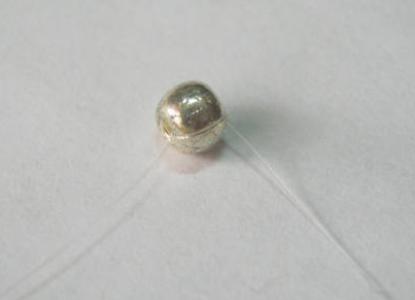
- We start the work with the tail. First, we take one large bead and fix it in the middle of a piece of fishing line with two strong knots.
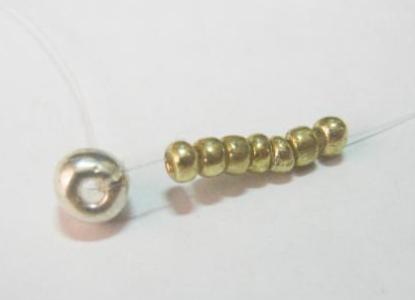
- At one end of the line we collect seven small beads.
- We pass the end of the line with beads strung on it through a large bead and get the tail of our sheep.
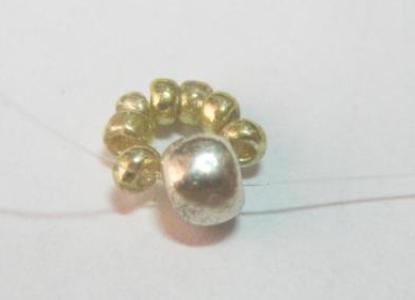
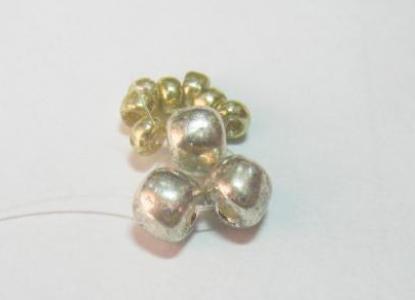
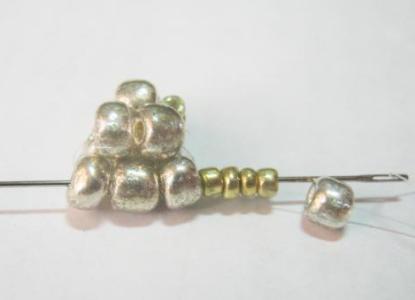
- We now turn to the formation of the torso of our sheep. We will weave it out of a large bead. For the first row of the trunk we string 2 beads on the line and draw the ends of the line through the bead of the tail.
- The inner part of the first row of the trunk will be formed from two more beads.
- We connect the two parts of the first row together, tightly attracting the beads to each other.
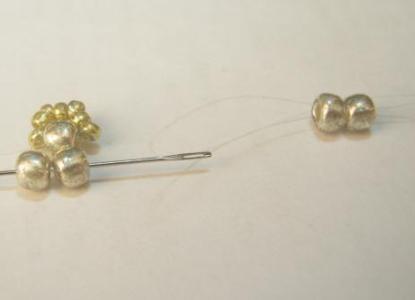
- For each of the halves of the second row of the trunk, we collect three beads.
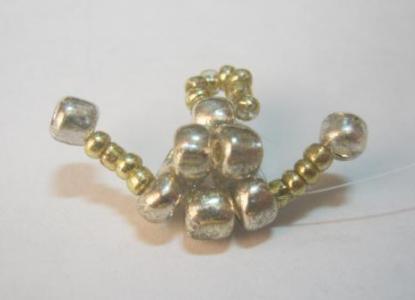
- It's time to build our sheep's legs. For each of them we will type on a needle four small beads. Then we'll string one big bead and go through the needle again through all the beads of the leg.
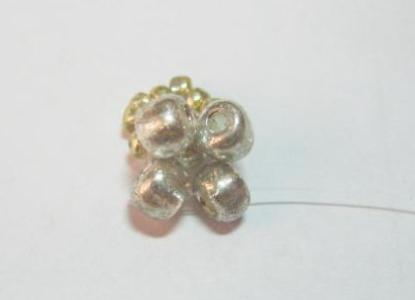
- For the next two rows, four large beads must be strung.
- After that, string four more large beads on the line and go to the weaving of the front legs of our lamb. We will weave them in exactly the same way as the rear ones.
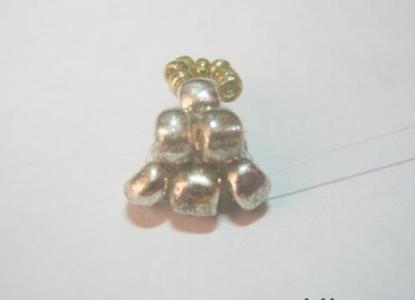
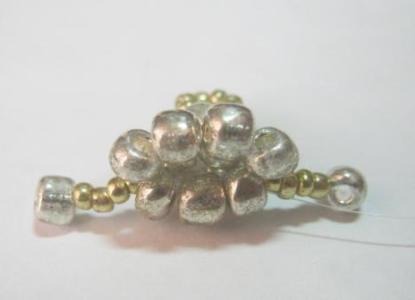
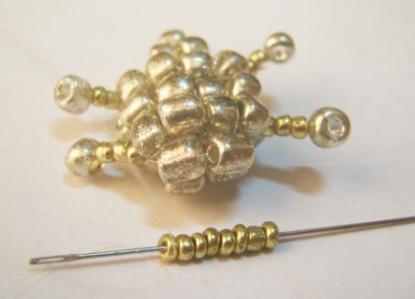
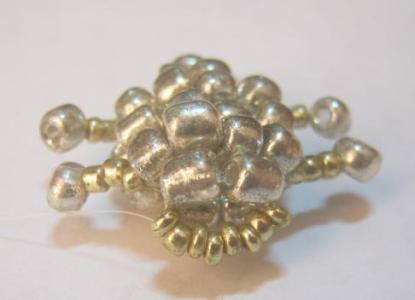
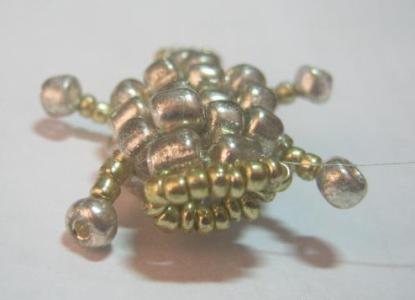
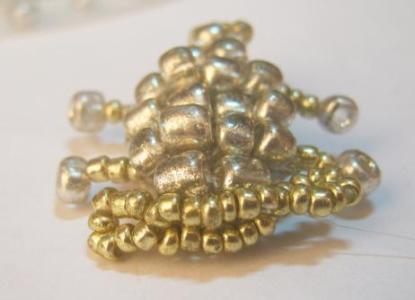
- A series of two large beads ends the torso of the lamb. After this, go to the weaving of the head. For the first row of the head, we will type 8 small beads on the needle. The amount of beads that will be required for further weaving can vary depending on its size - the most important is that the transition from the trunk to the head looks smooth and the product is not deformed.
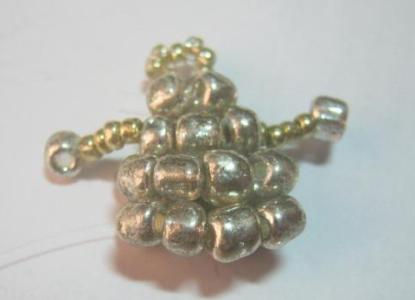
- We collect the necessary number of beads for the second half of the first row of the head and proceed to weaving the ears. In order to make the finished sheep look more interesting, and the ears do not merge with the head, you can take the beads of a different color or shade. For the first ear, we will string 8 beads on the line and close them in a ring, passing a line through the beads of the first row of the head.
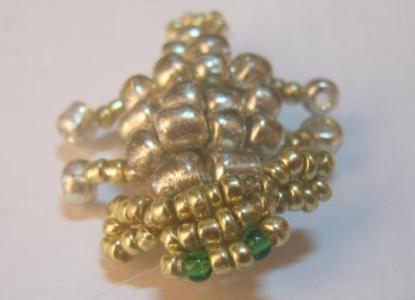
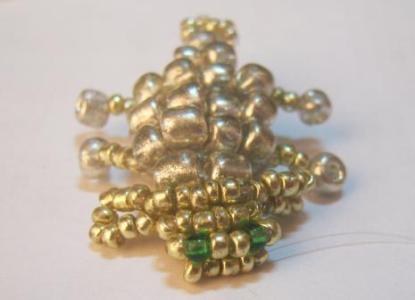
- Similarly, we will also weave the second eyelet of our lamb, and then proceed to the second row of the head. For each half of the second row, we will pick up 7 beads on the line. In the third row of the head, it is necessary to weave green beads-eyes. To do this, we draw on the line 6 golden beads for one half of the row, and the second one is executed in the following sequence: 1 golden bead, 1 green, 2 golden, 1 green, 1 golden.
- For the fourth row of the head, we draw five golden beads on the fishing line.
- For each half of the final row of the head, we need to collect three beads, one of which will be pink. Thus our sheep from the beads will have a spout. It remains only to fix and trim the working thread, neatly hide its ends in the work and our charming lamb is ready!
| | |
| | |
| | |
| | |
| | |
| | |
| | |
| | |