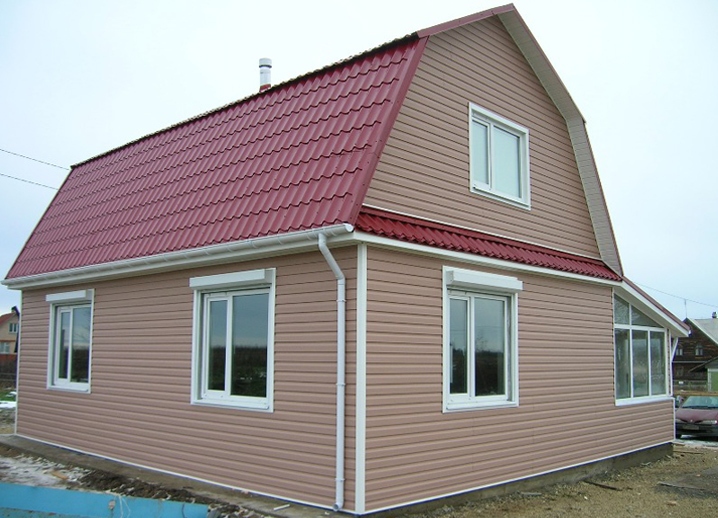
We all want our house to look neat and beautiful. And its external decoration is, in fact, the face of the whole structure. Therefore, it is so important to pay special attention to the decoration of the facade . Modern manufacturers provide a wide variety of materials to give an excellent appearance of the exterior of the house. Especially popular is siding. It looks modern, neat, and also quite economical. Let's see how to finish the house with a siding with your own hands.
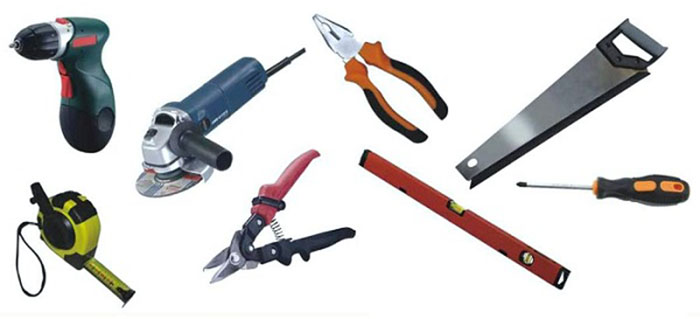
Required Tools
Of course, no work can be done without the necessary set of tools. So, for the siding of the house by siding with our own hands, we will need: a laser or building level, a measurement tape and a construction square, a hacksaw, a drill, a hammer, a screwdriver.
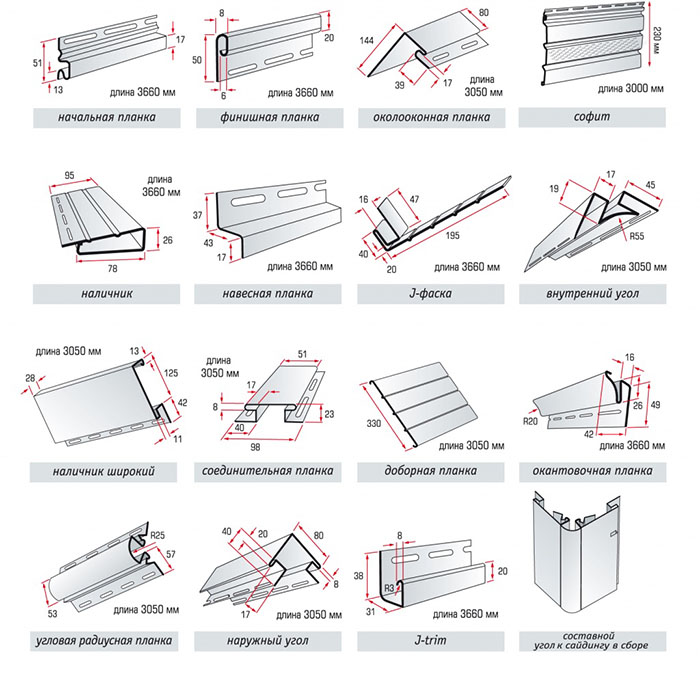
Calculation of materials for work
To understand how much siding we need, you need to know the length and useful height of the panel (without the lock, that is, one that will be visible after installation), as well as the height and length of all the walls. To calculate the siding on one wall, its height is divided by the useful height of the panel. Then the length of the wall is divided by the length of the siding to find out how many panels will be in one row. The result is multiplied by the number of panels on the wall, calculated for the first time. Thus, we get how many panels per wall. We add 7-10% for possible wastes.
The length of the finishing strip: the perimeter of the house plus the increase in the joints. The number of corner bars, connecting profiles is calculated individually, depending on the number of junction points and angles. In total we need the following types of bars:
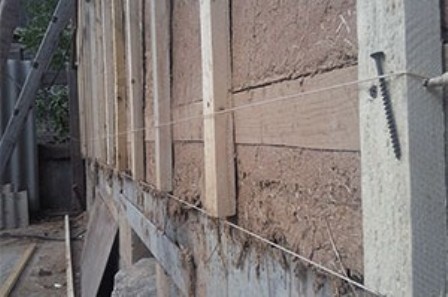
Edging of the battens
Laying of the siding with your own hands begins with the installation of the crate of the house. Before this, the wall needs to be carefully treated from mold and fungus traces. For the frame use wooden slats or profiles, which are designed for drywall. They perfectly withstand the weight of the siding. From the bottom of the house we set the UD profile. On the blind and the plinth vertically fasten the racks from the CD-profile. The distance between them should be 40-50 cm, and how exactly they are installed should be constantly checked by level. Begin with the angular racks. Between them, fix the thread, so that all the posts are equally fixed on the walls.
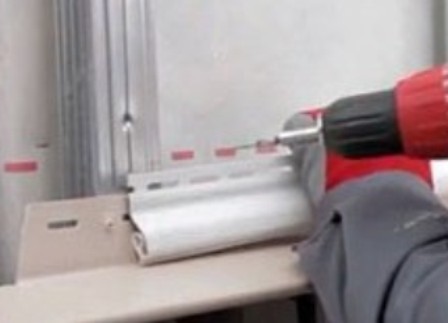
Vertical racks are fixed with galvanized self-tapping screws 9.5 mm.
Fastening of the starting bar
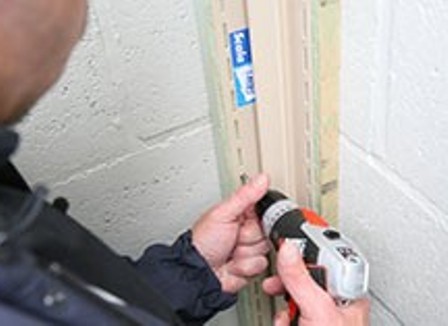
The next important step is fixing the starting bar. It is she who will guide all movements with the further installation of panels. Using the level determine the bottom point of the future cladding. On all corners of the building marks are placed horizontally, then indentation is made for the width of the starting strip, and already by this line the cord is padded. This line is the upper edge of the starting plate, which is fastened with screws in steps of 20 cm.
Warming
We fill the cells of the carcass with a heater, fix it to the walls with dowels-fungi. If necessary, we pull the moisture-proof layer on top.
Siding installation
Next on the walls you need to fix the guide angles. To do this, fix the corners to the corners of the house with holes or nails with a distance of 20 cm. Below, they should be about 5 mm below the edge of the starting strip, and from the top by 5 mm they should not reach the top edge of the wall.
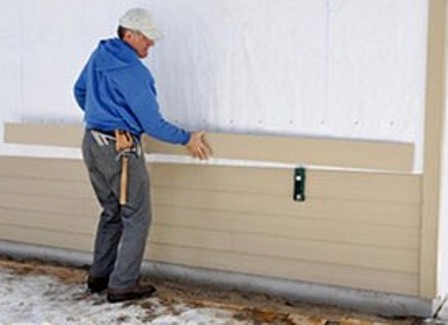
Between the two angled slats, starting from the starting plate, we mount the siding panels. The first should be snapped with a lock with the top edge of the starting plate, the rest - with the previous panel. Thus, the installation takes place very quickly. In the joints, special flat strips are punched. The last panel is cut, and its upper edge is wound in the final strip. So the siding is finished with their own hands all the walls of the house or only the facade .