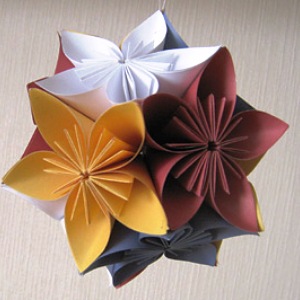
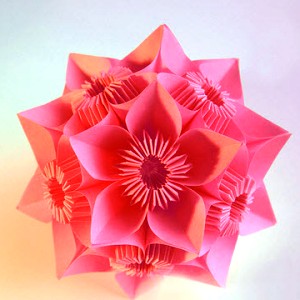
One of the components of the popular art of origami today is the classic Kusudama, how to do it yourself, we will describe it in detail. Initially, these balls made of paper elements folded in a certain way were used for medicinal purposes. The ball was filled with crushed medicinal plants, and then tied it in the house. Today the classical scheme of Kusudama is used for making various crafts, serving as decorations and decorating gift boxes.
We offer you a master class of kusudama for beginners, thanks to which you will learn how to make the basic element of the craft. Having made several such paper elements, you can create balls and whole compositions in Kusudam technique.
We will need:
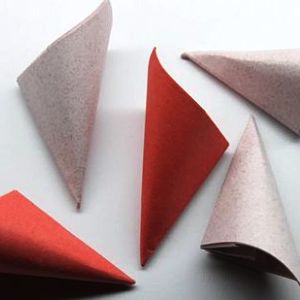
- A square sheet of paper (you can use sheets for notes) is folded in half diagonally. We should have an element of a triangular shape. Then lower the two corners of the corner to the top. Now the detail has turned into a square.
- The sides that we bent to the top at the previous stage, now should once again bend in half. As it shown on the picture. In this case, the bottom of the part is still a square.
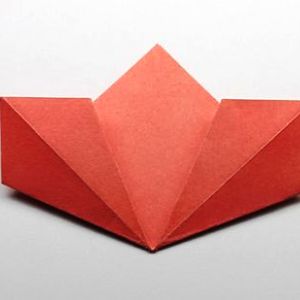
- The triangles on the sides are straightened so that a finger can enter into them. Open folds in the form of pockets give details a look reminiscent of the face of a diamond.
- Turn the part back to yourself. Turn both side triangles out.
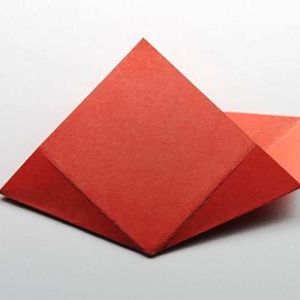
- Turn the paper over again, and the resulting triangles on the sides again bend along the existing lines. The resulting part will again take the form of a square.
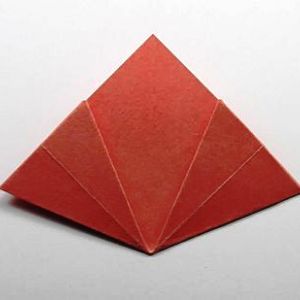
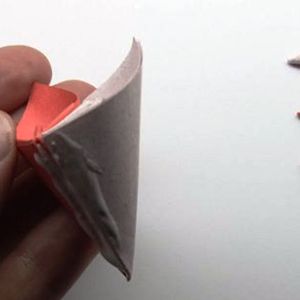
- On the front side of one of the flaps, apply glue. Connect the left and right flaps to make a cone. Since the glue needs time to dry, secure the cone with a paper clip.
- We need at least four such details. The more of them you make, the more spacious the work will be.
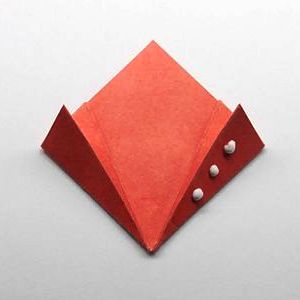
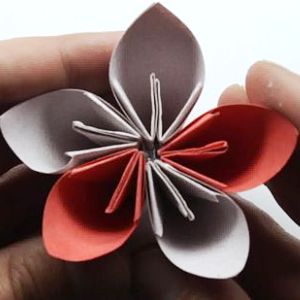
- Next we apply glue to each seam of the glue and alternately join them in the form of a flower.
- We should get such a paper flower. That the petals do not disintegrate (glue after all does not work right away!), Fasten them with staples.
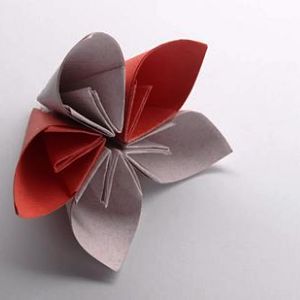
- If you are sure that the glue is completely dry, remove the staples. The flower of the Kusudam is ready!
If you make 12 such flowers according to the instructions of this master class on origami technique, then gluing them together, you will get a bowl of Kusudama, which will be an excellent decoration for the house. It is not necessary to use one-color paper. A ball made of multi-colored details will look more fun.
Helpful Tips
- The Kusudam's ball can not only be suspended. If you fix it on the stem (wooden or plastic rod), you get an improvised bouquet that will long please the look.
- It is not recommended to use rubber or super-glue for making kusudama. Despite the fact that they dry faster than PVA or clerical, the hand-made can have an inaccurate appearance.
- Folds on paper, try to make it more distinct and sharp, so that the Kusudama looks neater.
- The craftsmanship of thin paper will look more elegant. It is easier to work with it, because the glue dries faster. In addition, thin paper will make the ball more magnificent, as more parts will be needed.
- Work surface, which you will use when creating crafts, cover with paper or a tablecloth, so as not to stain it with glue.
Having mastered the classic kusudama, you can proceed and make more complex variants: the flower ball and the Kusudama electr.