To make roses from paper (including corrugated paper), we will need the minimum of materials, which are clearly found in every house - a cut of paper and glue. The paper should be chosen as tight as possible, however it should not be cardboard, it can not be beautifully and evenly bent. Ideal for these purposes is a cut of wallpaper matching colors, a beautiful flower is obtained from bright red or burgundy wallpaper, you can also try the crimson color. The size of the cut depends on the size of the planned rose, we took the paper 15x15 centimeters for clarity, however in scrapbooking we often use flowers of much smaller sizes, so we recommend taking a sheet of paper no more than 10x10.
Glue can use the most common PVA, but if the paper is too dense, you can take "Moment", it is more tenacious and quickly grasps. We will also need a simple pencil or a ball pen, you can take a marker, as well as a figured scissors, but if you can not use those, you can do the usual.
Having prepared everything you need, let's get to work.
Rose from paper: master-class
Consider how to make a rose from paper:
1. The first thing we do is draw a scheme of roses from paper. We draw the diagram in the form of a spiral over the entire area of the sheet.
2. Then we cut the paper according to the planned spiral with figured scissors.
3. Now take the ink or the paint is dark red, or better even a burgundy color and gently paint over the outer edges of the spiral.
4. Next, we fold the outer wavy edge of the cut out spiral inward, make a small bend, just a few millimeters.
5. Now proceed to the most interesting and at the same time the most painstaking work - we begin to twist the paper rose. We twist the paper in a spiral inside as much as possible, if by negligence the paper breaks, there is nothing terrible in this, if the tear is noticeable, it will look very natural and will only give our rose from paper even more natural.
6. Continuing to twist the spiral, gradually weaken the clamp, making it more natural - it will give the impression that, closer to the core, the rose is not yet completely dissolved, and the extreme petals have already started to be straightened.
7. At the end of the spiral, pull the paper circle, that is, the middle of the spiral, this will be the base of our rose.
8. We will put on a circle a drop of glue.
9. Now carefully glue the rose to the base, trying to do it without effort, without spoiling its fragile shape.
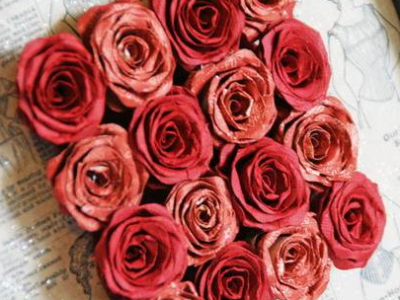
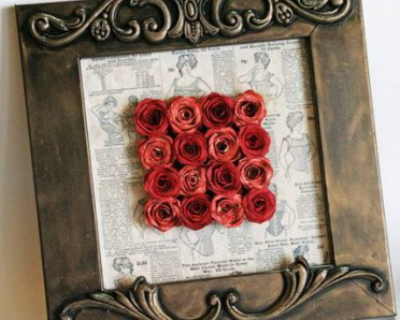
10. At this point, our rose is made of paper. Having made several more exactly the same colors, we can decorate a greeting card, an album for photos or simply make an original panel on the wall.
| | |