With the advent of cassettes, and then computers, old vinyl records seemed to become unnecessary, but then they found a new and very unexpected application. Designers could not pass by such material as a vinyl record and created whole collections of author's watches, which amaze with their incredible beauty, and at the same time simplicity of products and unexpectedness in the choice of raw materials.
However, making a watch from a vinyl record is not so difficult if you have enough free time and an old unnecessary vinyl record. This product is very simple in execution, and the variety of materials for such work is unlimited. The basis can be discs, canvas or a wooden palette. As for the decoration, the number of options is simply incredible.
How to make a clock from a vinyl record?
Master class for making watches from vinyl records with decoupage:
1. First you need to find a vinyl record and tear off the label from it. It is highly desirable that the sticker in the center be white. Such a background will not be noticeable later, unlike bright colors.
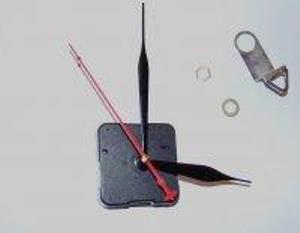
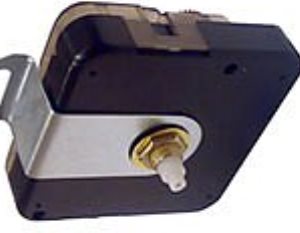
2. The next move is the purchase of a watch movement. Any working mechanism, new or old, will fit here, it will not be visible anyway. It can also be removed from old or unnecessary home watches, bought in specialized stores or simply by watchmakers. The main thing is that the mechanism should include:
- hour, minute and second hands;
- a central nut and washer for clamping;
- actually the driving mechanism.
Of course, we draw attention to the design of the hands, the watch with decoupage is a very delicate and delicate product, and the usual massive arrows can look ridiculous. If there is no possibility to pick up beautiful hands, we can cut them ourselves out of anything - from the same vinyl plate, acrylic, a variant of arrows from metal wire painted in black is possible.
| | |
3. Next we proceed directly to preparing the plate for decoupage. To start working it needs to be covered with white soil. You can use a universal alkyd primer, or paint with ordinary acrylic paint of white color, but it should be noted that the special primer grip will be slightly higher, and therefore it will be a little easier to work with it after.
4. At this stage, apply the background. To do this, we need to mix the acrylics to get the right shade and apply the sponge to the plate. Do not forget to dry the surface. You can wait until the plate dries by itself, but it's best to use a hairdryer.
5. From the decoupage map we cut out the motif you liked. PVA is applied to the plate, after which a pre-moistened decoupage map is pasted. From above it is necessary to again apply PVA and to expel air bubbles from under the map. You can do this with your fingers or a brush. Once again, dry the surface.
6. Let's briefly describe how correctly to translate the decoupage map to the surface, so that the pattern goes evenly without air bubbles:
- place the sheet in a container filled with water, leave for 5 minutes;
- We take the wet sheet from the water in an upright position and let it drain. It is important to control the detachment of the picture;
- with the help of the sliding method, we put the pattern down on the surface, the upper layer of paper is further separated by folding;
- after the drawing has been safely transferred, carefully expel the air bubbles with a spatula or flat blade;
- when the pattern is dried, varnish.
7. Rice paper is glued in exactly the same way as a regular decoupage napkin.
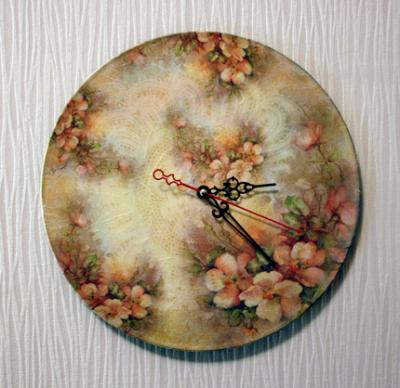
8. We cover with varnish in three layers. We stick or draw figures, they can also be bought in shops or made with their own hands from the same possible materials that can be used to make arrows. In our master class there is a watch with a dial without numbers.
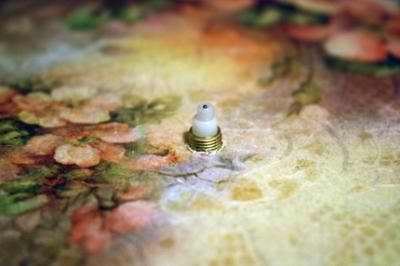
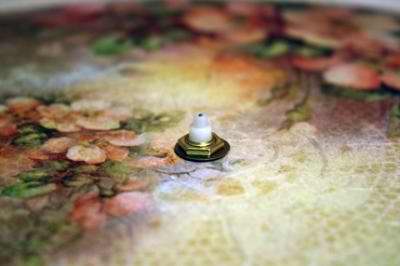
9. It is very likely that during the work the hole of the plate (future hours) was blocked by a decoupage map. It must be carefully cut, then just as gently insert the tip of the scissors and turn it several times. Thus, the clock mechanism will enter the hole without unnecessary effort.
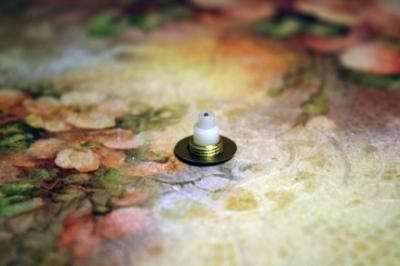
10. It's time to set the clockwork. On the drive inserted into the hole, we put a flat washer and tighten the nut. The loop, if any, is screwed from behind.
| | | |
| | | |
11. If the mechanism did not have its own loop, then you can make it yourself. To do this, using a transparent resistant adhesive, we paste two loops and draw a thread or a thin wire between them.
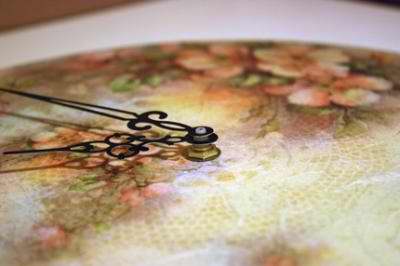
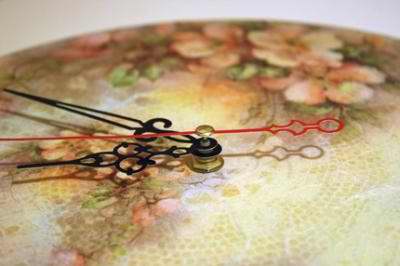
12. If necessary, you can paint the arrows in contrasting colors so that they do not get lost against the background of the pattern. After that, in the given order, we put the arrows on the rod.
13. The product is ready, it remains only to insert the battery and enjoy your creation.
| | |