The wear resistance, environmental friendliness and strength of ceramics have been known since antiquity. If before design of a tile was poor, now with a texture or a coloring of problems there are no any. You can choose a cover for natural stone, Greek marble, with some unique pattern, make the floor rough or perfectly smooth. All this allows you to lay the tile on the floor not only in the bathroom or in the kitchen, where it is used traditionally, but also in the living room, hall, hallway . The only question that confuses some of the owners is how difficult this work is for a common man who is unfamiliar with construction specialties. Let's try a little highlight this topic in a simple example and dispel all unnecessary fears.
How beautiful to lay the tile on the floor?
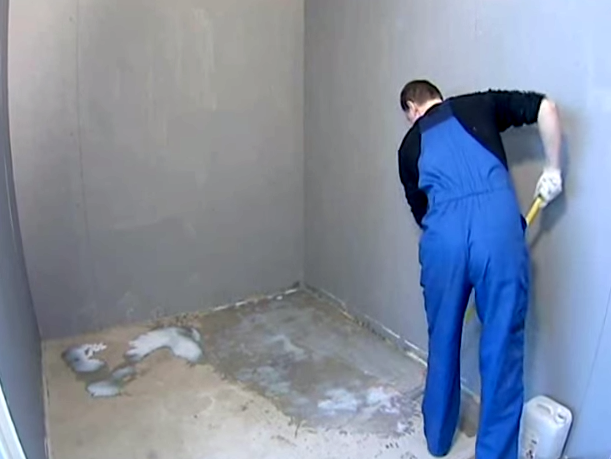
- Many mistakes arise at the very first stage, when the owners make a new tiled floor, not leveling its foundation. First remove the old tiles and waterproofing, and then we process the floor with a primer layer. Dry the surface for about 4 hours.
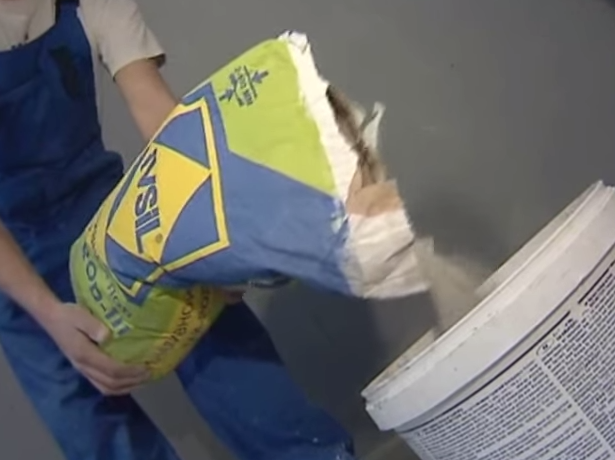
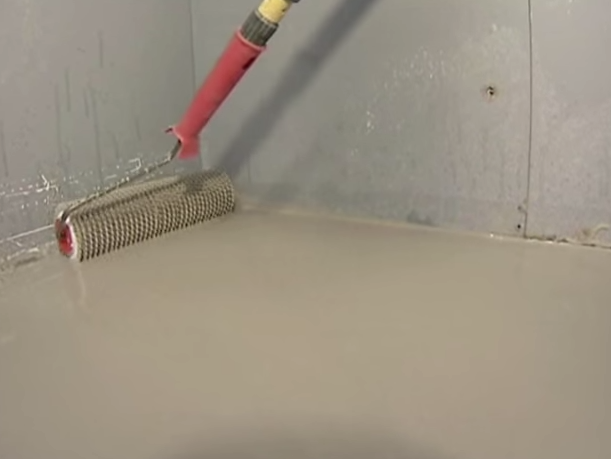
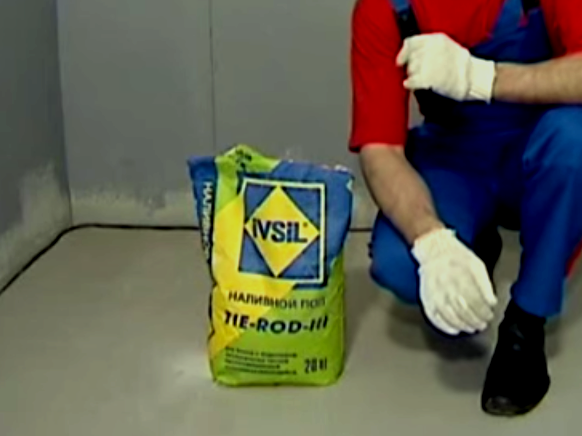
- The best way to level the floor in a bathroom or another room is to use liquid floors about 30 mm thick. We fall asleep working powder in the container.
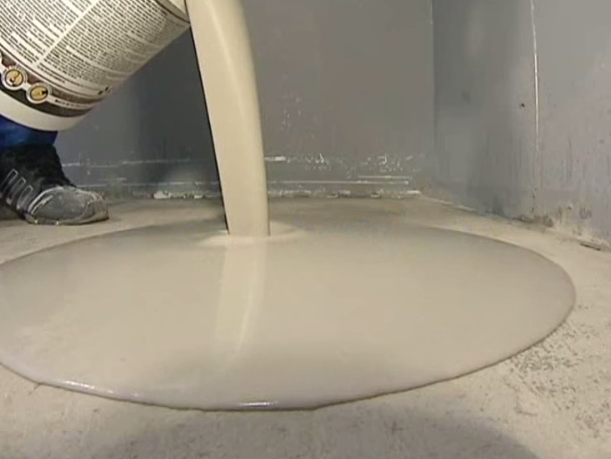
- Using a mixer, mix the solution.
- Pour the resulting liquid onto the floor.
- Remove the formed air bubbles with a needle roller, rolling the coating several times in different directions.
- Within a few hours, the almost perfectly leveled floor is ready for use.
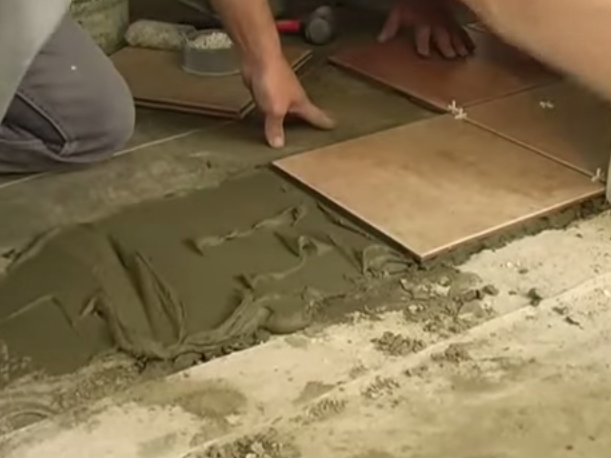
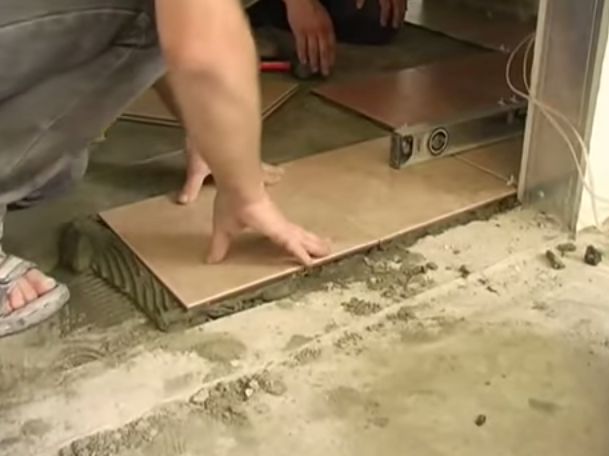
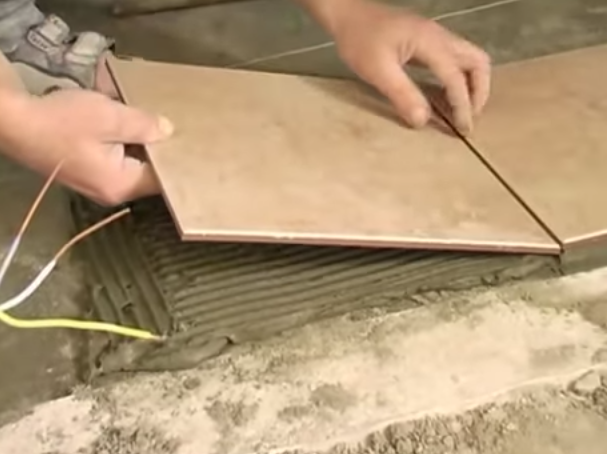
- We apply mastic or other glutinous solution on a well cleaned surface. Instead of usual mixtures consisting of sand, cement and water, we recommend using a special glue, for example Cerecit, which is extremely simple to prepare. But for each type of tile (ceramics, granite, mosaic), its brand will be different.
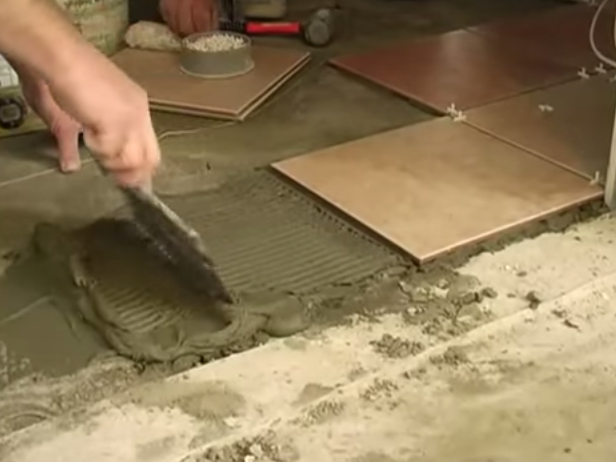
- We try to apply a little mixture, the large layer quickly hardens, making it then unfit for laying. Smooth the solution with a moistened serrated spatula. It is desirable that the thickness of the adhesive layer does not exceed the thickness of your floor tiles.
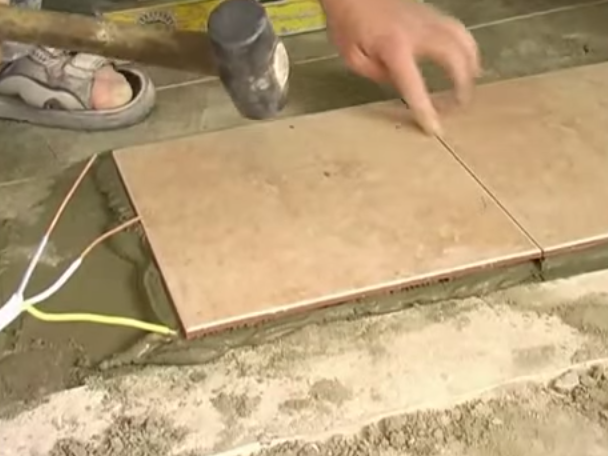
- Put the tile on the mortar, press it with your hand.
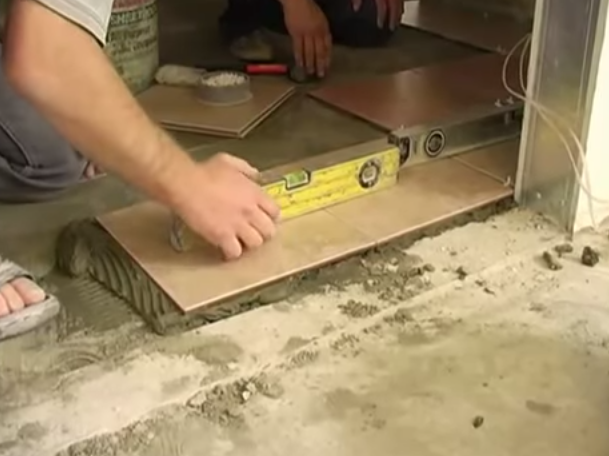
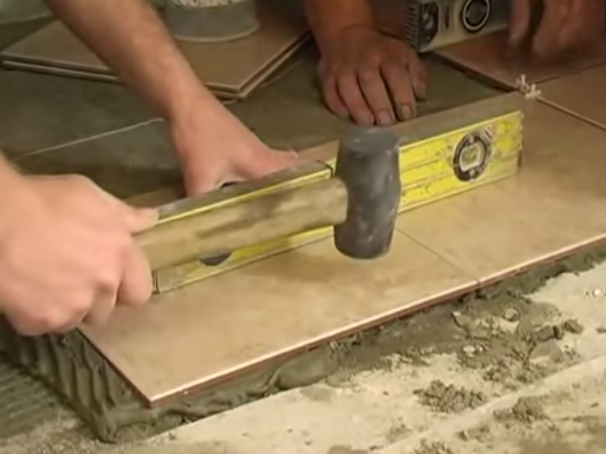
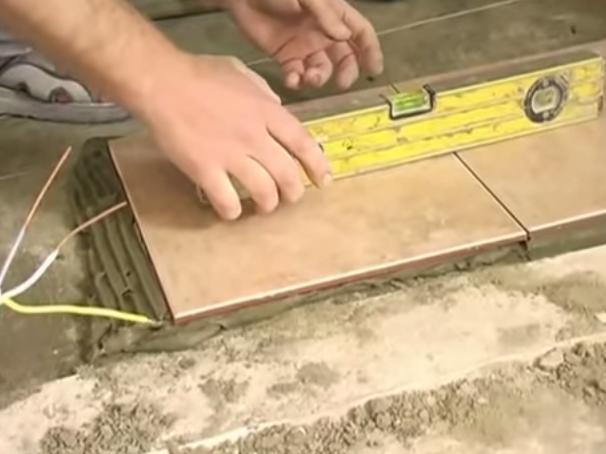
- Constantly control the tile laid on the binder with a level.
- Align the surface and strengthen the bundle will help easy tapping with a rubber mallet.
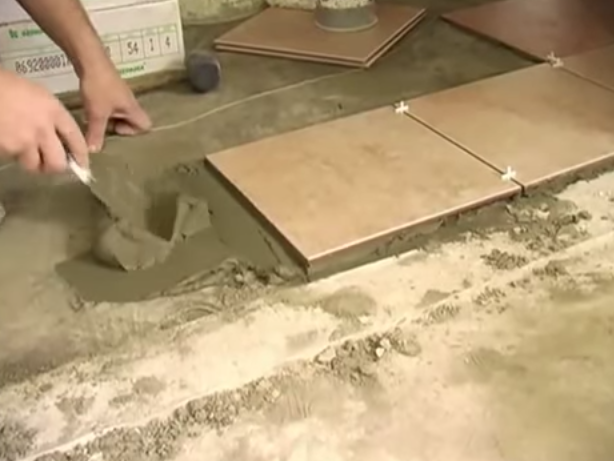
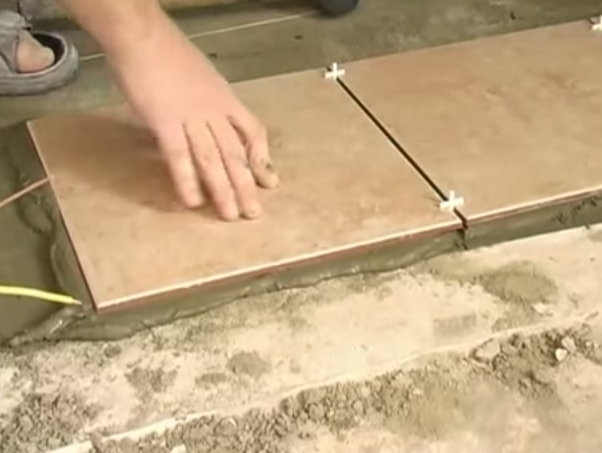
- The spacer distance is easily controlled by plastic crossings, use the same size fixtures.
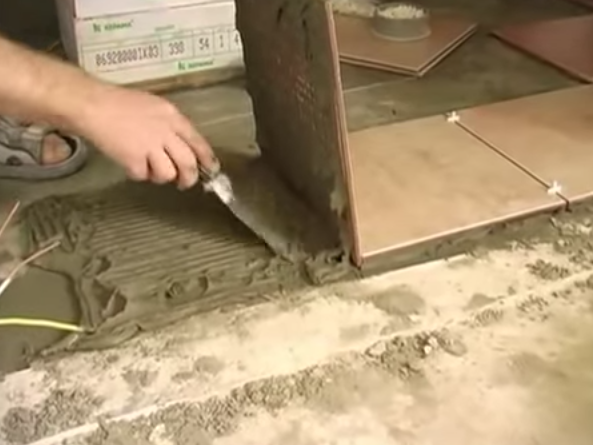
- We remove all residual glue with a spatula and apply the composition for the next tile.
- You can navigate the cord so that the rows are even. Producing works with mastic strictly according to the previous scenario, we lay the next tile.
- Be sure to control the plane covered by neighboring tiles, the level.
- If the difference is large, this is quickly eliminated, tearing the tile with a spatula, and removing the excess working mixture.
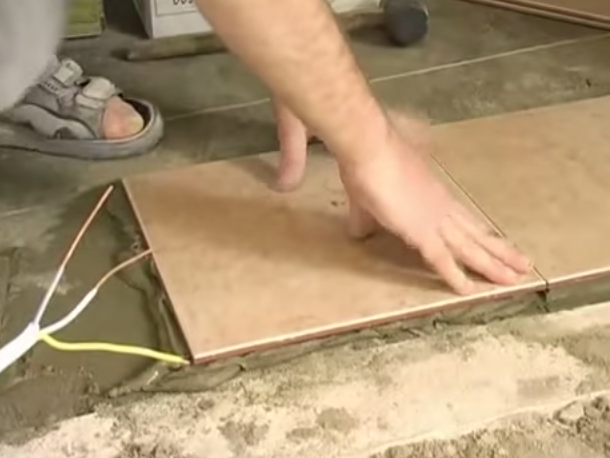
- We put it again and press it with your fingers.
- Tapping the kiyankoy, level the plane and check the work level.
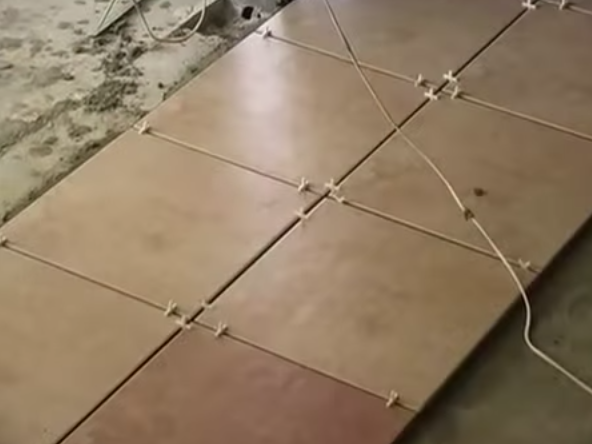
- Do not forget to reinsert the crossings between the tiles.
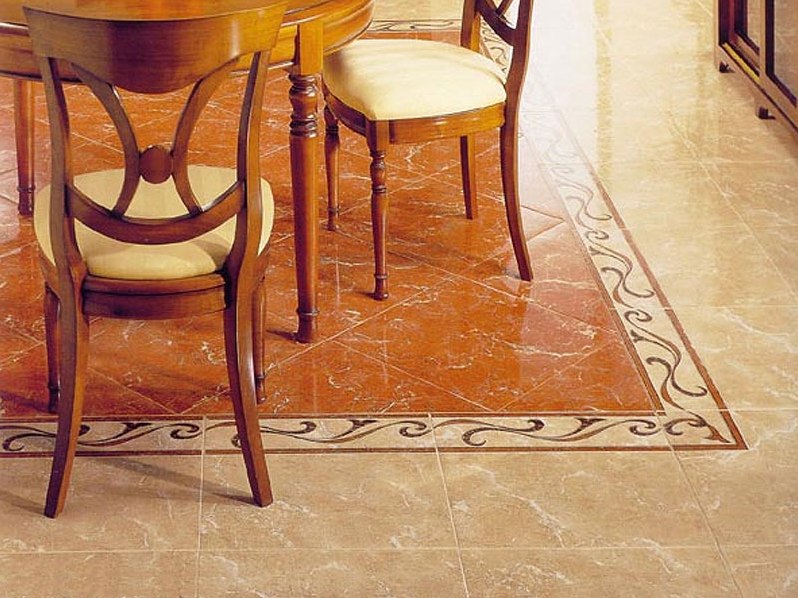
- If you correctly learn how to lay the tile on the floor, then you will also end up with such straight lines. (Photo 20)
Of course, at first, without special skills will have to work hard, trying to make the surface smooth. But diligence and such unpretentious tools as kiyanka and level, will help to achieve a positive result.