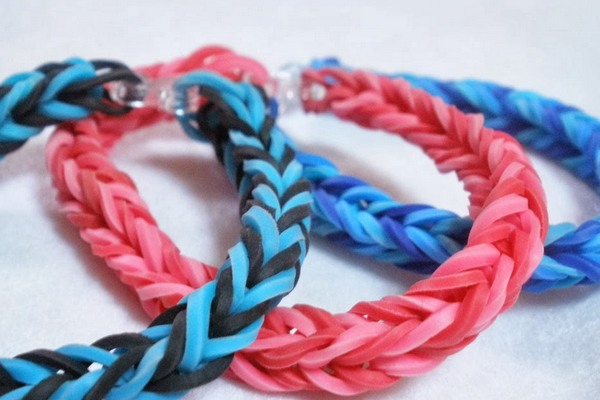
Weaving bracelets from colored rubber became a hit this year. The lesson is very exciting and accessible to everyone, regardless of gender, age, level of prosperity. Even if you do not have a special machine, you can first try on a slingshot, fork or even your own fingers . In this article we will learn how to weave elementary rubber bracelets on a fork.
How to tie a bracelet out of rubber bands on a fork?
There are many types of bracelets made of rubber bands that can be weaved on a fork. This is the "fish tail", and the "French spit", and "flowers" , and "zebra" and many others. By the way, the craftsmen weave on the forks not only bracelets, but also various figures.
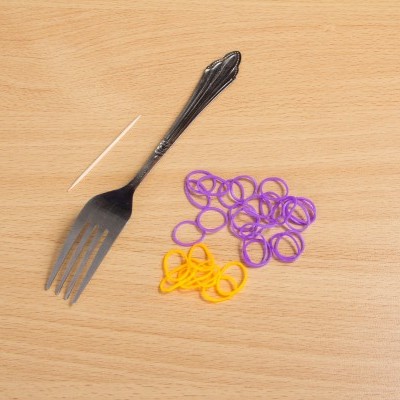
Whichever type of bracelet you choose, you will need these materials:
- usual dining fork (sometimes two);
- many multicolored rubber bands;
- fasteners;
- hook or toothpick (crochet to work more conveniently);
- photo or video lessons or your own imagination.
Step-by-step weaving of bracelets from rubber bands on a fork
Now we will learn how to weave a bracelet called "fish tail" (or "herringbone").
The process is quite simple, but the bracelet looks original, especially if you use different colors of gum. In this master class we will use only blue rubber bands, but you can choose them at your discretion.
Performance:
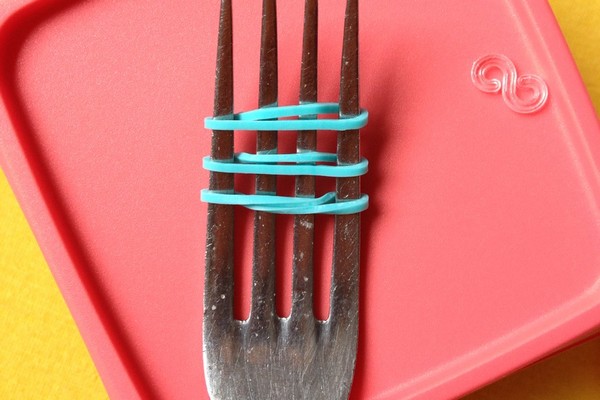
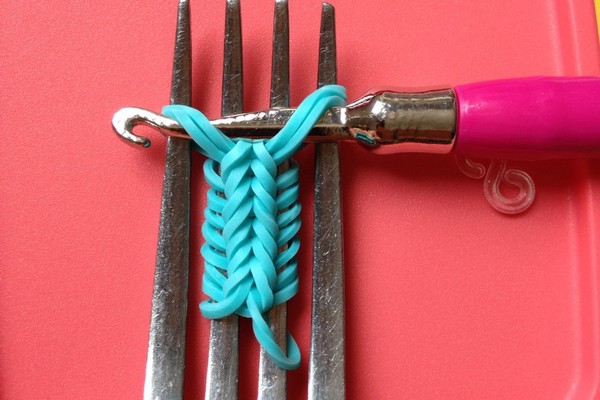
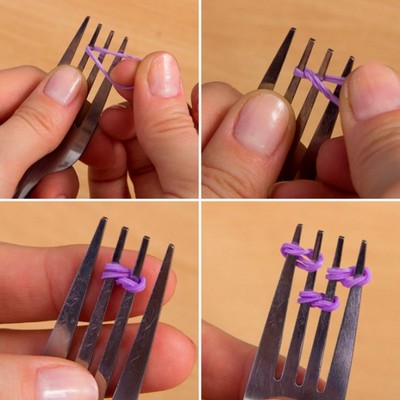
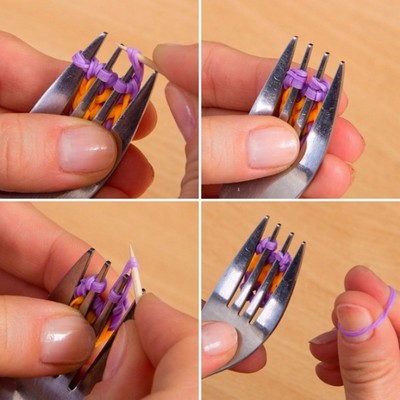
- We begin by taking a standard four-prong table fork and putting three rubber bands on it. We put them carefully: the bottom one on the first three denticles on the left, twist it with the "eight" and put on three denticles on the right. On the middle teeth of the fork, parts of the rubber bands will come into contact. Next - we put on the second and third gums in turn, having hooked them first for all four prongs, and then - only for two medium ones.
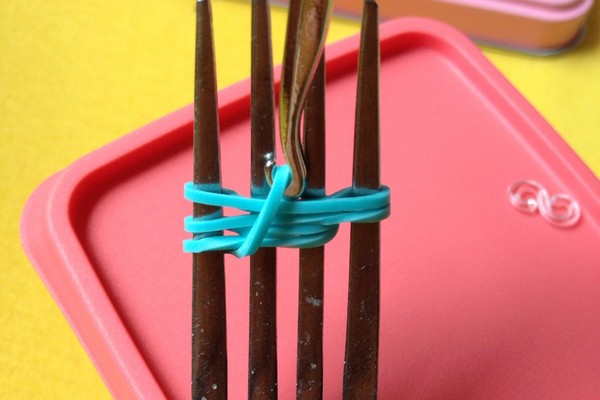
- We take the hook, we catch and raise first one part of the lower elastic band, fix it at the top between two middle teeth. Similarly, raise and fix the second part of the lower gum.
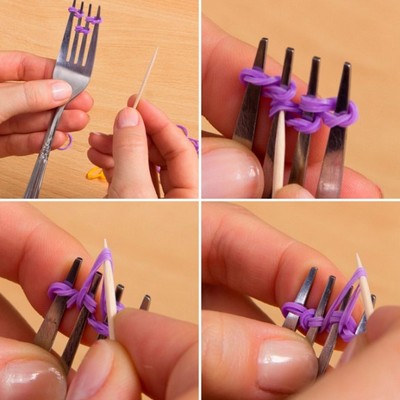
- Now on the fork, put on one by one a rubber band in the same way as the first time. Each time we remove the hooks from the bottom loops and fix them on top. Gradually, you will begin to loom the pattern.
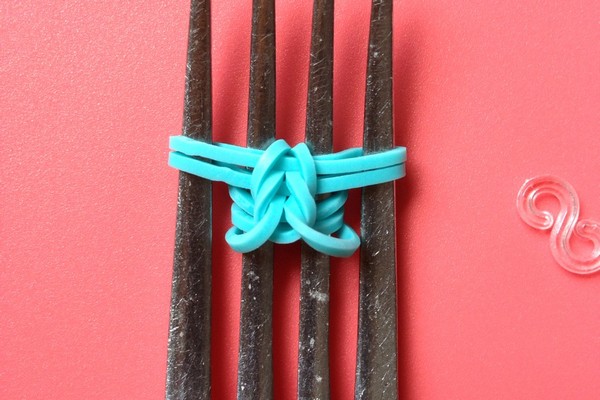
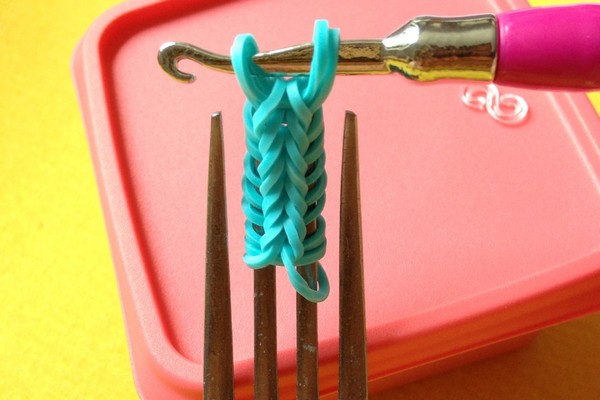
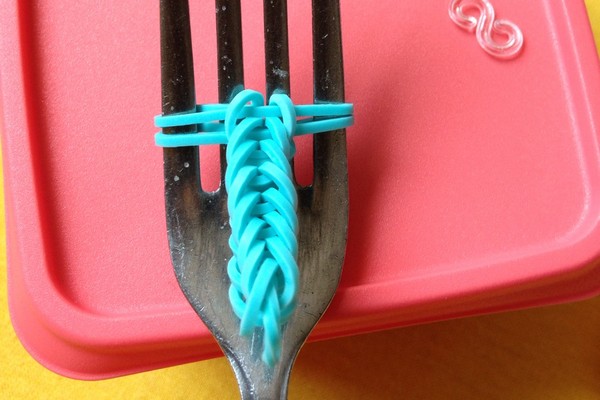
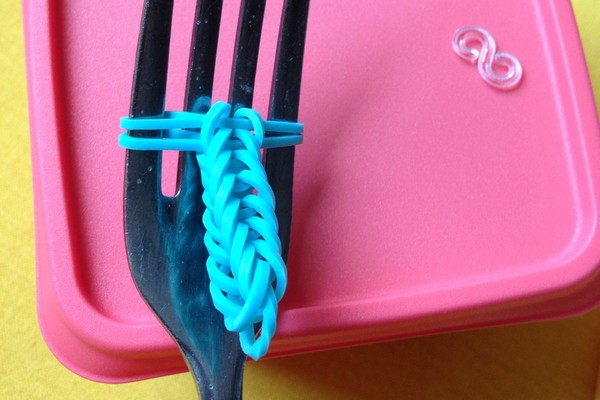
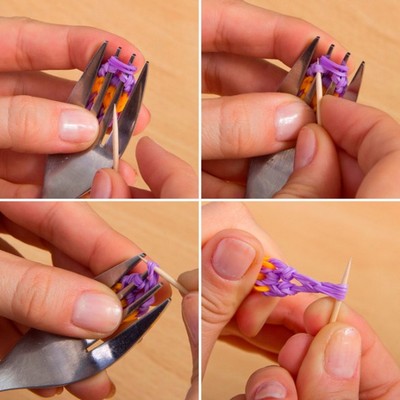
- Periodically remove the bracelet from the fork with the help of a hook: we hook on the extreme rubber bands and hold the hook upward along the prongs.
- The removed product is again put on the fork, fixing on the teeth only the extreme rubber bands, on which the whole weaving keeps.
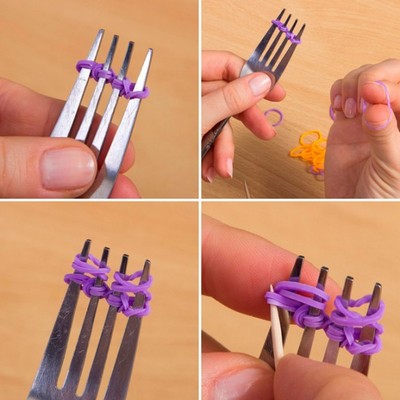
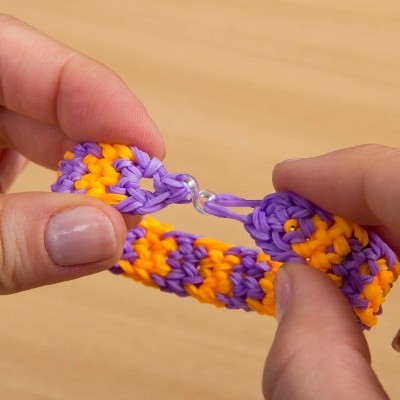
- Continue the weave until you have the right length of the bracelet. At the end we fix the edges and connect them together with the help of a fastener.
| | |
Master-class braiding bracelets on the plug number 2
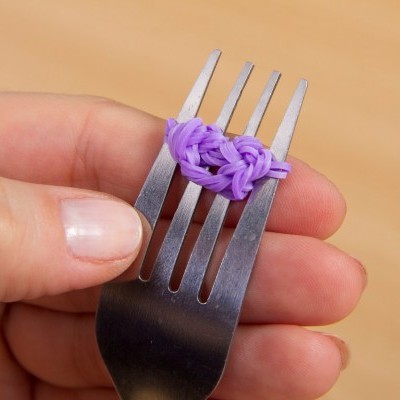
Let's try to complicate the task and learn how to weave a two-color and wider bracelet. So, how can we weave such a bracelet out of rubber bands on a fork? We need a fork, two-color rubber bands and a toothpick.
Progress:
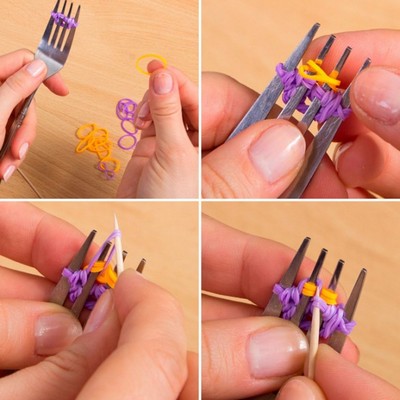
- And start with the fact that we will put on a lilac elastic band, folded in half, onto the middle teeth of the plug and twist it with the "eight". The next two bands are also twisted with a "eight" and put on two teeth on the left and right.
- Then use a toothpick to grab the lower loops from the middle teeth, start them up and release them.
- Now put on the rubber bands on the right and left without twisting. Raise the lower loops up.
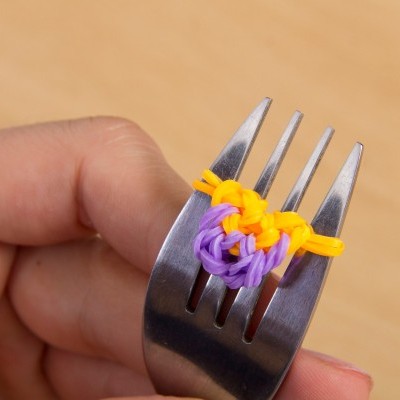
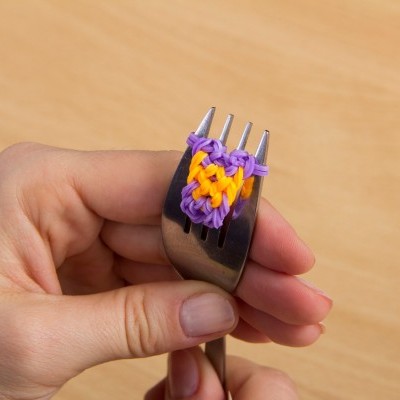
- The following should happen.
- All the manipulations are repeated in this order: 1 elastic band in the center and 2 around the edges. Each color is two rows, then changed to another.
- Plait in this way, until we have the right length. We finish the bracelet as follows: we remove the loops from the extreme teeth of the loops to the middle ones, and from the lower ones to the top. On the middle teeth, put on the last elastic and remove all the loops.
- We fix the edges with an S-shaped crochet.
- Our bracelet is ready!
| | | |
| | |