The summer was replaced in the autumn, and intricate drawings on nails gradually go out of fashion. In the coming season, stylists are advised to experiment with shades and gradient transitions. For this, it is not necessary to visit the salon, you can perform a manicure ombre at home. The procedure requires minimal effort and adaptations, does not take much time.
Manicure ombre at home with your own hands
There are three ways to cover nails in this way:
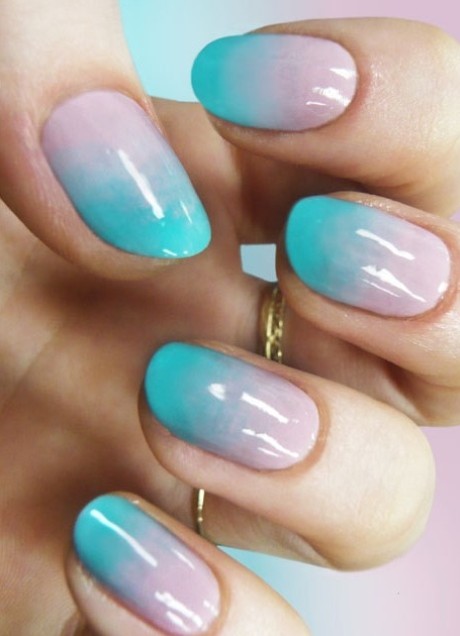
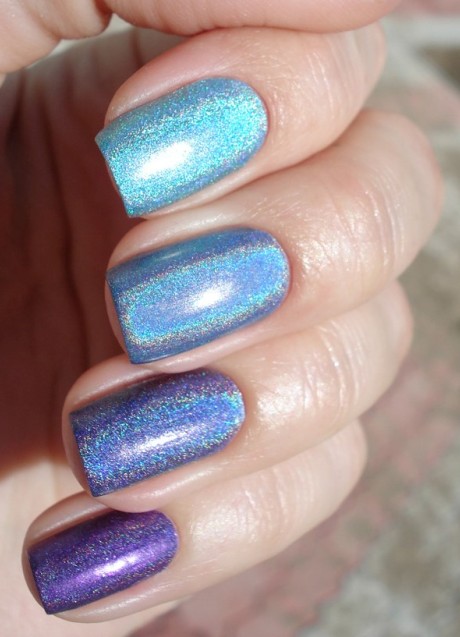
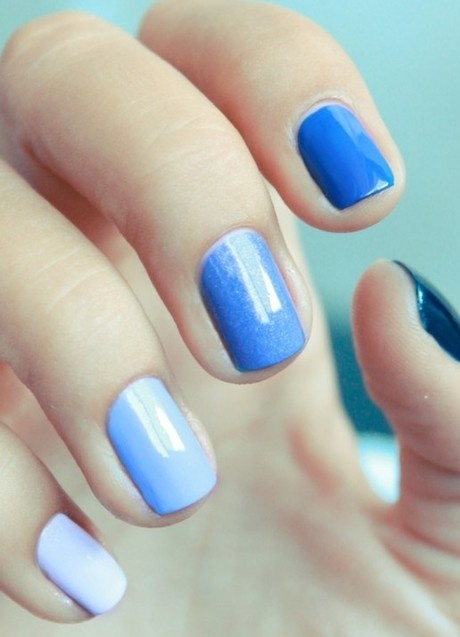
- All plates are painted with the same color of different saturation. For example, on the big finger the dark-green varnish is put, and on each following fingernail the shade brightens up to saladnogo on a little finger.
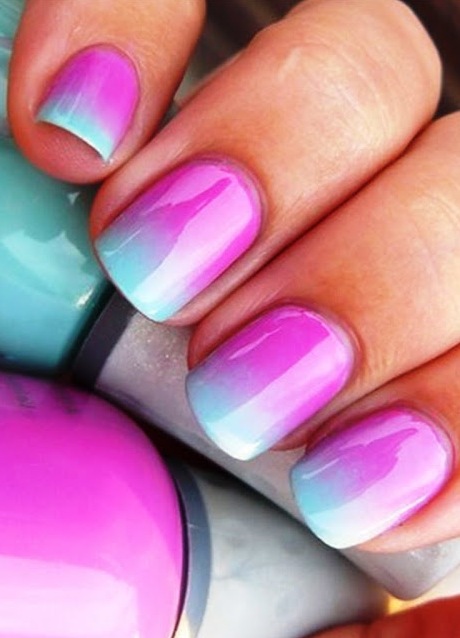
- The manicure looks like a soft transition of the selected tone to a darker one (pink-red, blue-black, orange-brown).
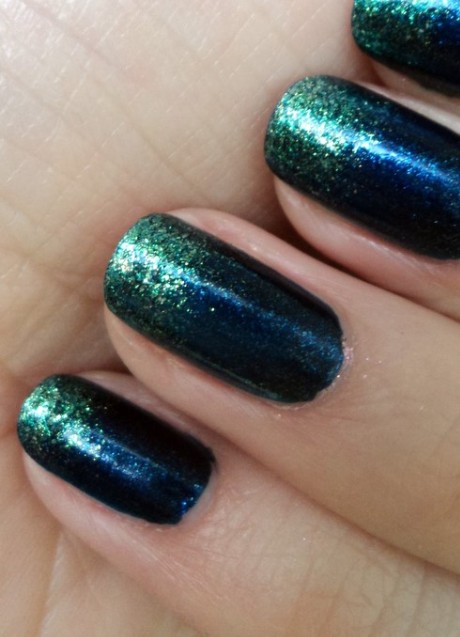
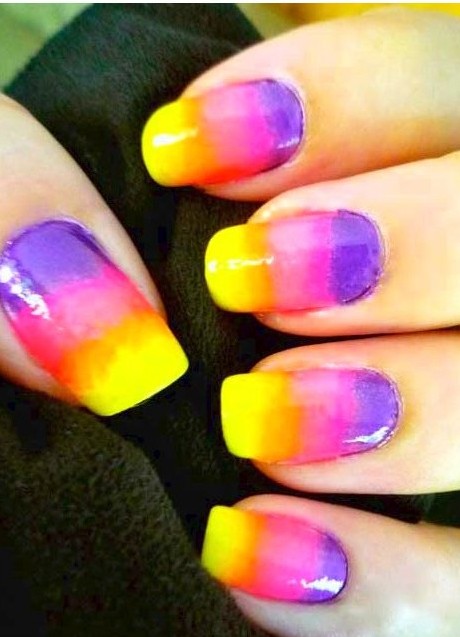
- Rainbow gradient using 3-5 colors. You can make it structural, applying glitter, fine particles.
To ensure that the coating is resistant to external damage and temperature effects, it is recommended to perform a manicure ombre gel-lacquer or shellac. It combines an easy-to-work consistency and the ability to protect the nail plates. In addition, the benefits of gel-lacquer include:
- natural and absolutely safe composition;
- preservation of brightness and color saturation for a long time;
- giving the surface an absolute smoothness and brilliance.
Nails at home
To perform the described manicure you will need such a set of devices:
- the basis for covering the nail plates;
- varnishes of several colors;
- dense sponge or a piece of sponge;
- liquid for removing varnish ;
- cotton buds;
- finish coat.
Moreover, you can not limit your creativity. To create an individual style, you can use:
- glitter sand;
- lace;
- sequins;
- rhinestones;
- foil;
- beads and other all kinds of accessories and jewelry.
How to make a manicure with an ombre effect?
Before proceeding to the procedure, it is important to carefully process the nails:
- give them the right shape;
- remove burrs and cuticles;
- clean and degrease the surface.
It is desirable that the whole set of necessary things is at hand.
Here's how to make a manicure ombre:
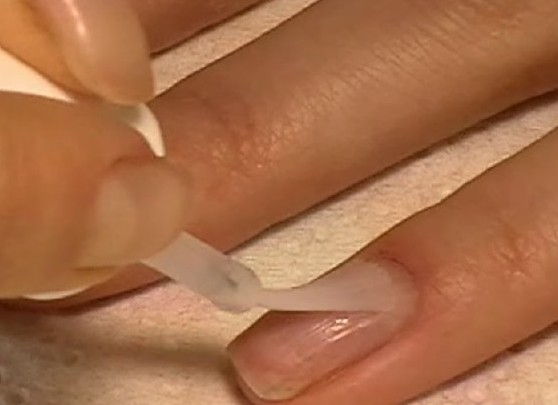
- Cover the nails with a transparent base. The layer should be thin, but sufficient to make the plates smooth.
- Apply the base lacquer of the selected color. It is important that the nail surface does not shine through.
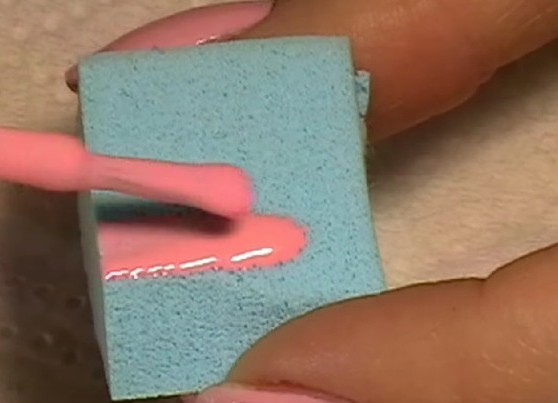
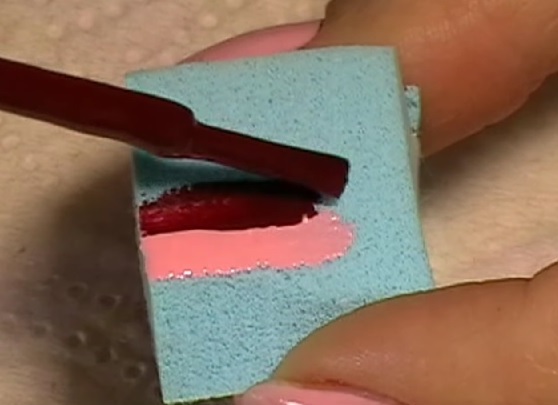
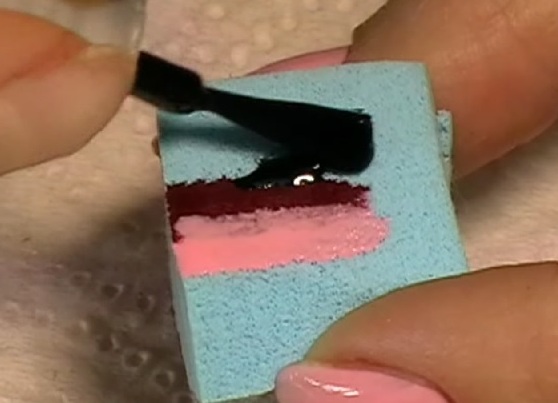
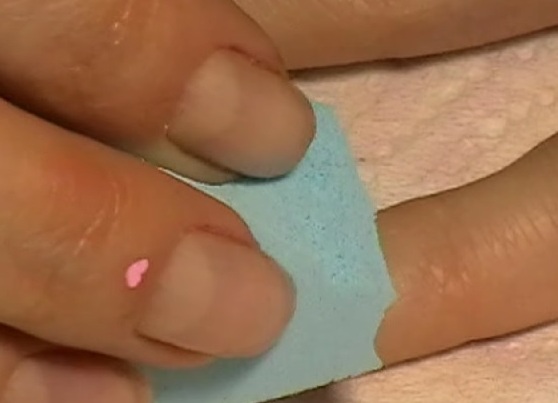
- Dye a small area of the sponge or foam sponge with the same basic lacquer. The width of the strip should be about 0.5 cm.
- Immediately after this, apply the next shade of lacquer directly to the fixture.
- The last layer is to paint the sponge in the supposed darkest tone. If the sponge quickly absorbs the lacquer, you need to repeat the steps described in turn. As a result, there should be three bands of different shades on the surface.
- Firmly press the sponge against the nail and hold for a few seconds.
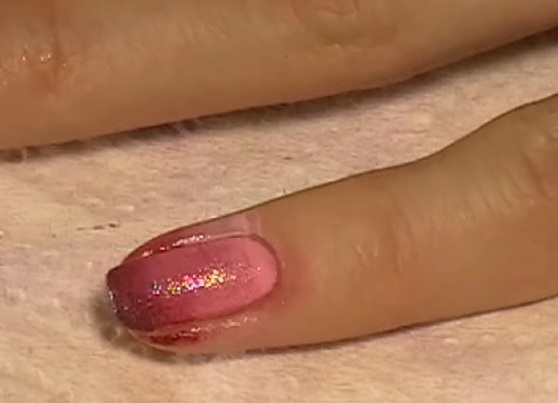
- When the varnishes are imprinted on the plate, quickly, with driving movements, treat it with a sponge so that the transition of one color to another becomes as smooth as possible. If the varnish on the sponge is absorbed into the pores or dried, you can refresh the strip, applying new layers.
- Dampen the cotton swab in the liquid to remove the varnish and gently remove the surplus coating from the surrounding skin.
Naturally, after doing a manicure, the surface of the nail will be uneven due to contact with the sponge. You can leave it in this form or give a smooth finish by using a clear varnish or a fixer .
To decorate such design of nails stylists advise either glitter, or sequins on the outer edge of the plate.
| | | |
| | | |
| | | |