In every family there are always a lot of pens and other office trifles, which is very often scattered all over the house. To all these necessary items were in one place and always were at hand, we will tell you how to make an original hand-made pencil case yourself.
Pencil with your hands for the boy
Materials:
- a large can of coffee;
- thick, strong cardboard;
- Scotch;
- fleece of two colors;
- Threads of the same shade as the material;
- scissors and a needle.
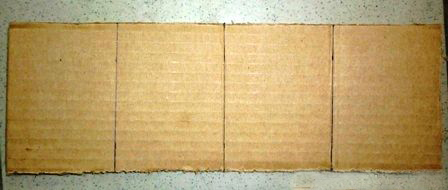
1. We build a cabin. Cut out a cardboard rectangle according to the size of the can:
- one side - the diameter of the can, multiplied by 4;
- the second side is the height of the can.
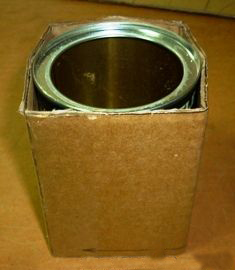
2. The resulting rectangle is divided into 4 segments, bend along the lines and wrap the jar.
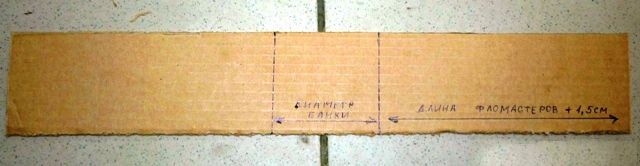
3. Now we will deal with the bodywork. Again cut out a cardboard box:
- one side - the length of the markers or pens + 1.5 cm, multiply by 2 and add the diameter of the can;
- the second side is the height of the can, minus 2 cm.
4. Rectangle bend along the lines and attach to the cabin with adhesive tape. If you want, for the reliability of the design can also be stitched.
5. We will engage in the bottom of the machine. Cut out the cardboard and sew it with the sides.
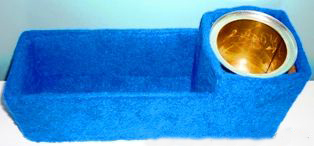
6. The base is ready. Now we cover it with material from the outside, bending the edges inside.
7. In the same way, we trim the bottom and the inside of the machine.
8. From the material of a different color cut out the headlights, windows and sewn to the cabin.
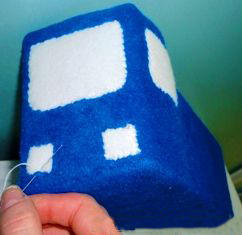
9. From the cardboard we cut out 4 mugs for wheels and 8 circles from fleece of the same color as the headlights with windows. We cover the cardboard wheels with the material and sew it to our machine.
Everything, the pencil truck is ready, it remains only to load it with your cargo.
The author of the idea and images of Evgeny Rucchnov (http://ladydance-vyksa.ucoz.ru/publ/rukodelie/rukodelie_karandashnicy/10-1-0-1078)
Pencil holder with your own hands made of paper
Materials:
- thin paper or old newspapers;
- PVA glue;
- balloon;
- brush;
- 2 plastic cups;
- gouache or paint;
- furniture varnish.
Let's get to work:
- We inflate the ball, and it is necessary to make sure that it turns round.
- One of its halves is covered with small torn newspapers and pasted with glue. For greater strength it is necessary to try and make as many newspaper layers as possible. It turns out a papier-mache figure.
- We cut the bottom of the cups so that the lower cut piece would fit well to the glued bottom half of the ball.
- We let our creature dry out.
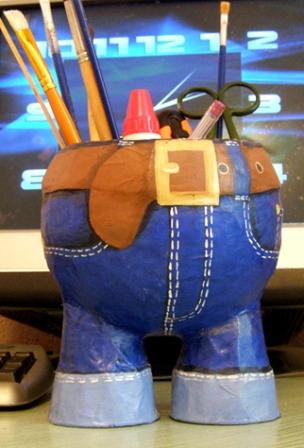
- We break the ball and proceed to the most interesting - the design. Color the pencil. And the more nuances you outline, the more interesting will be the result - it can be pockets, rivets, stitches, fly.
- We cover the structure with varnish.
Everything, your original pencil is ready.
Pencil with your hands made of cardboard for a girl
Materials:
- a box of chocolate sweets;
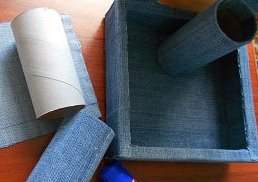
- cardboard reel from scotch tape, 3 reels from toilet paper;
- ironed jeans fabric;
- good glue pencil;
- thick cardboard;
- decorative elements.
Let's get to work:
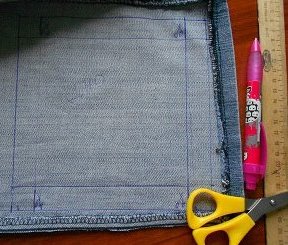
- We make measurements of a candy box and all round elements. Note that the box from the inside also needs to be pasted, so try to make it so that the box can be pasted in one piece. We transfer these sizes to the jeans and make patterns.
- To cover the box was fixed, fix it with thick cardboard.
- Adhesive must carefully permeate the pattern and glue to the box. First, glue the bottom and the back wall, then take care of the edges.
- While the box is drying, we will tackle the round parts. Just do not forget to turn the fabric inside.
- We decorate the reels and the box. For this you can use an interesting picture, braid, beads or rhinestones.
- Using a glue gun, attach the coils to the box.
Now we will deal with the paper clip.
Materials:
- a rectangular piece of jeans;
- braid;
- scissors;
- thread;
- needle;
- button.
Let's get to work:
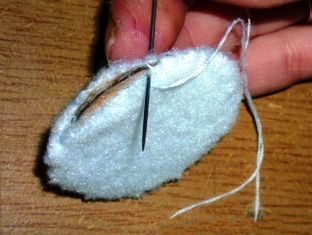
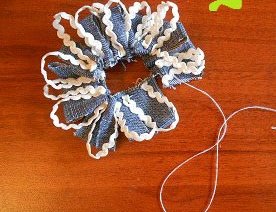
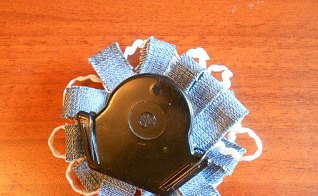
- The fabric is folded in half and cuts are made along the entire length.
- We lay the braid with a snake and we take it with a thread to the fabric, we cut off the excess.
- We pull the fabric, carefully pulling the thread, we make a flower.
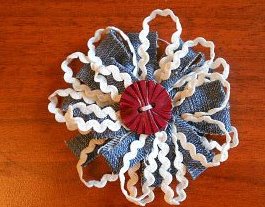
- We sew the flower and sew on the button in the middle.
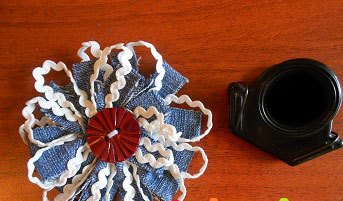
- With a hot gun, paste the resulting flower onto the paper clip.
- We add a flower to the finished pencil.
| | |
All we can admire the result.