Today, choosing a gift for any celebration is absolutely not a problem. However, we often give gifts to relatives without proper framing. But in vain, because a successful presentation package is a pledge that a birthday girl will like the surprise and he will be satisfied with it. You can order gift packaging in the store. But if you pack a gift in a box made by yourself, then the recipient of such a presentation will be pleasantly doubled. After all, having spent some time on making a package for a gift , you thereby pay attention to the gifted.
From this article you will learn how to make beautiful boxes for packing gifts yourself.
Master-class on making an original gift box
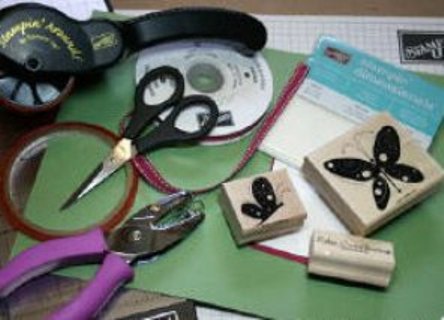
First of all, prepare the tools and materials you need to work. You will need:
- dense scrap paper or designer cardboard of standard size 22x28 cm;
- scissors;
- ruler;
- paper cutter;
- tool for creasing (embossing on paper);
- figured and ordinary punchers;
- contrasting color ribbon;
- adhesive PVA or double-sided adhesive tape;
- various elements of scrap-decor (for your taste).
Keep in mind that if you do not have any of the tools described above, you can easily replace them with suitable tools (cutter - knife, glue - scotch tape, etc.).
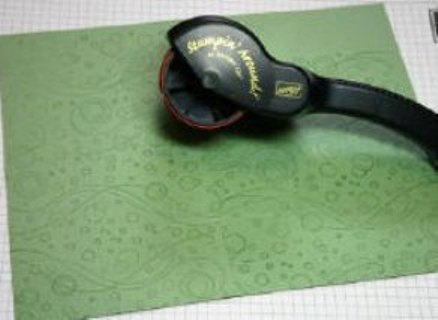
- First, mark the sheet from which the gift box will be created. Using a cutter or embossing tool, mark the fold lines on the paper 5, 13, 18 and 26 cm from the edge, respectively, to the four sides of the sheet.
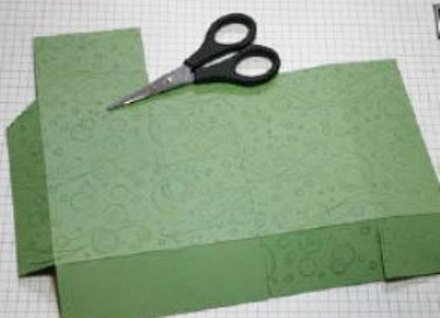
- Now bend the paper along the planned lines, and cut the part that has a width of 5 cm.
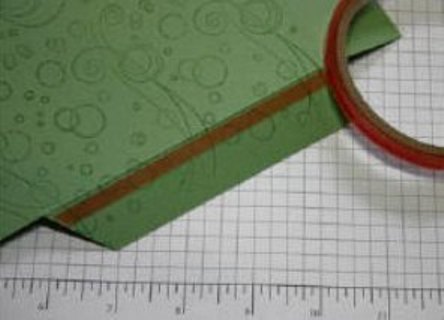
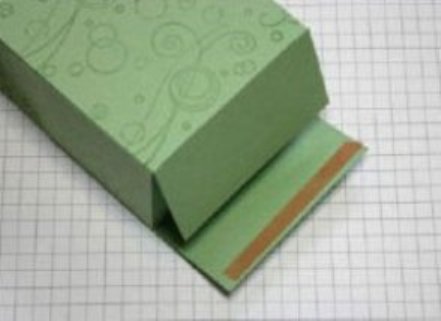
- In order to be able to glue the box together, trim the narrow side of the sheet.
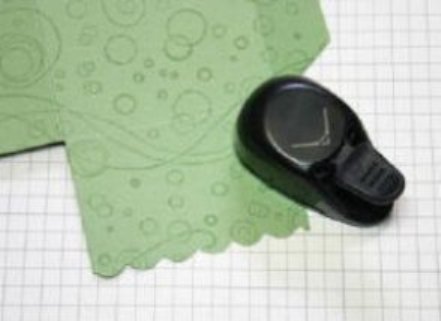
- And the side that will become the lid of the box, you can already decorate with a figure punch. If it is not available, you can use regular scissors, cutting out any pattern at your discretion.
- It's time to put the box together! Apply a small amount of PVA glue or strips of double-sided adhesive tape to the areas intended for gluing (side and bottom "tongues"), and fix them with your fingers until the glue seizes or until the scotch lies flat.
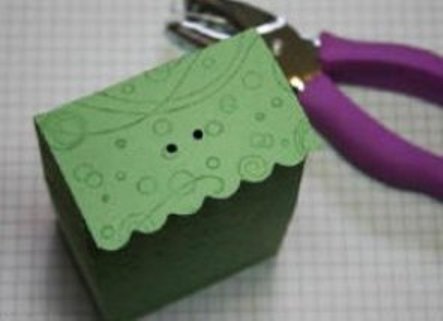
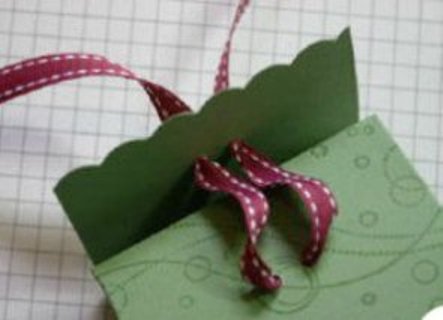
- At the top of the box, make two small holes. Use for this purpose a conventional punch or scissors with sharp ends. The holes should be located in the middle and be symmetrical - however, it is the lack of symmetry that can become a kind of "highlight" of your product.
- Exactly the same holes do in the top of the front of the box. They must necessarily coincide with the first two!
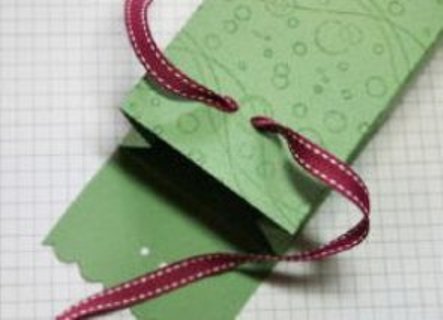
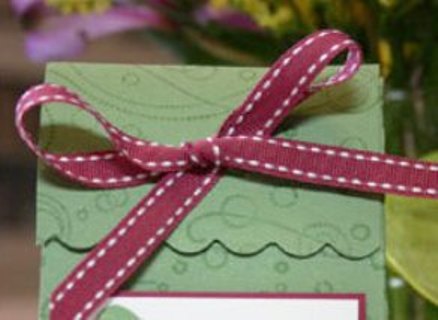
- Pass through all four holes a ribbon that matches the color scheme to the product (in my case, red) and tie it to the bow. And before that, of course, do not forget to put in the box and the gift itself!
That's ready box for gifts, made by own hands. If desired, you can additionally decorate it with stickers, crystals, beads, buttons, bows and other elements. However, remember that they should be suitable (for example, a rose decorating a gift for a motorist's holiday , it is unlikely to look appropriate). In a word, how to decorate a gift box depends only on your preferences and the availability of decorative materials. Our gift box has turned out to be rather small: it is possible to present small souvenirs, as well as jewelry, jewelry, perfume, money, sweets, cards, etc.
Give gifts with pleasure!