Every boy wants to feel like a medieval knight, and toys help in this. Swords, warrior figures, horses ... And what if you give him a real castle with towers, spiers, powerful defensive walls? Make a castle for children with their own hands can be made of paper, cardboard and wood. The work is laborious and painstaking, but the result is you and the child will be satisfied. In this master class we will tell you in detail how to make a beautiful lock made of paper to please the child with an interesting hand-crafted article.
We will need:
- cardboard (cardboard boxes can be used);
- Tubes from kitchen towels or toilet paper
- glue;
- scissors.
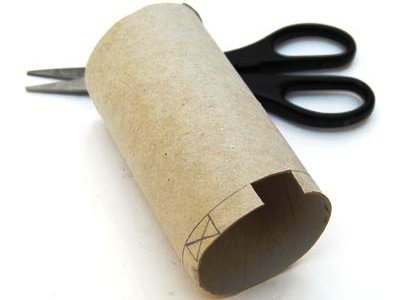
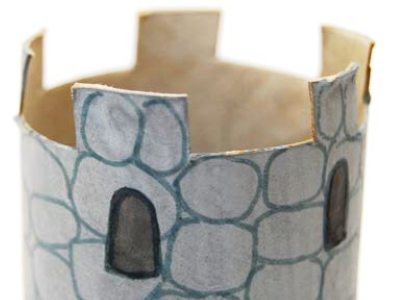
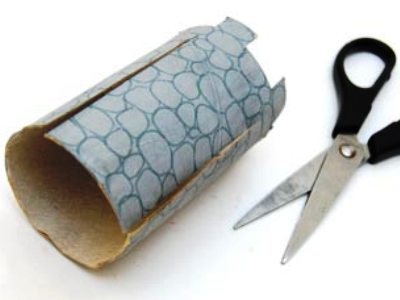
- The creation of a paper lock should begin with the preparation of a diagram of its individual block modules. Let's start with the dentate towers, which give the cardboard castle a medieval look. Use tubes to create towers. First, draw a line on the bottom of the denticles, for which you retreat from the cut by one centimeter. After that, at the same distance from each other, draw a few vertical lines. In order not to get confused as to which elements to cut, shade them. You can start cutting out the teeth. In our example, tubes from rolls of toilet paper were used to create lock towers. If you have tubes of kitchen towels, then they should be shortened by 5-8 centimeters. Paint the towers, draw the loophole windows.
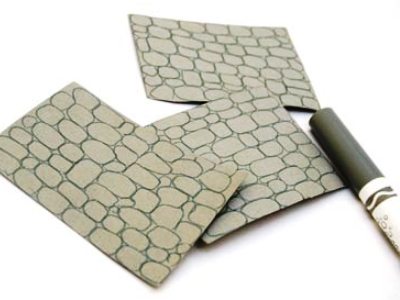
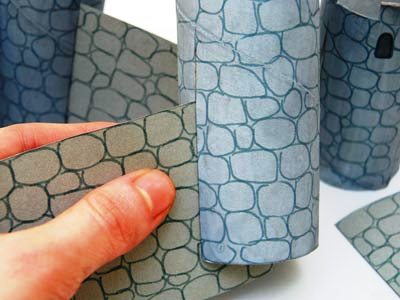
- Now you can start creating the walls of the castle. From a dense cardboard it is necessary to cut out four rectangles (width of 6,5 centimeters, height of 9 centimeters). But decorate the stone until you can only three walls. Apply gray paint, wait for drying, and then draw a marker with a felt-tip pen of arbitrary size and shape.
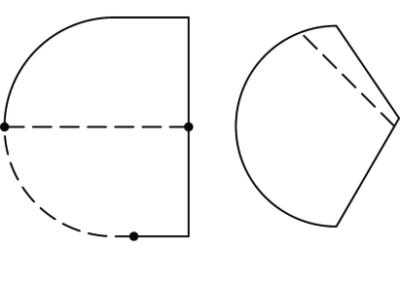
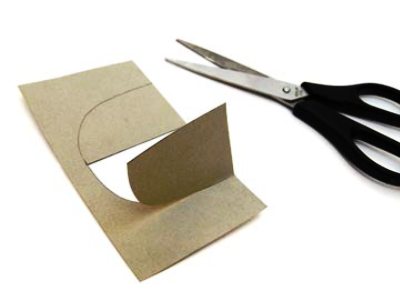
- From the template below, cut the gate leaf on the fourth wall of the lock, making cuts only along the dotted line. These gates can be closed and opened. Decorate them with a pattern under the tree, draw forged hinges, and decorate the wall around the gate in the same way as other walls.
- Take the tower-tube and divide its circumference into four equal along the length of the arc, marking these points with a pencil. Then in two adjacent points make incisions (6.5 centimeters in length). They are necessary for connecting the tower with the two walls of the castle. Similarly, cut the rest of the towers. By connecting four towers with three walls and a fourth wall with a gate, you will receive a lock.
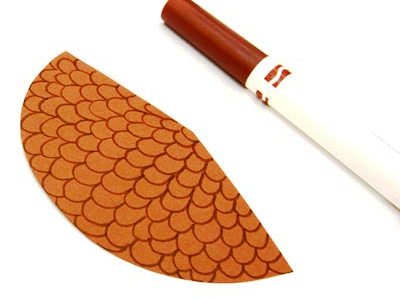
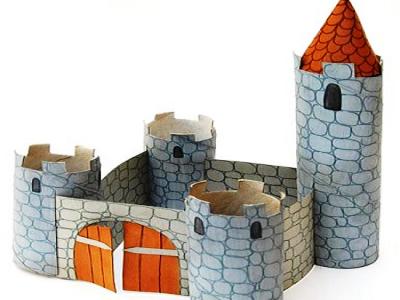
- Cut out a pattern of brown cardboard roof, draw a marker with a felt-tip pen and attach it to the highest tower. Such roofs can be made for the rest of the towers. You can decorate the tower with a flag attached to the toothpick. The handicraft is ready!
| | |
| | |
| | |
| | |
As a basis on which your padlock will rise, you can use a sheet of plywood or thick cardboard. If you plan to use the handmade not only as an element of the decor of the children's room, then it is worthwhile to worry about its stability. The usual glue you will not provide. It is better to fix each individual structure from paper with the help of an adhesive tape, gluing it from the inside.
As for the decor of the castle, the possibilities are not limited. The easiest option is to paint it with an aerosol paint. If you want to turn a gloomy medieval castle into a fairy kingdom for a little princess, it's best to make it bright. To do this, use colors of different colors to paint individual paper constructions. You can place in the courtyard of the castle animal figures, small plastic trees and so on.