You bored the interior of your apartment and you want novelty? Then, as an option, you can change the doorways to the arches. They do it in one room, and in all at once. The interior arches will bring a fresh stream into the podnadoevshy design of your home. Creating such an arch will slightly reduce the height of the doorway, but it does not threaten serious problems if you make an arch in the bearing wall. Very often a balcony is combined with a room, and instead of a door an arch made of hypocartboard is made. And it is not necessary to invite specialists to conduct such work. The most suitable material for creating a door arch is gypsum cardboard.
Such popular material as gypsum cardboard has a number of advantages. It is environmentally friendly, relatively inexpensive, due to its flexibility, interior parts of various shapes and sizes are perfectly made from it. Depending on the thickness of the sheet, there are several ways how to bend the hypocartboard for the arches.
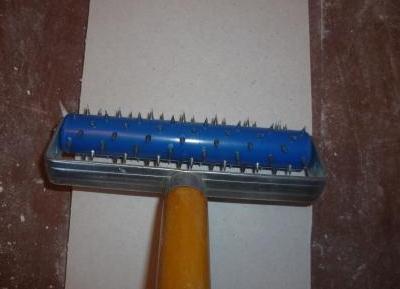
- Wet way. Rolling sheet drywall with a special needle roller or piercing with an awl. Punctures should not be through, but only superficial. Then you need to moisten the leaf a little. After the gipokartonny sheet was impregnated with water, it can be put on a pre-prepared form or simply bend into the necessary radius and fasten it. It is used for figures with small radii.
- Dry way. Leaf cautiously bends to the frame and without any impregnation is fixed on it with screws. Suitable for surfaces with large radii.
- On the one side of the gypsum board, many incisions are made and the necessary surface is bent. After that, putty is required.
Let's look at how the arched plasterboard is made with our own hands.
How to make an arch of plasterboard?
For work we need such materials and tools:
- screwdriver and screwdriver;
- hacksaw or electric jigsaw;
- a Bulgarian or scissors for metal;
- perforator, needle roller;
- spatula, brush;
- sheets of plasterboard 10-12 mm thick;
- metallic profile;
- plastic dowels and screws;
- reinforcing tape;
- finishing putty;
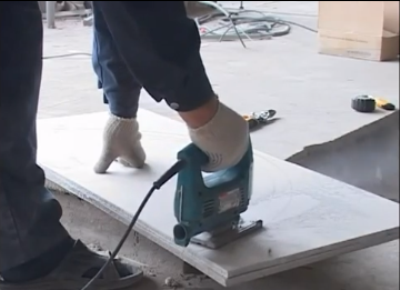
- The production of the gypsum board arch starts with the workpiece for it. For this, we mark the sheet of gypsum board according to the predetermined dimensions and cut out the contour of the future arch with a hacksaw or electric jigsaw. Taking as a template the finished workpiece, we cut out one more same detail of the arch.
- Cut a strip of gipokartona for the end of the arch. We bend the hypocardboard in a wet way. To do this, it is necessary to slightly moisten the hypocardic band with water, bend it, imparting the necessary radius, and fix it. If the humidification is not enough and the sheet of drywall is bent poorly, it is desirable to perforate it with a special needle roller.
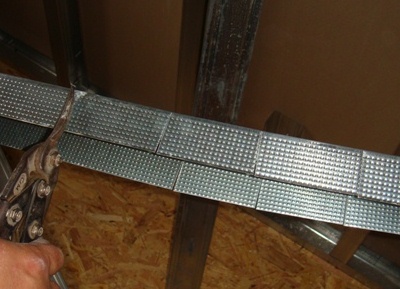
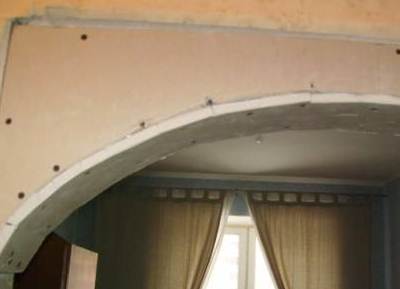
- Using a perforator and dowels, we attach metal profiles to the doorway, installing them so that the arch and the surface of the wall are in the same plane. The profile intended for the rounded part of the arch must be bent. To do this, after approximately 5 cm, we make slits on it and bend it to the required radius.
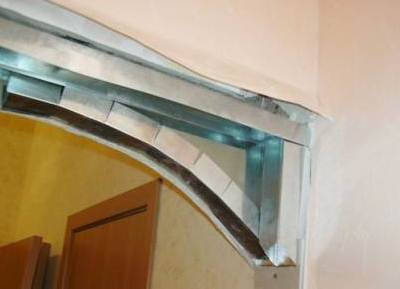
- We fix the profile along the rounded parts of the gypsum board, the protruding ends of the profile are cut off. We fix both sides of the arch on the screws to the profile in the doorway.
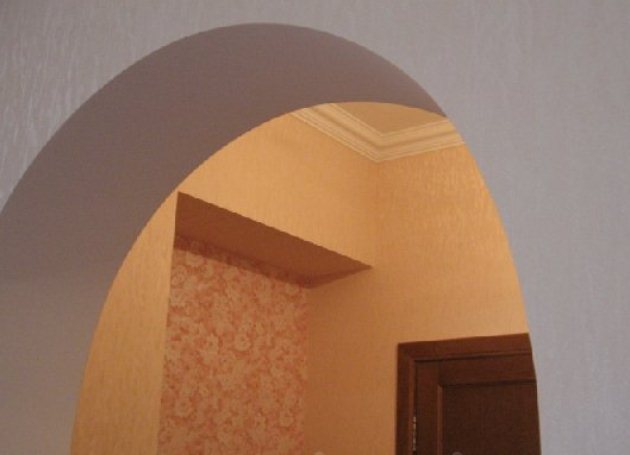
- Attach a pre-curved sheet of gypsum cardboard to the bottom of the arch. We seal all the seams, joints and corners with a reinforcing tape and put them together. Now the arch can be pasted with wallpaper or painted - it all depends on your desire.
- Here's how the arch, made of hypocards, can look like with your own hands.
As you can see, making an interior arch from gispokartona is easy, even having very little experience in repairing an apartment.