French manicure as a time-tested classic remains one of the most popular types of nail design. It is not surprising that when a nail is being grown, the French jacket is popular, and different techniques are used to create it (build-up on tips or forms) and materials (gel or acrylic).
Nail extensions acrylic in the style of French
Consider the sequence of nail extensions using acrylic powder:
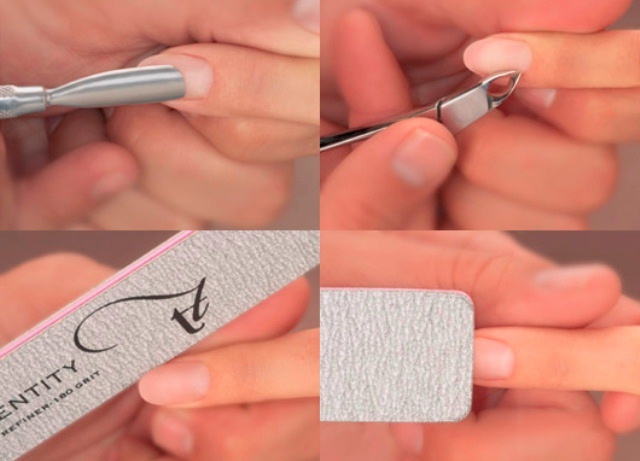
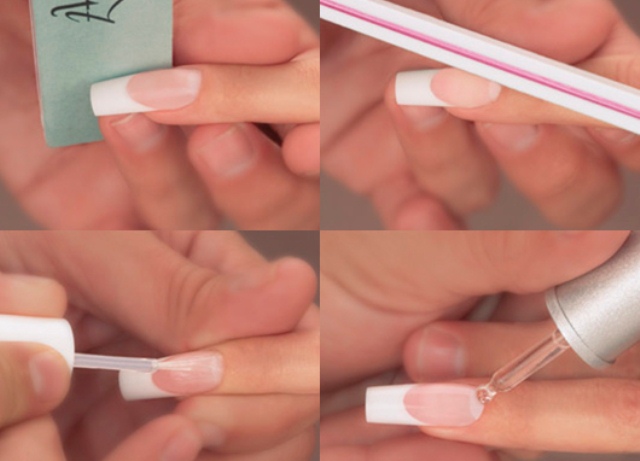
- The hands are treated with a disinfectant, the cuticle is removed by means of a spatula. Pterigia is removed with tweezers, after which the edge of the nail is filed, creating a beautiful "smile line" and treating the nail from above, taking off the natural shine. Such preparation is carried out standardly, regardless of the technology of escalating the nail french ( gel or acrylic , on forms or tips).
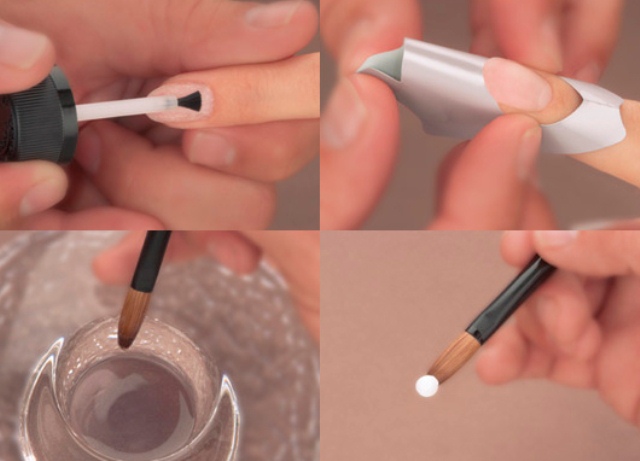
- The nails are treated with a dehydrator, and then with a primer. To the fingers attach the form. Brush dipped in liquid, and then - in acrylic powder, forming a neat ball - smooth, without roughness and roughness. For the classic design use a white powder. If you conceived a colored jacket, nail extensions are performed with the powder of the desired shade.
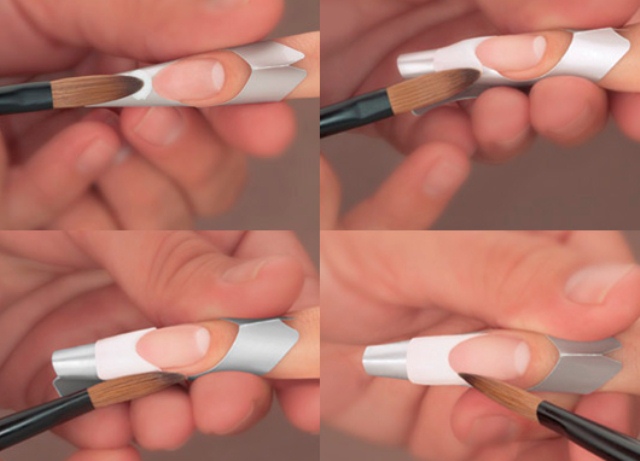
- The ball is placed in the middle of the mold so that it does not go to the surface of the natural nail. The material is laid out one and the other side, modeling the "smile line", as well as the length and width of the free edge. Clamping the brush, achieve alignment of the material on the entire form and the ends. The dry thin tip of the brush is the final correction of the "smile line".
- A medium-sized bead of pink or transparent acrylic is spread over the top of the nail. A slightly larger ball spread immediately at the "smile line", and distribute acrylic on the entire nail. Finally the smooth and even shape of the coating is attached, pressing on the brush. After the material "grabbed", the shape from the finger is removed and clamped the "mustache" of the smile line for 30 seconds, forming a C-curve.
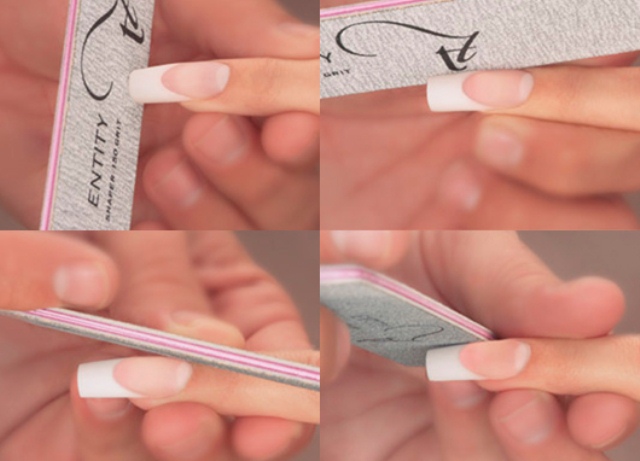
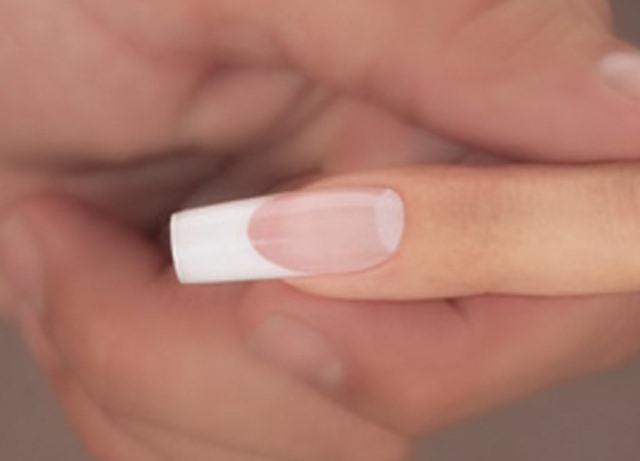
- With a 150 grit saw, the free edge is treated, the lateral sides, following their parallelism, as well as the cuticle zone, moving along a circular path. Repeat the same, using a saw blade 180-100 grit.
- Nails are gloss polisher, apply a top coat, rub oil for the cuticle.
- Ready marigolds look very natural. Add to the image festive notes will help build nails in the style of French with a pattern - this option is especially suitable for a wedding.
Gel extension of nails in the style of French
The technology described above is generally similar to the method of gel build-up, which is performed in the following sequence:
- The nail is prepared, degreased.
- Apply the base gel, dry 2 - 3 minutes in a lamp.
- The gel is applied for modeling the nail, it is dried as much.
- The sticky layer is removed, the free edge is filed to create a beautiful "smile line".
- The modeling gel of white color spread on the substituted form. Dry 3 minutes, remove the sticky layer.
- The nail is sawed, polished, applied to the finish coat.
In a similar scheme, gel nail extensions are performed on fancy-style tips: the nail bed is prepared and degreased. On the contact area tipsy glue and fix them to the nails, and then adjust the length and shape, using a saw and special tongs. When the tips are ready, a gel is laid on it, drying each layer in the lamp.
Each technology has its pros and cons. For example, acrylic requires polishing with oil to give a beautiful shine (ideal - finish acrylic nails finish-gel), but the edges of the nail can be pressed, which gives them a more elegant appearance. Gel nails due to the finish coat beautifully shine, but they can not be compressed, and if tips are used, the look may not turn out to be very natural. Acryle is stronger than gel, it dries faster and modeling takes less time. The gel also requires a special lamp for polymerization and is laid out longer.