Are you fond of writing paintings or embroidering original canvases? Then you are familiar with the problem of storing your own works. And so you want to decorate your house with beautiful paintings, panels or hand-made articles! An excellent option - the placement of such works on the walls. All that is needed is a frame. Of course, it can be purchased at a specialized store, but it's not always the standard sizes of these products that correspond to the size of your work. In addition, the ready-made framework is not cheap.
We offer an alternative option - to make a frame for a picture or a panel with your own hands. The advantage of self-made frames for pictures is not only in the choice of any size. Their production will cost several times cheaper than a similar purchase in a store could have. In addition, you will not doubt the quality of materials and work. Our master class is devoted to how to make a frame for a picture. Shall we proceed?
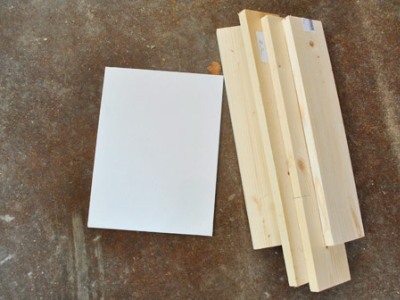
We will need:
- wooden boards;
- A sheet of paper equal in size to the picture;
- glue for gluing wood;
- a hammer;
- sandpaper;
- saw;
- adhesive tape;
- varnish;
- paint (optional).
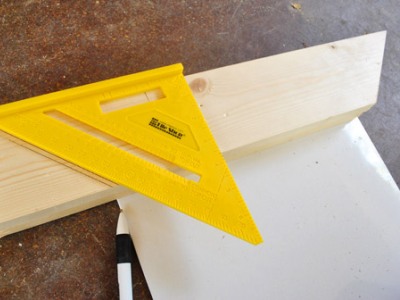
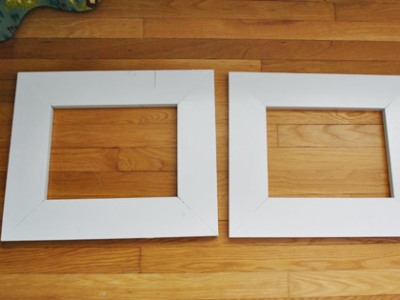
- On a paper template, the size of which coincides with the size of the picture, lay out four boards of the same thickness. Make a pencil mark on them, indicating the width and length.
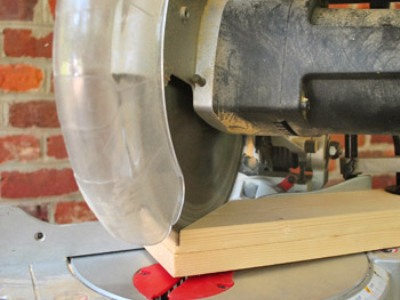
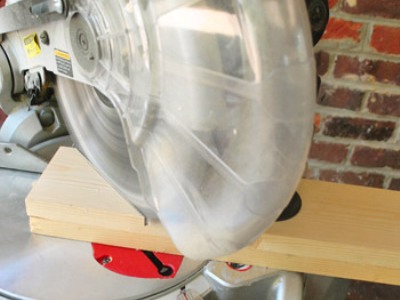
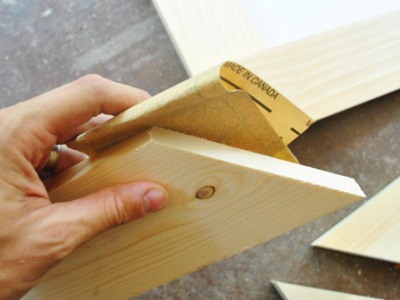
- To join the obtained parts, it is necessary to cut off the end of the first bar at an angle of 45 degrees. On the cutting machine this is done in a few minutes. If you do not have one, use a regular saw.
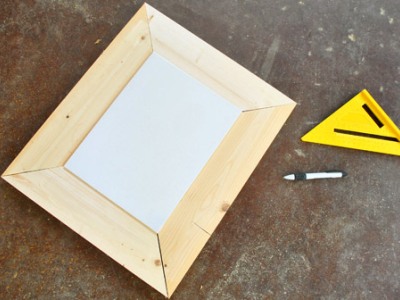
- It is very important that the frame dimensions are slightly larger than the canvas. This is necessary so that the picture can be fixed under the slats. We recommend each bar after cutting the corner to apply to the paper template, in order to correct the joints if necessary.
- Similarly, cut off the corners on the three remaining slats.
- Ultimately, you should get two short and two long bars, the ends of each of which are cut at an angle of 45 degrees, but in opposite directions.
- Collect all the treated slats in a frame and attach to the template to check the fit of the dimensions. If necessary, trim the protruding parts.
- Now all the details should be treated with sandpaper, removing all irregularities and roughness.
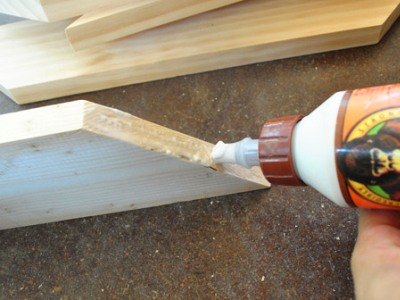
- Lubricate the ends of all the straps in the joints with glue and assemble the frame. Wait until the glue dries.
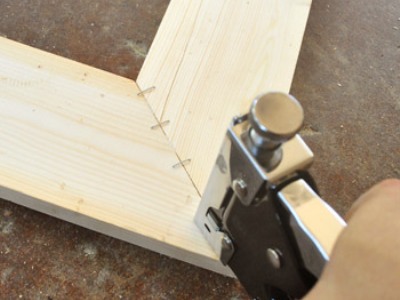
- On the back of the frame, fasten the parts with a stapler.
- It remains to put on the frame the paint of the chosen color or to open it with varnish, wait until everything has dried and the product is ready!
Variants of decor
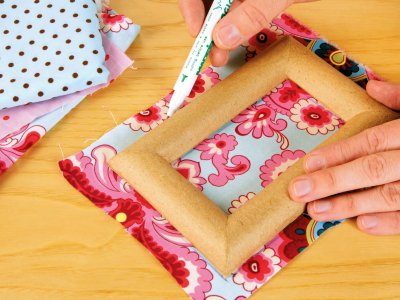
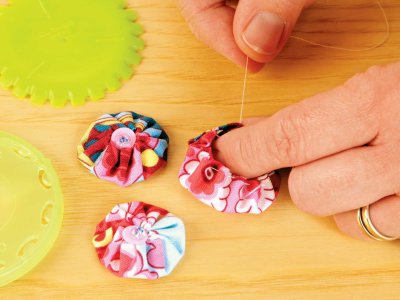
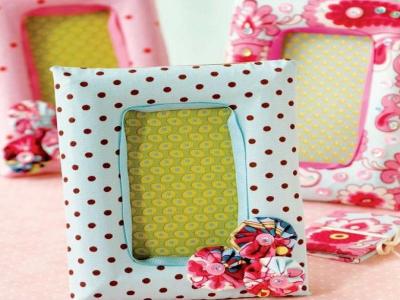
The usual wooden frame may seem boring and inexpressive to you. Try to revive it. Variants of how you can decorate the frame for a picture are many. Do you want to give it tenderness and softness? Then use the cloth. To do this, attach the frame to the fabric, circle around the contour, leaving a few centimeters on the outer edge. Mark the center on the fabric inside the frame, dragging the diagonals, and then cut out. Fold the frame with a cloth, and place the joints with adhesive tape or glue a narrow tape. Make a flower out of the fabric and glue them to the frame.
| | |
| | |
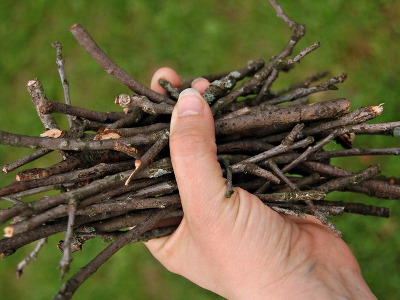
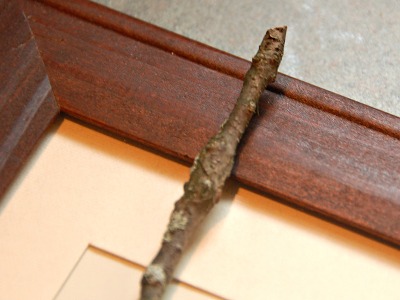
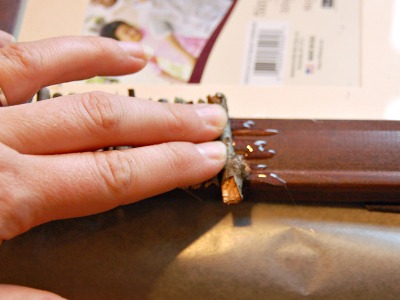
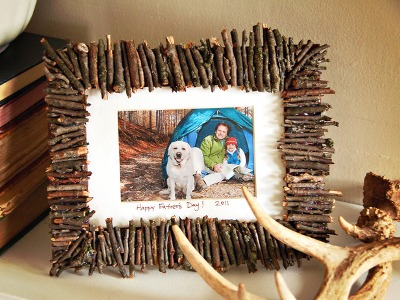
Do not know how to proceed, if you want to frame a picture written for a country house? Use the usual brushwood. Cut it into lengths a little more than the width of the bar, grease the frame with glue and gently attach them parallel to each other. By the way, this variant of decor can be used for decoration of small photo frames. Experiment!
| | |
| | |
Also for the design of pictures you can use the idea of a framework for photos.