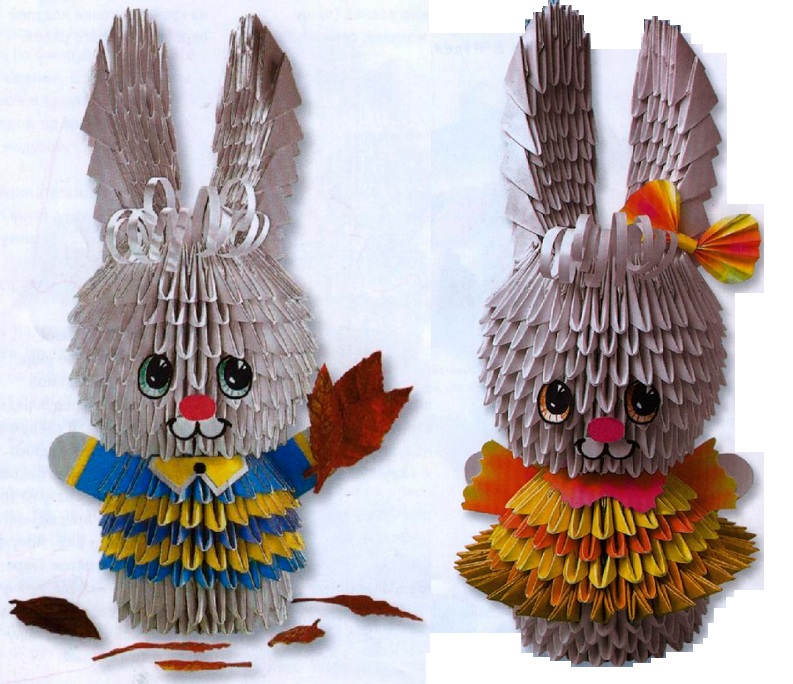
Origami is an occupation that attracts many, both children and adults. It calms down with its slow pace of action and is inspired by the fact that simple paper can make animals, flowers - the whole world.
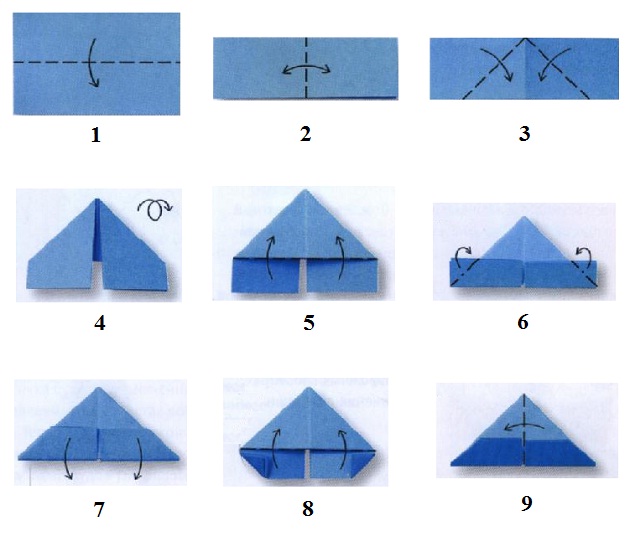
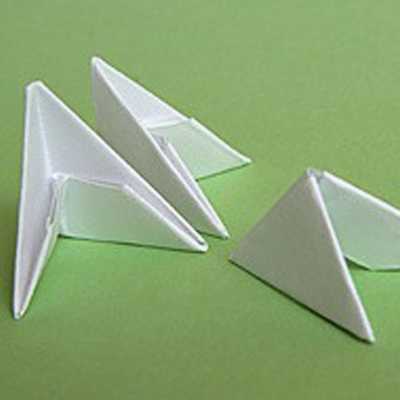
In this article, we'll look at how to make a hare from origami modules. This work requires patience, because before you begin to build the hare, you will need to make 522 triangular modules. You can make them all white, and you can make 402 modules white, and the rest 120 are colored.
So, let's now consider how the hare is made from triangular modules.
Hare from the modules - assembly diagram
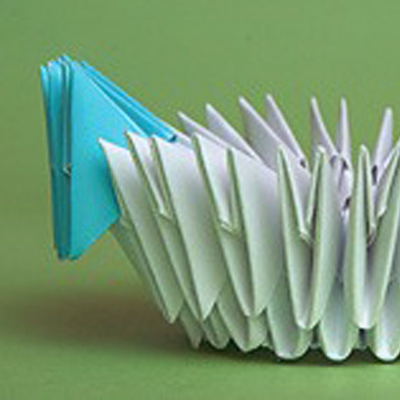
Step 1 : Place the first three modules as shown in the picture. Then connect them together by inserting the corners of the first two into the "pocket" of the third.
Step 2 : Take two more modules and connect them to these three in the same way. Last module, close this chain in the ring. You have a basis for the next series.
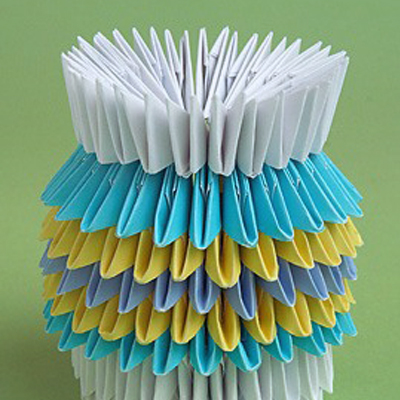
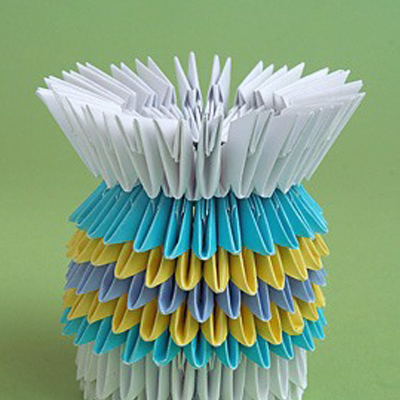
Step 3 : Next, by grasping the modules in staggered order, you get three rows of torso origami from a module of 24 modules each.
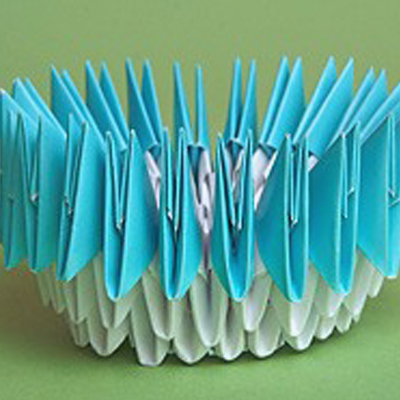
Step 4 : Carefully turn out the resulting circle from the modules so that it turns into a kind of bowl in shape. Next, take 24 modules of a different color and start attaching them. Color modules need to be attached a little higher, to give the impression that the sweater is slightly moving away from the torso of the hare from the triangular modules.
Step 5 : After making the fourth row, align it.
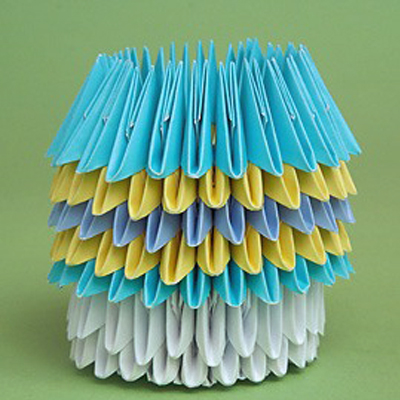
Step 6 : Similarly, make four more rows of rabbit sweaters from paper modules.
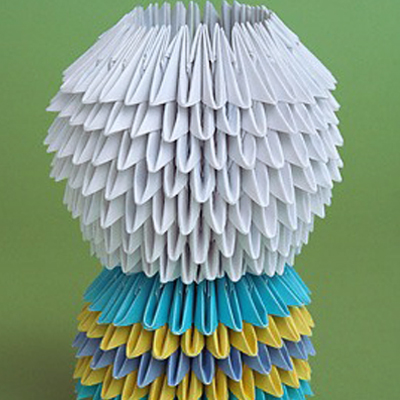
Step 7 : Next, again take the white modules (24 pieces), and attach them to the outside with a short side.
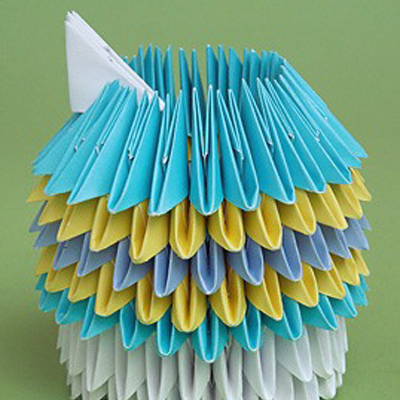
Step 8 : This series will be obtained already previous, since the modules are located somewhat differently.
Step 9 : Increase the new series by six modules, to this end, for every fourth module on the account, wear two new modules at once. In this row, wear the long side outwards.
Step 10 : The following series are also made up of 30 modules. Collect the head - it contains 8 rows (one for 24 modules, the rest for 30).
Step 11 : In the last row, bring all the modules together, that the head is shaped like a ball.
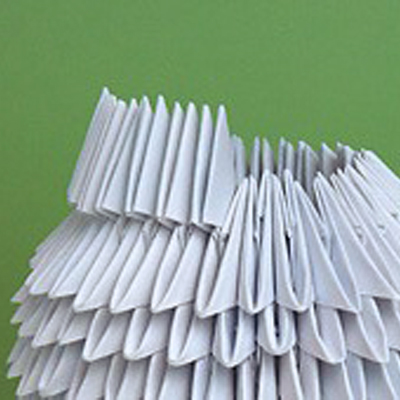
Step 12 : Next - the ears. Take the 6 modules and secure them at the top of the head.
Step 13 : In the second row of the ear there will be 5 modules, and in the third one again take 6. The extreme modules must be put on the extreme corners of the first and second rows. Thus, make seven rows, and in the eighth two extreme modules, put them on the three corners of the previous row. In this row you will have 5 modules. And in the last, ninth row, put on four modules, two of which, in the middle, should be slightly higher than the other two.
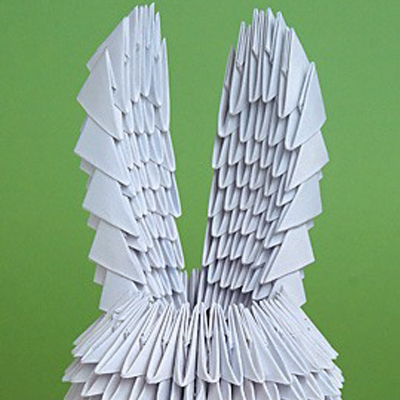
Bunny is ready!