Nowadays, money is one of the most common gifts and, it would seem, there is nothing easier than to give a banknote . But sometimes I would like to bring something unusual in such an ordinary gift. And it's not difficult at all, it's enough to have only desire and the simplest materials. So, we suggest you make a box for money with your own hands, following our master class.
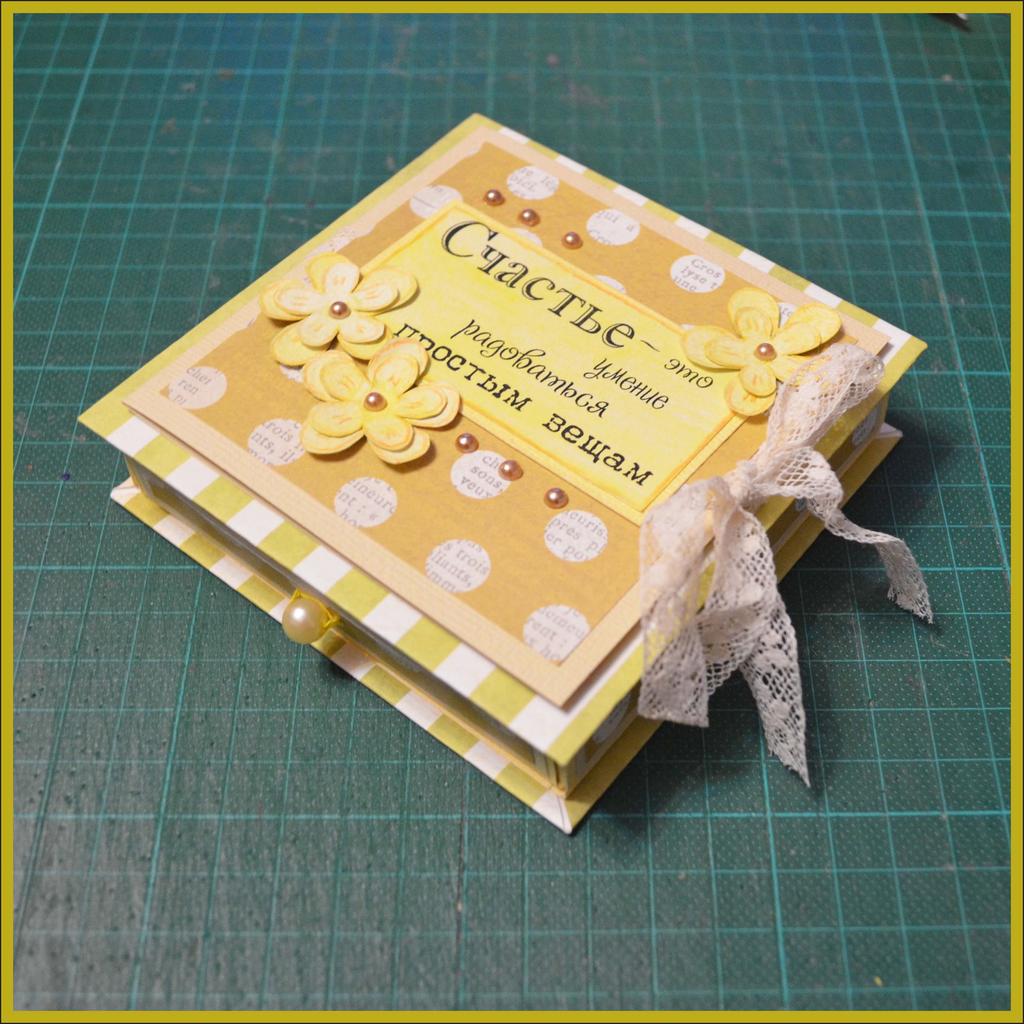
A box for money scrapbooking - a master class
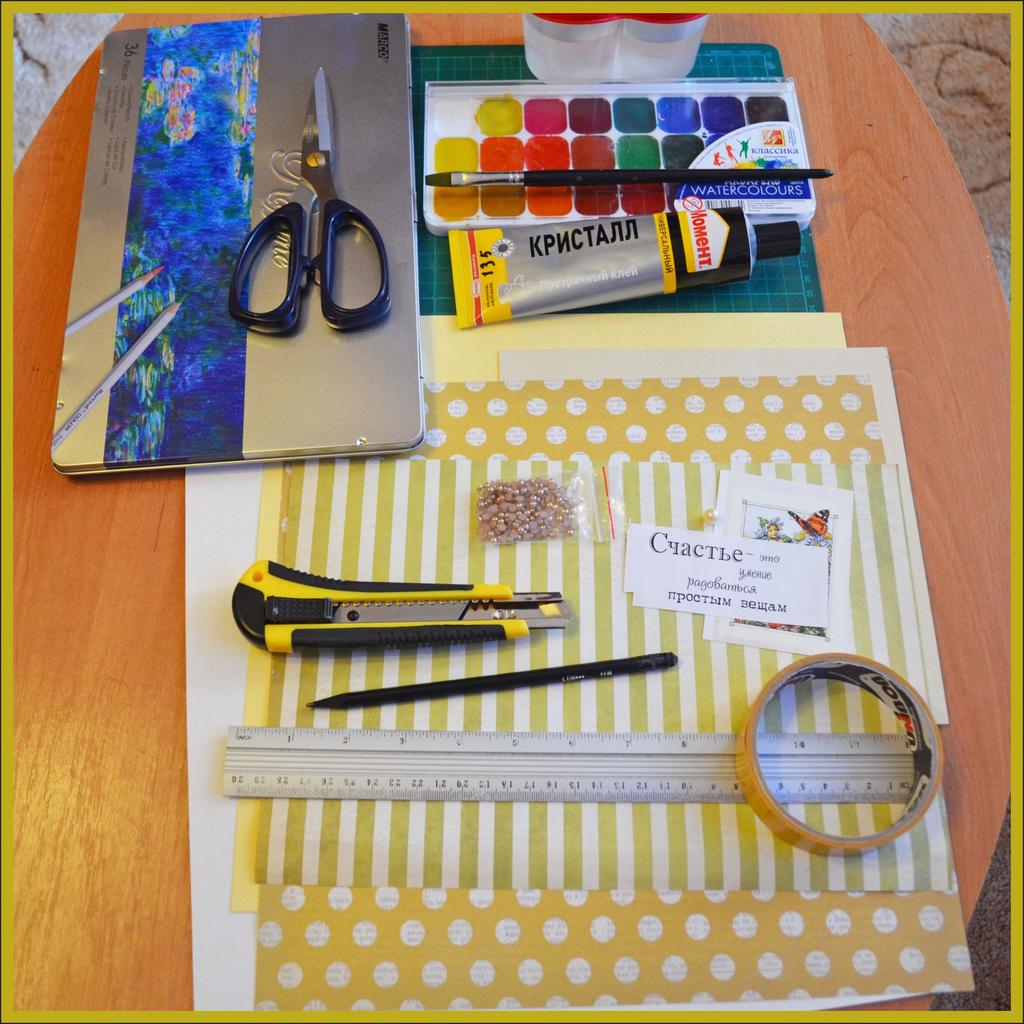
Necessary tools and materials:
- 2 types of scrap paper (backgrounds for it can be found on the Internet and print or buy ready);
- cardboard white and color;
- watercolor paper;
- pencils and watercolors;
- brush, a simple pencil, a stationery knife, a metal ruler, scissors;
- an inscription or a picture (they can also be printed independently);
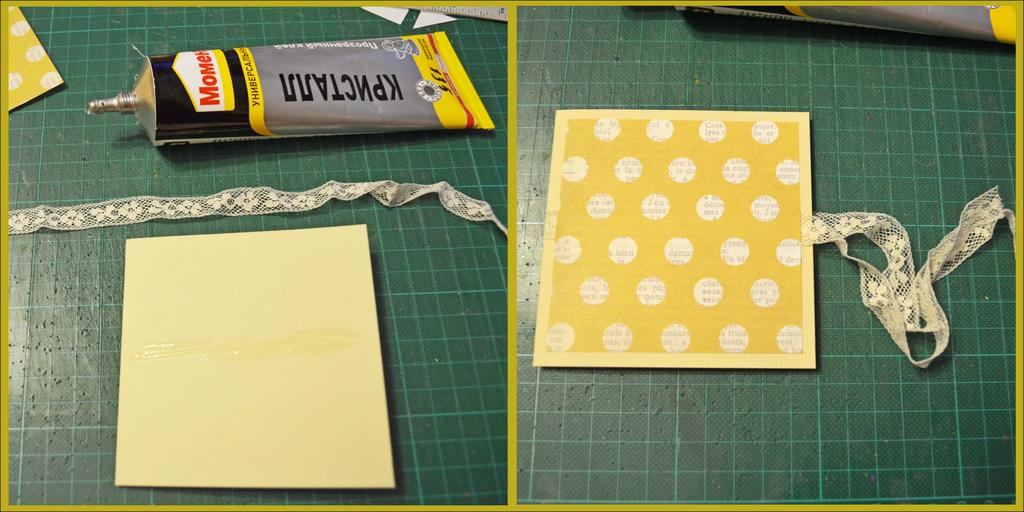
- Glue (better "moment-crystal");
- two-sided adhesive tape (you can limit yourself to glue);
- ornaments (beads, half-beads, buttons, pendants-anything you deem fit);
- tape.
Performance:
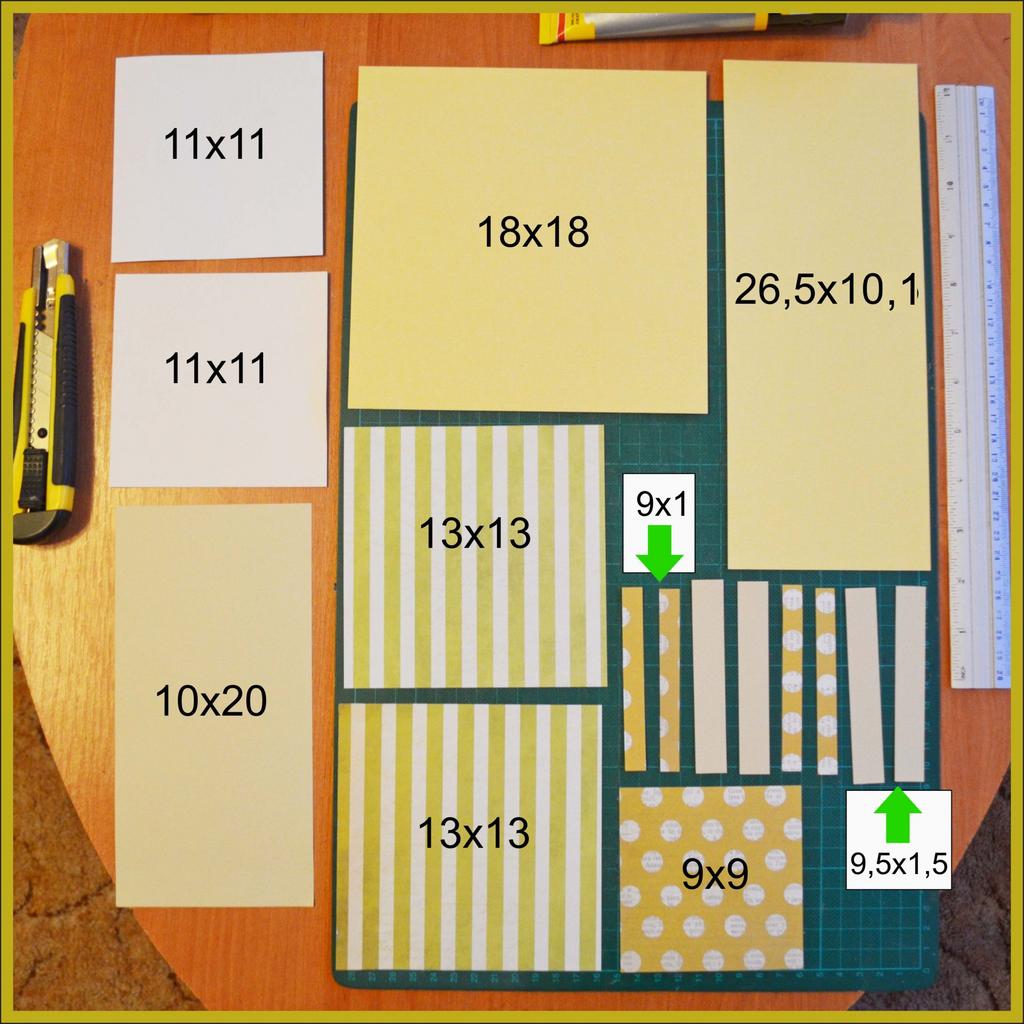
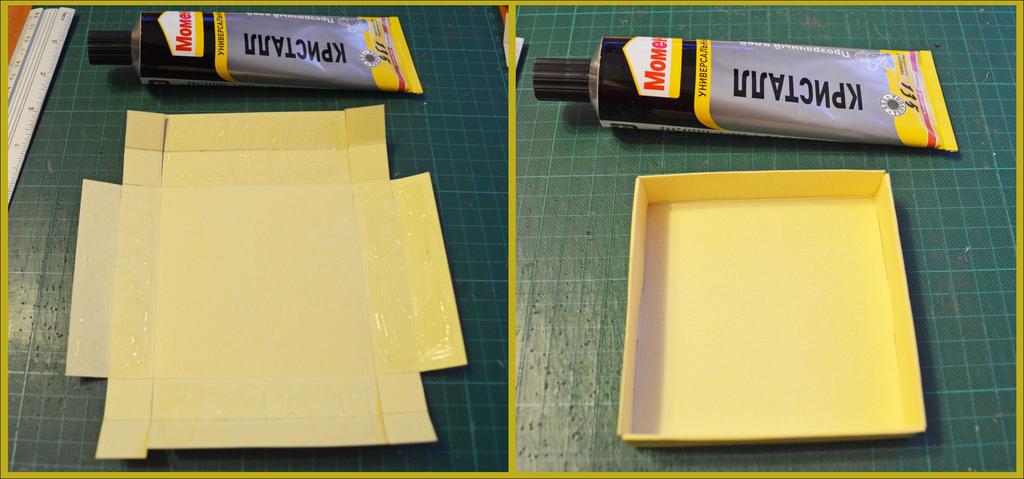
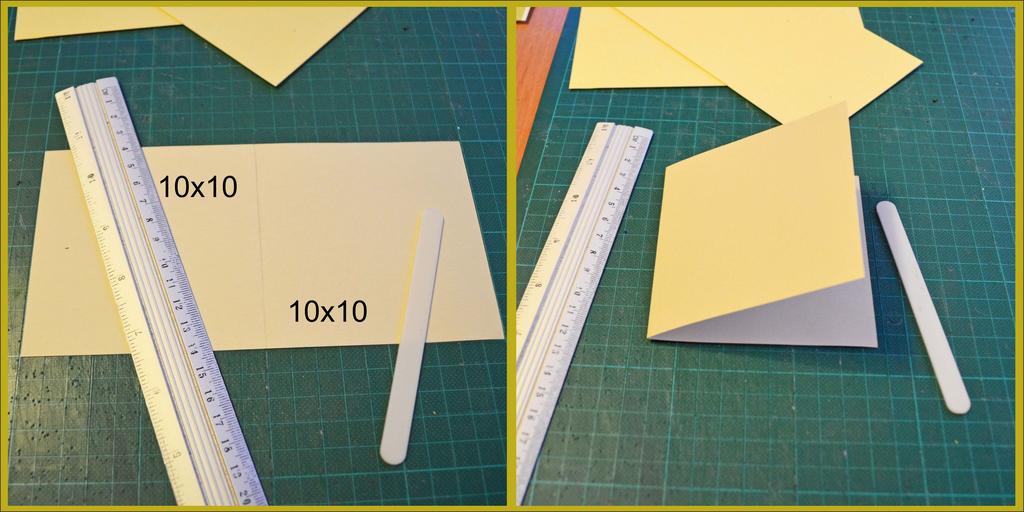
- To start with a ruler and a stationery knife, you need to cut cardboard and paper. Dimensions of paper and paperboard, as well as the principle of distribution of colored and white cardboard is shown in detail in the photo.
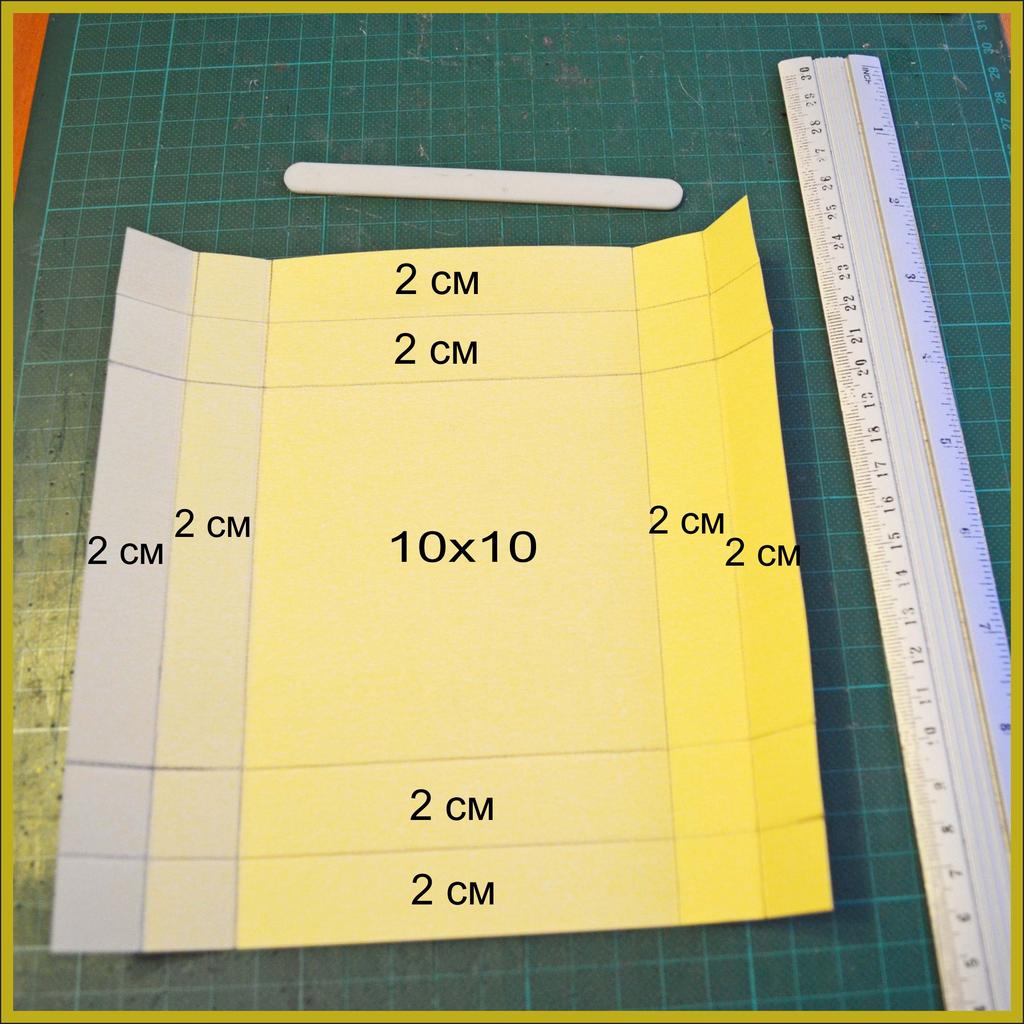
- Next, we take the largest square (18x18 cm) and we cast. The next step is to make a creasing (to specify the places of folds) - in addition to a special stick, a lot of objects (not a pen, a plastic card and even a simple teaspoon handle) will do for this. I used a wand from ice cream. The principle of lining and creasing is shown in the photo.
- The next step is to make the cuts and trim the excess.
- And, finally, we glue the necessary details with glue and add our main box.
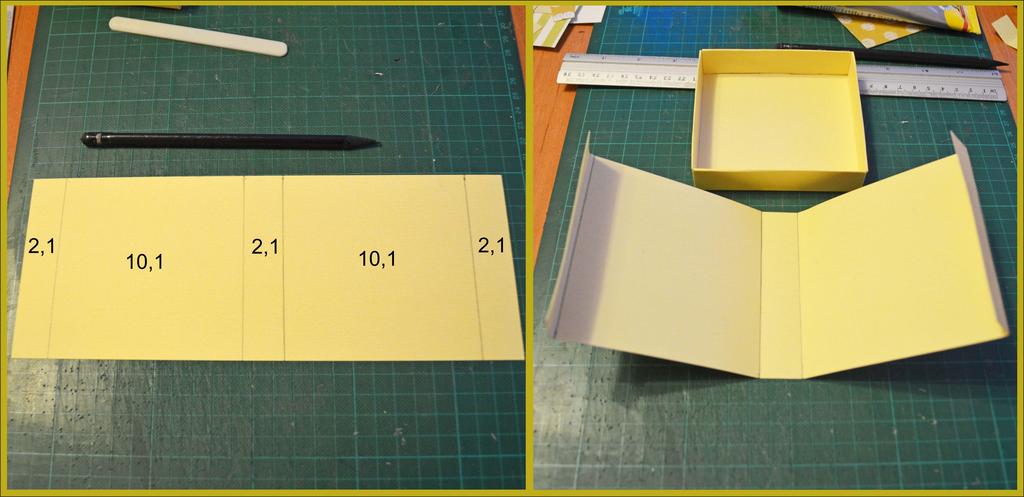
- It's time to make the second part of our box, and for this we pour and make a creasing on the largest rectangle of cardboard. Make it necessary as shown in the photo.
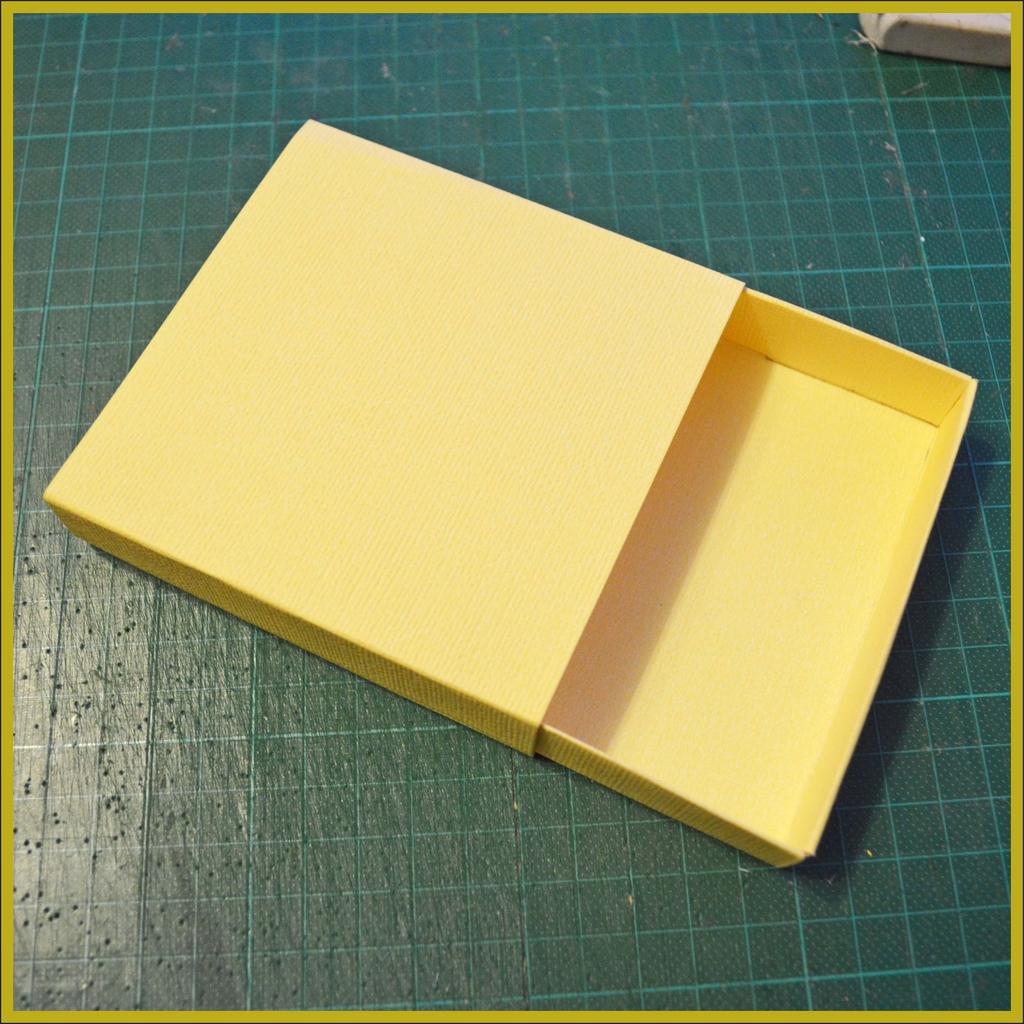
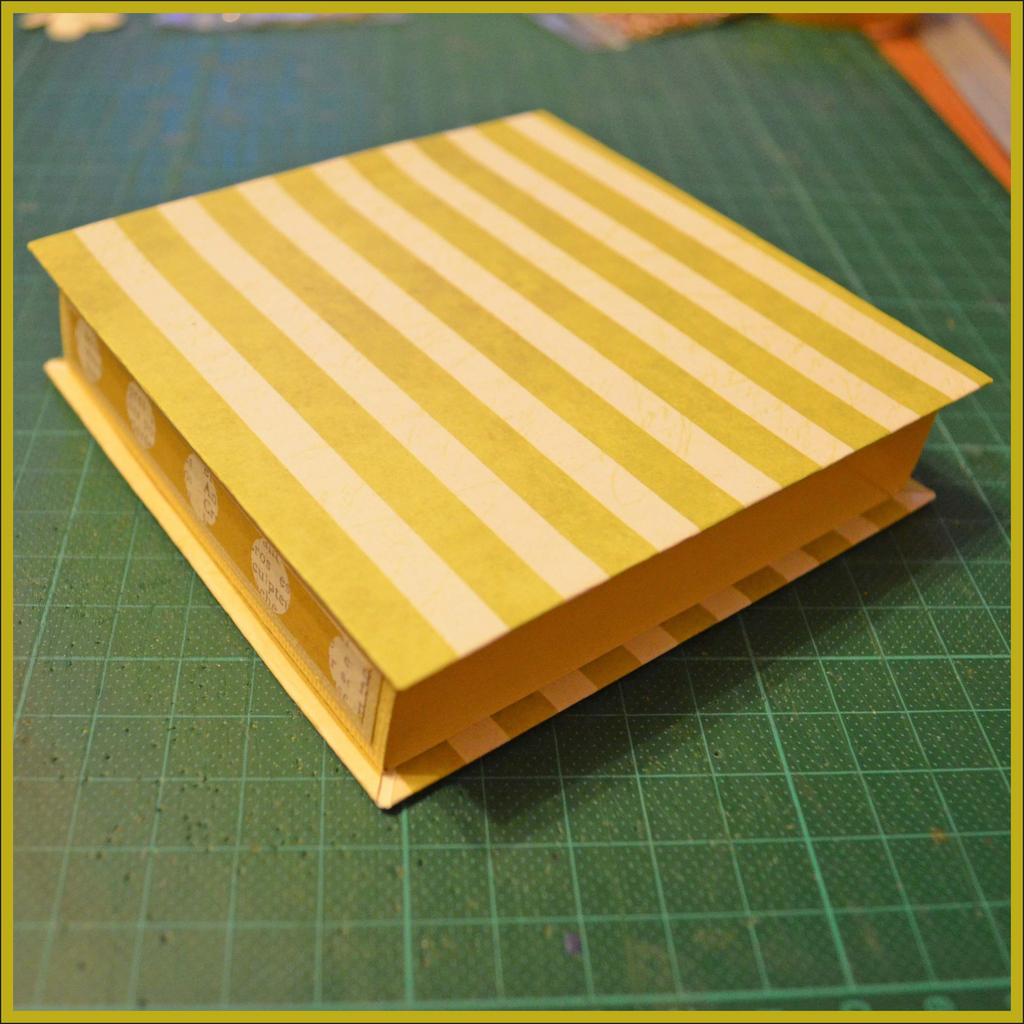
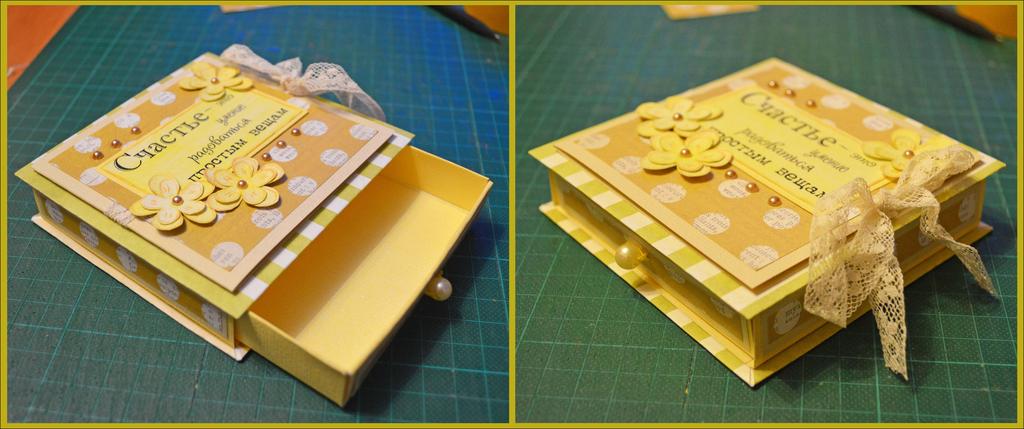
- Here is a box we should get. Now it's time to start decorating.
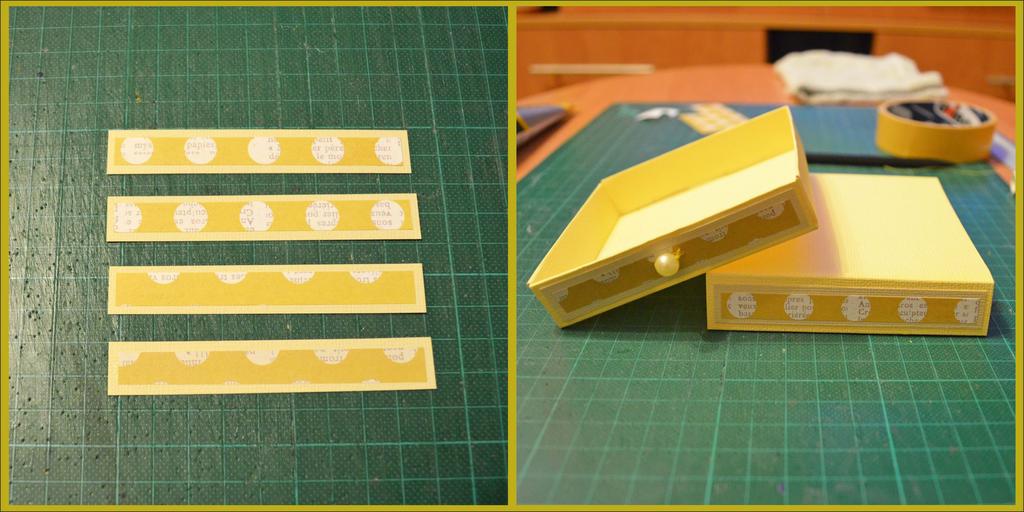
- Narrow strips of paper (1x9 cm) we paste them on the strip of cardboard (1,5x9,5). The next step is to paste these double curbs on the box (2 pieces per inner and outer parts), and sew a bead that will serve as a handle.
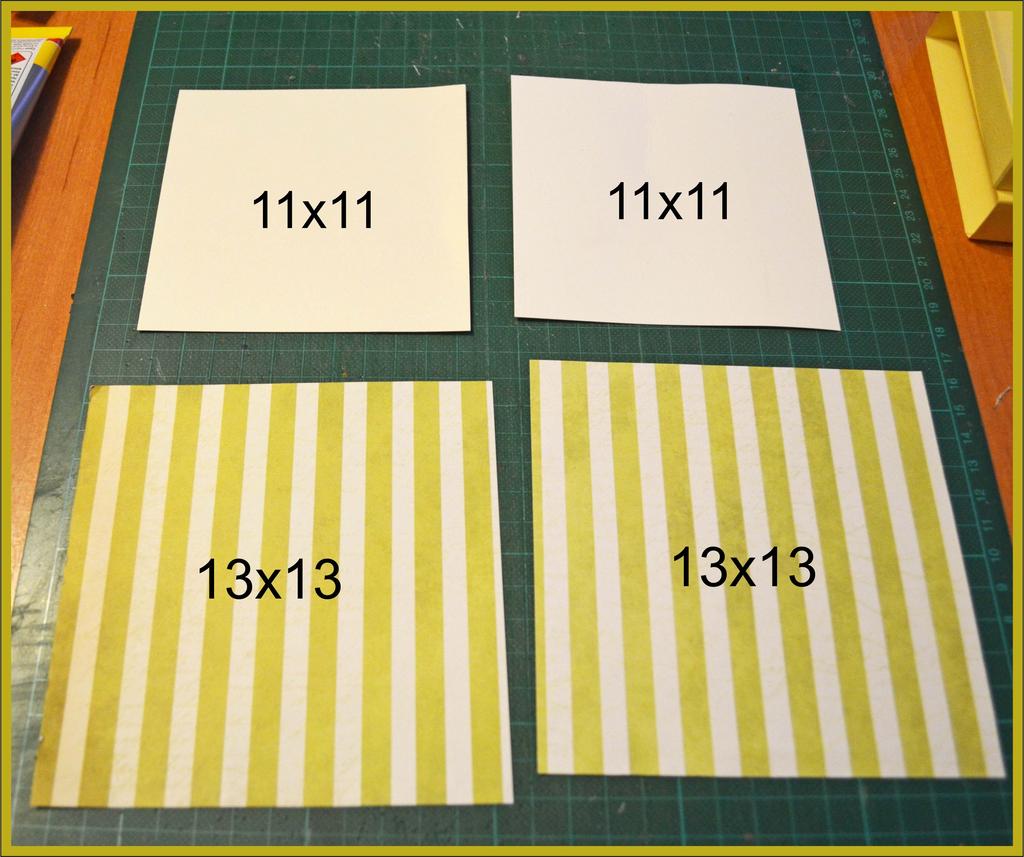
- Now take 2 cardboard boxes 11x11 and two paper squares 13x13.
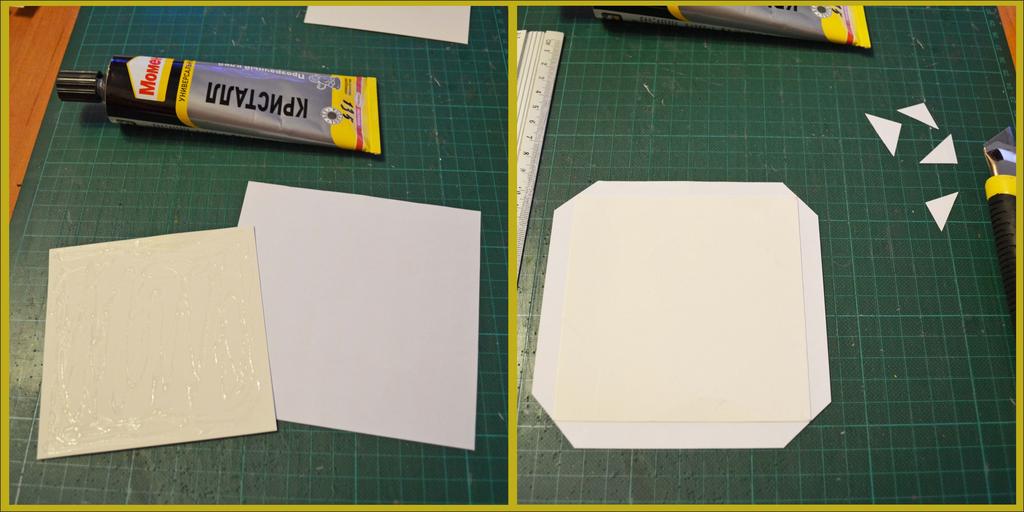
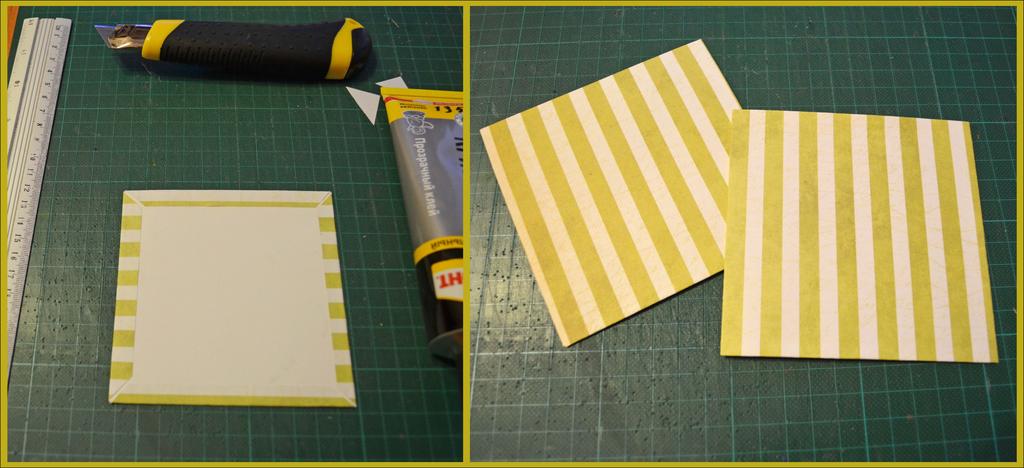
- We spread the cardboard square with glue, glue it to the wrong side of the paper and cut off the corners.
- We fold the excess paper and glue it to the cardboard. The same thing we do with the second pair and get two neat squares.
- Our dense squares we glue to the outer part of the box so that an equal amount of cardboard protrudes around the edges.
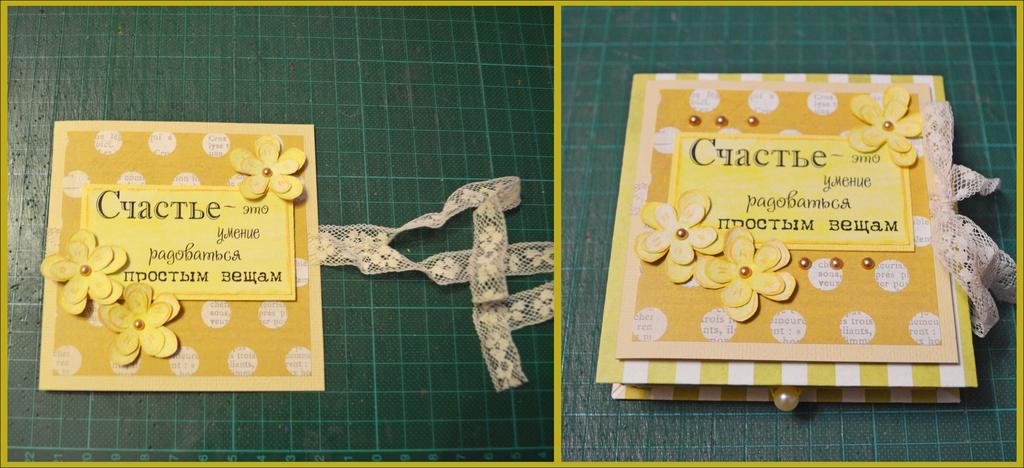
- Cardboard rectangle 10x20 cm we scribble and fold in half - it will be a postcard for wishes.
- Now you need to glue the ribbon and the top layer of paper - a square of 9x9.
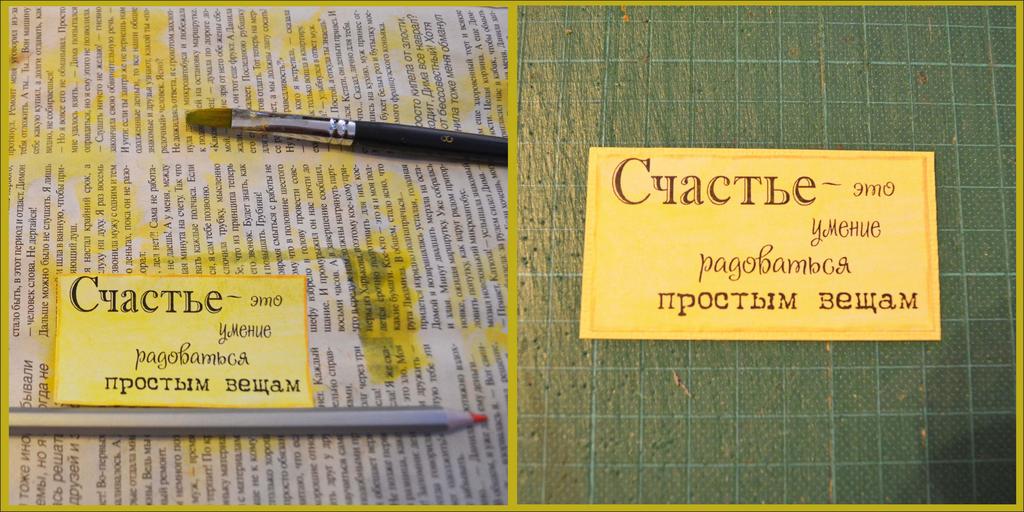
- We paint the inscription with a thin layer of watercolor paint, we draw a pencil around the edge and paste it to a cardboard rectangle 0.5 cm larger than the inscription itself.
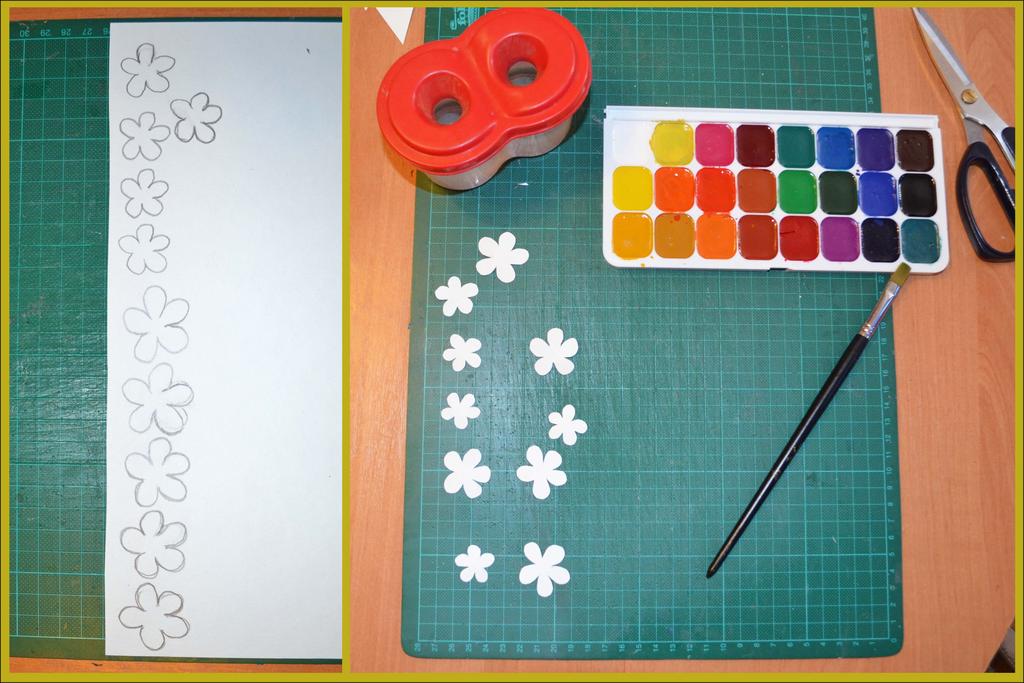
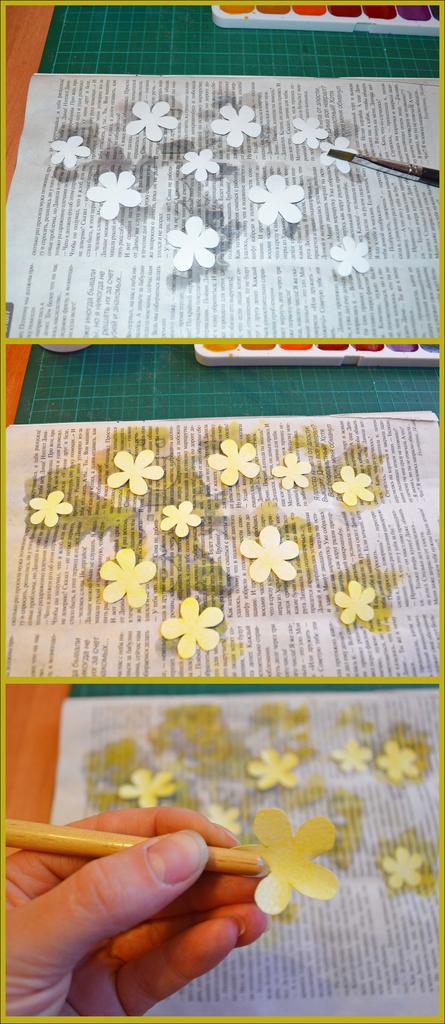
- Flowers for decoration fit perfectly and they do not have to be bought - you can make yourself. Draw on the wrong side of the watercolor paper a few large flowers and a few smaller flowers, and then cut out.
- We moisten our flowers with a damp tassel. Right after that add color to taste (the saturation depends on your desire), and after - we form the petals - we twist them around the pencil or (as in my case) the shaft of the brush.
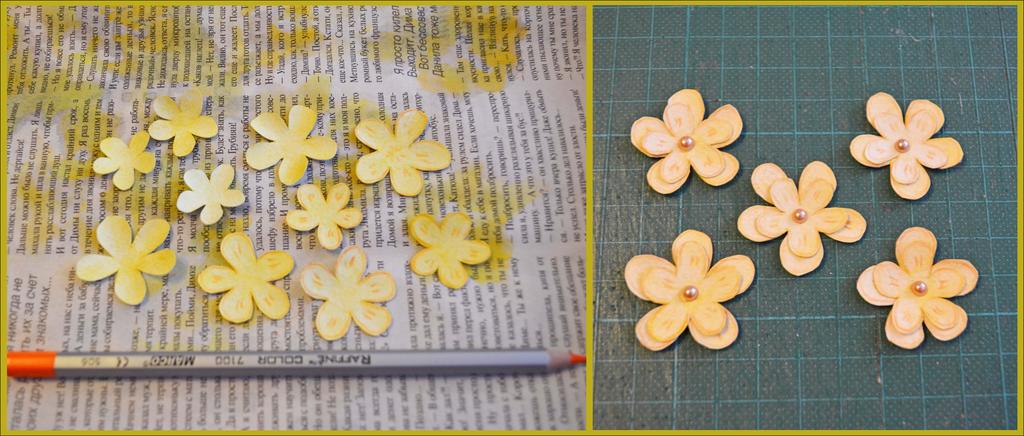
- We will add clarity and volume to our flowers-we will slightly circle the petals and draw the veins, and after gluing together in pairs and paste in the middle a straighter or half-bead.
- And here is the finale: we fix all the decorative elements on the postcard, and paste the card itself to the box.
So, all the most complicated things are left behind, but it's too early to stop, because only half of the way is passed.
It's time to decorate our creation:
Our box can easily become a packing not only for money, but for other small gifts, and later not get lost, becoming a place of storage of useful and pleasant trifles.
The author of the work is Maria Nikishova.