If you already have experience in creating decorative things in the technique of scrapbooking , you will surely agree that a lush bow made from satin ribbon is one of the most universal and indispensable ornaments. It can become a single decoration in the corner of a postcard or photo album, you can also make a few bows and create a certain composition. Also, a volumetric bow will decorate a gift wrapped in a gift box, agree, what gift without a bow? You can decorate a lavish satin bow with a children's pin of ribbons or a hoop, a brooch, and many applications can be found with this cute little thing!
In scrapbooking there are many ideas how to make a bow of satin ribbon - from the simplest to magnificent bows, tied from several ribbons, cloth flaps and sewing accessories. Of course, to tie a classic bow from a satin ribbon and give it a voluminous form even a child can do, there is nothing complicated in this. We in the master class will show a new, original technique of working with ribbons - we will make a bow on the fork.
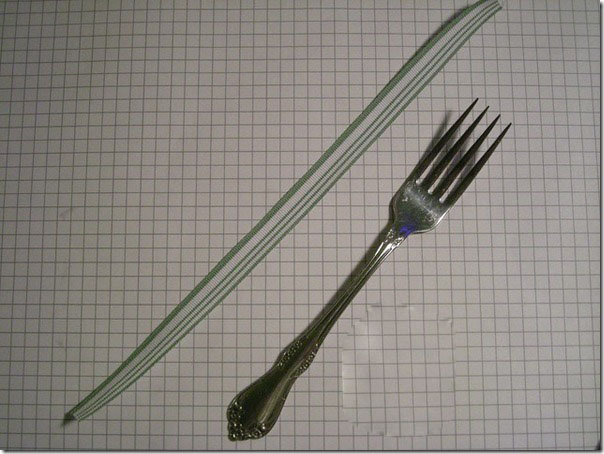
For work we need a cut of satin ribbon, we choose length based on our preferences, the optimal variant is 25-30 centimeters, in this case the bow will turn out to be magnificent and voluminous, and it will be convenient to work with the plug.
Also we need an ordinary kitchen plug. The plug will fit any, the only condition - it should be of a classical form, that is, thin with four long prongs.
So, picking up everything you need for work, we can proceed.
How to tie a bow from a satin ribbon?
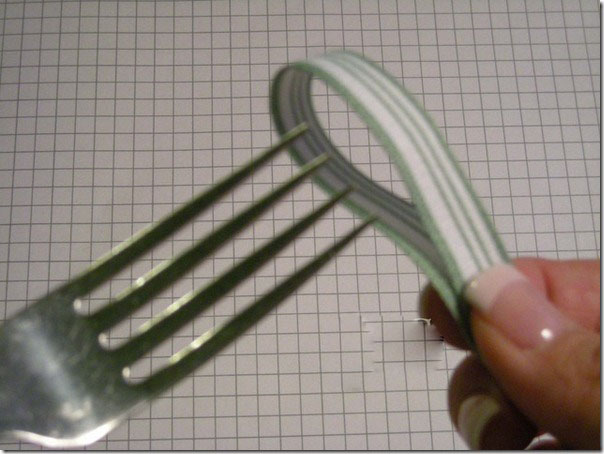
- Take in one arm a piece of satin ribbon, fold it in half so that a loop is obtained. In the second hand, take the kitchen plug.
- We put the loop from the tape on the upper half of the fork teeth, the lower half should be free, with it we will work further.
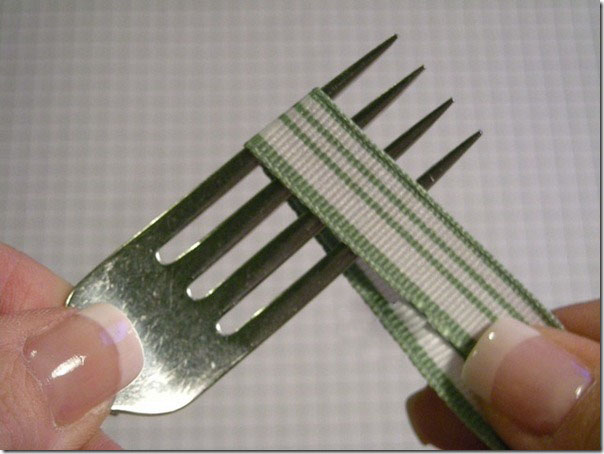
- Now take the edge of the tape, located farther away from itself, through the top we will remove it in advance and let it pass between the teeth of the plug in the manner shown in the figure.
- Next, take the second end of the cutting of the tape, pass it through the bottom, lift it up and also pass between the teeth, following the image.
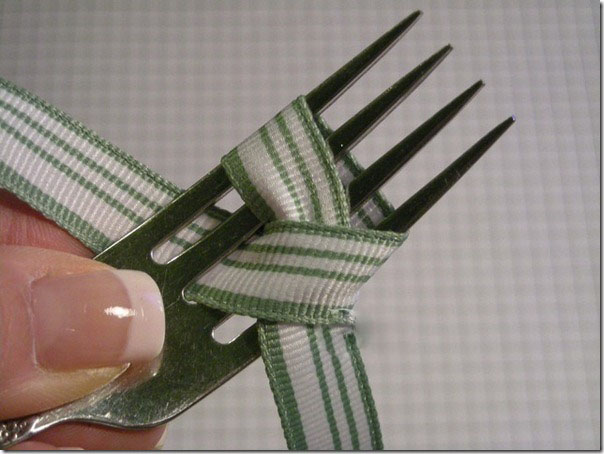
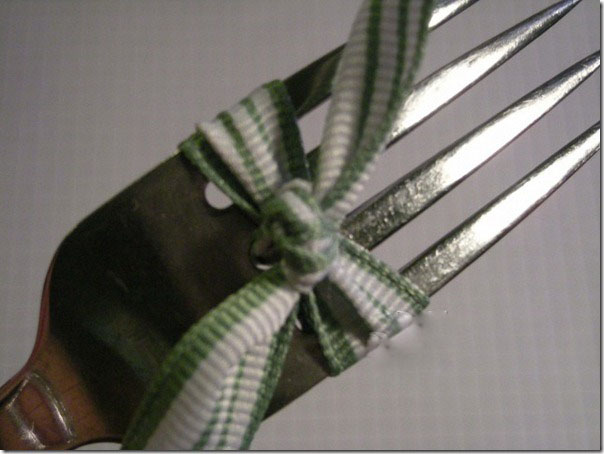
- Then turn the plug back to yourself. We see the two ends of the tape, passed between the teeth, between them a strip of tape.
- Now we take these two free ends of the tape in hand and fasten them tightly to two knots from the same reverse side of the fork.
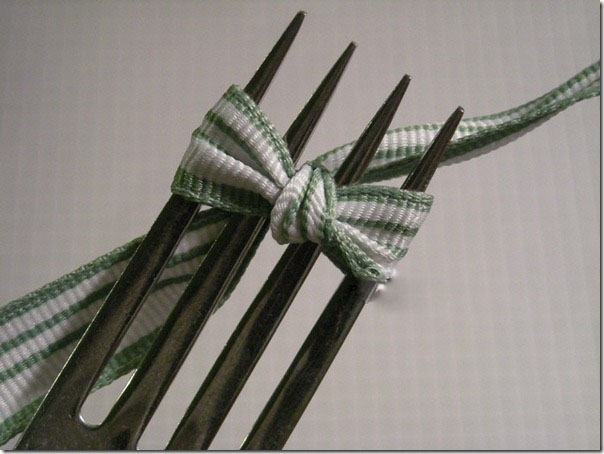
- Again, turn the fork toward you. As you can see, we got a neat little knot of a bow.
- Further, once again, we will see that our knot on the reverse side is tightened tightly, after which we can safely remove the almost finished product from the kitchen plug, we will not need it any more.
- Now let's get to the ends of the bow. As you can see, on the reverse side there were long cuts of satin ribbon. Using scissors we trim them, leaving the desired length.
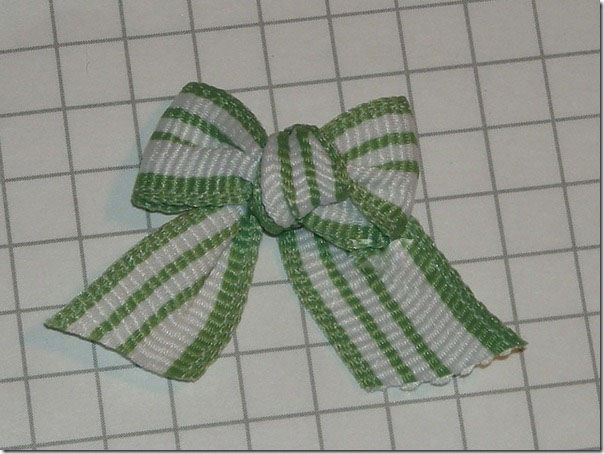
- If the edges are left in this form, they will soon begin to hurry, this will spoil the entire look of our bow. To prevent this from happening, we take an ordinary wax candle, light it and gently follow the edge of the flame along the cut edges of the tape. It is important to be careful here - burn carefully, barely touching, so that the edges do not have time to blacken or change the shape due to melting. The color and shape of the edges of the tape should not change.
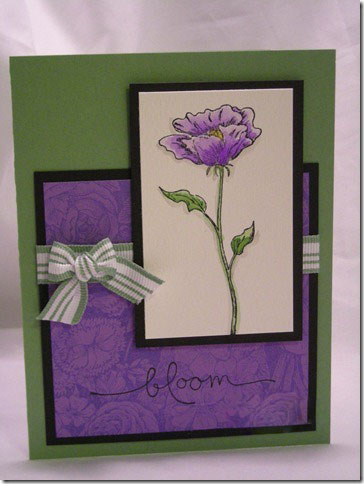
Well, that's all, our voluminous bow of satin ribbon, made by ourselves, is completely ready. Now you should find him an application - it can be anything from decorating a woman's accessory to just a souvenir. We used it as a postcard element in the scrapbooking technique. As you can see, he transformed the whole look of our postcard.