As you know, working with cereals and grains calms, and for children it is a good training of fingers. But sometimes the pictures from different groats can become quite full-fledged decor of the room and not immediately noticeable, from what they are created. We offer several ways how to make a picture of cereals.
Pictures from groats own hands
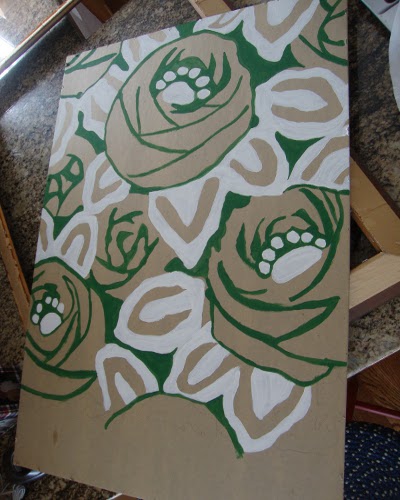
In the first lesson we will use beans of several colors, paints and glue. It's not even a picture, but a whole panel on the wall, so that you can take more grain.
- First, we select the picture that you would like to recreate in the picture. Try to choose large and simple forms.
- Further on a sheet of plywood or very dense cardboard we apply contours and paint them with paints. This is necessary to ensure that between the croup did not shine an empty surface.
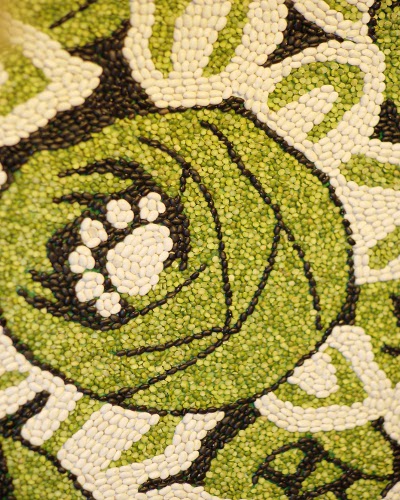
- In this case, the drawing of cereals in the picture consists in applying the glue and applying grains of the appropriate color. You seem to draw not with paint, but with natural material.
- White and green beans were used for this picture. You can try to take beans, lentils.
- In order to make the picture become more vivid and textured, we will add a little black color. Time will take a lot, but the result is worth it.
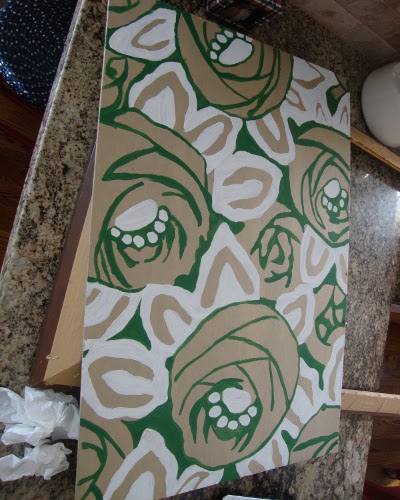
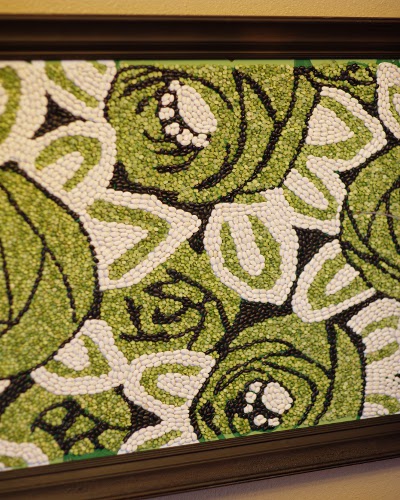
- Paintings from grains and cereals can be very effective and stylish.
| | |
How to make a picture of cereals and plasticine?
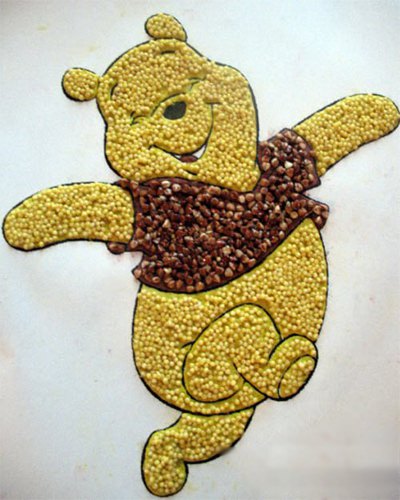
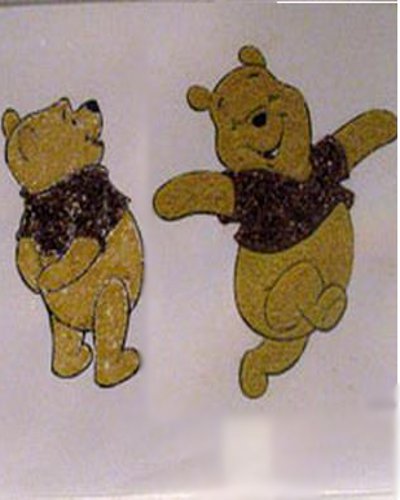
Favorite by the multperger of many children, Winnie the Pooh can decorate the room of your crumbs. It is important that even children can make such pictures from cereals.
- Print out the image on a sheet of paper and transfer it to a thick cardboard. The simpler and larger the pattern, the better: it will be easier for you to apply a layer of the base and pick up the groats.
- Next, gently, in small portions, smear the plasticine of a suitable color. This process can be trusted to the child.
- The last stage of the master class making a picture of cereals - filling the background with grains. For this picture, yellow cereals such as wheat and buckwheat were used.
- It remains only to put your work in a frame and decorate it with the child's room.
Contour pictures of cereals with their own hands
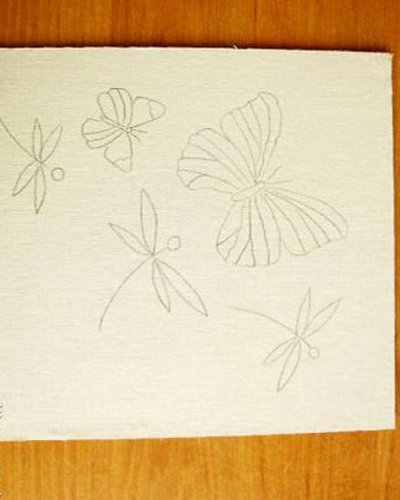
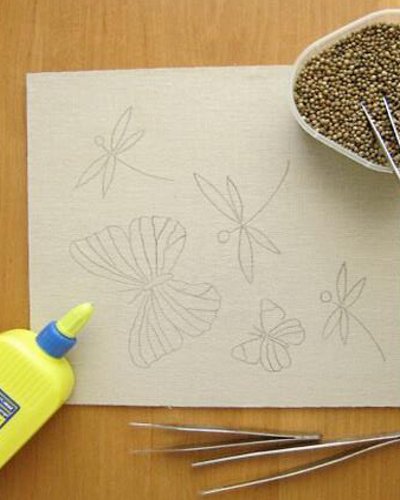
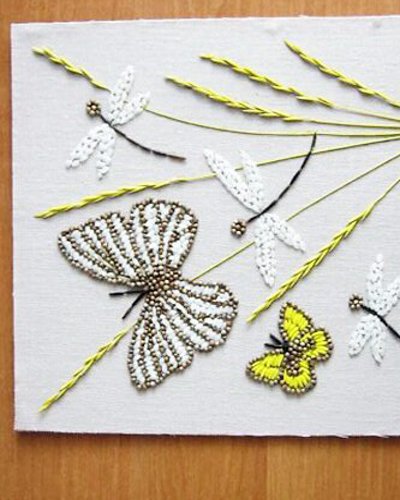
The most painstaking and complex technology of creating a picture of cereals, when the grains do not just fill a certain area, but are laid out along the contour. But the result is impressive. We will also use dried flowers or dried herbs, as butterflies and dragonflies were chosen as the image.
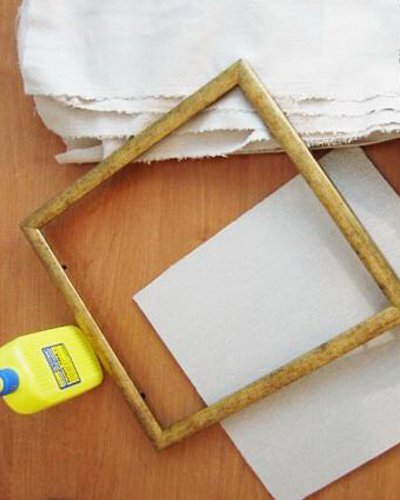
For work we will need:
- picture frame;
- piece of compact cardboard or thin plywood;
- a detached cotton cloth of canvas type;
- glue;
- brushes;
- dry coriander or buckwheat, white rice, spikelets, wild rice;
- the paint is yellow and white.
Now let's look at how the pictures from cereals are obtained.
- We turn the base from the plywood cloth and fix it from the back side.
- Next, we draw the contour of the future drawing.
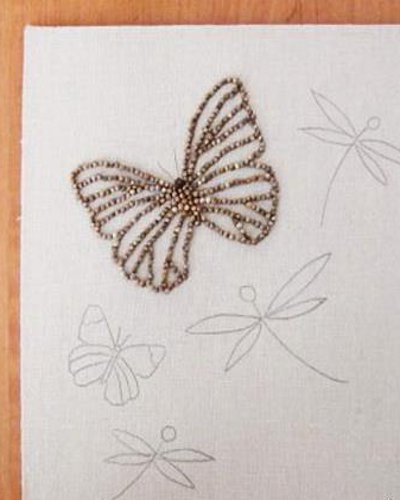
- For work we take tweezers or something similar. Carefully apply glue on the line and spread the brown croup.
- In this technique, we spread the wings of dragonflies along the contour of rice and fill the space of the wings of butterflies.
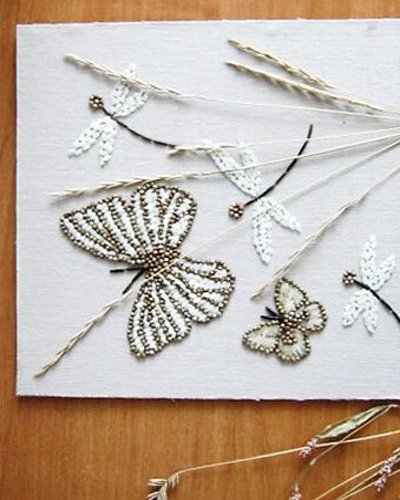
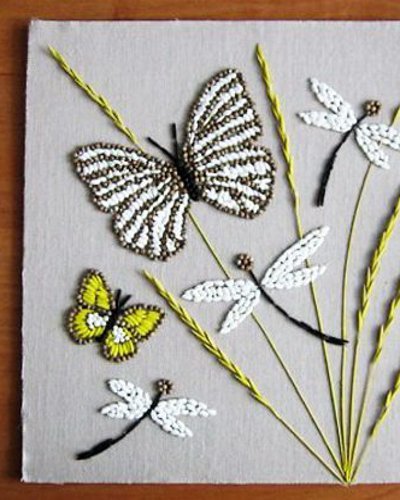
- The basic composition is ready. You can start decorating. Spread the spikelets or other dry herbs in random order.
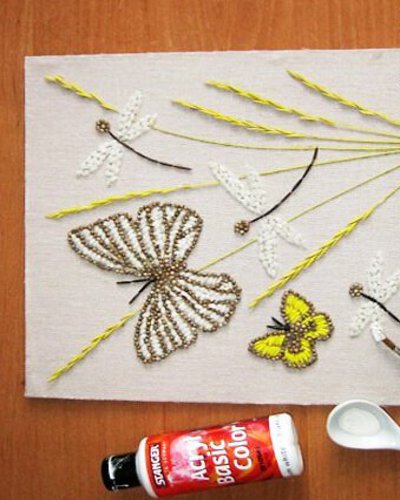
- We will make our picture more vivid. Take the yellow paint and the smallest brush. It is colored with spikelets and a part of the wing of a butterfly made of white rice.
- We will also paint all the details of rice with white paint to make the picture clearer.
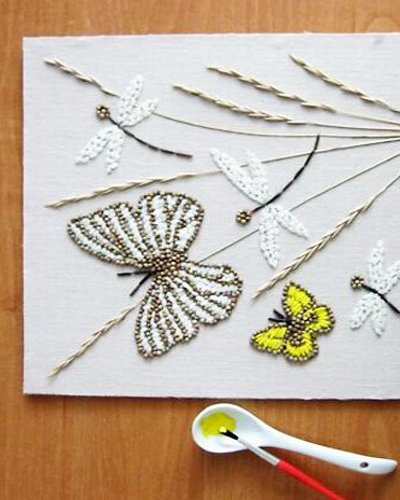
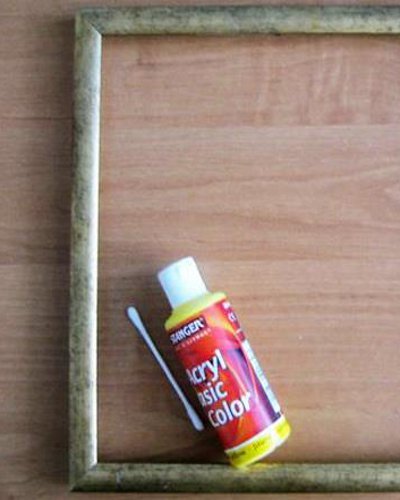
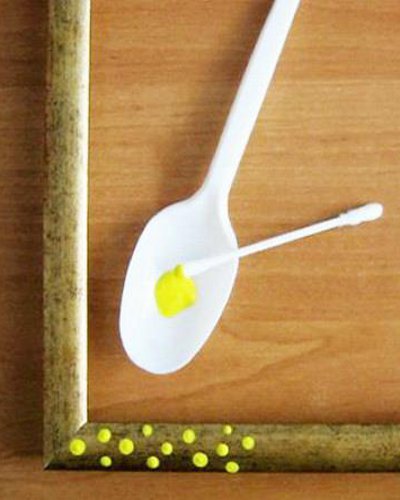
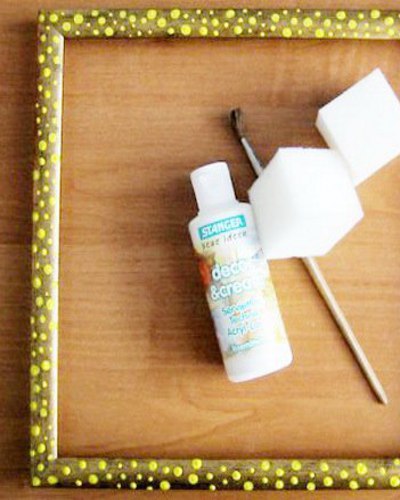
- Prepare a frame. We take a yellow paint and with the help of cotton buds we apply small specks along the perimeter.
- It remains only to insert the finished composition and the work is completed!
| | |
| | |
| | |
| | |
| | | |
Amazing paintings can be made from other materials - from buttons or coffee beans .