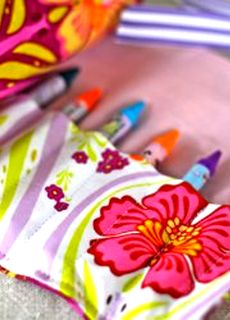
A pencil case is not just a school attribute. The real value of this subject is that he accustoms his owner to organize a workplace, having pens, markers, pencils and other stationery in strictly designated places. In order for the pencil to play a role in some kind of mascot, and the little student felt the invisible presence of a number of mothers, it is best to make a school pencil yourself. In the master class, there are two options for sewing a pencil case yourself.
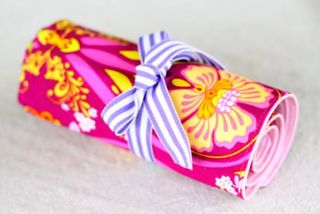
Simple pencil case made of fabric
The first pencil case for own pencils can even be made by a beginner seamstress.
You will need:
- dense cotton or a mixture of bright fabric for the outer parts of the pencil case;
- fabric for the inside of the pencil case;
- sintepon or thin batting;
- tape length 45 - 50 cm.
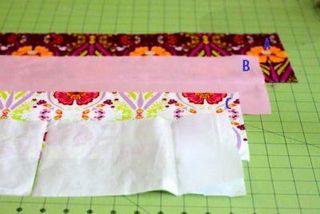
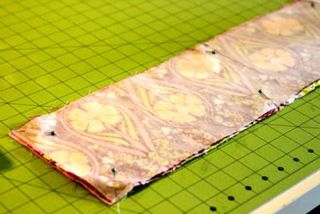
- From the fabric we cut out three rectangles measuring 45x15 cm. A - the outer part of the pencil case, B - the inner part, C - the pencil case. Fold the pieces as shown in the photo.
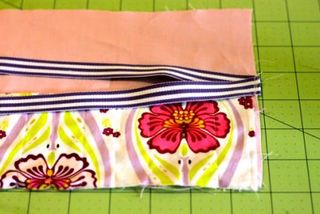
- Fold in half the part C, we put on it a vertical marking and deducted the markings on the sewing machine. We attach the tape folded in half to the middle of the side part.
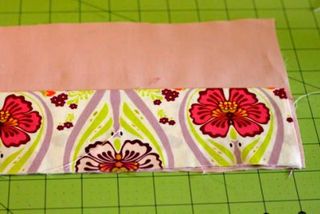
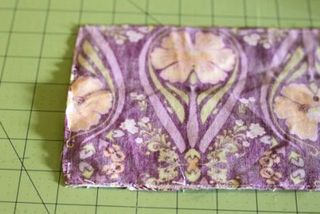
- On the preparation of the front part we impose part A, fastening it with pins. We grind off all parts of the pencil case, leaving a hole on the side for subsequent turning of the product (the hole is located on the opposite side to the one to which the tape is attached).
- Through the left hole we twist the product. All the corners are carefully straightened, ironing the seams with an iron and laying the machine line along the entire perimeter, receding from the edge of a half centimeter.
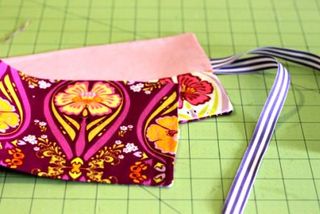
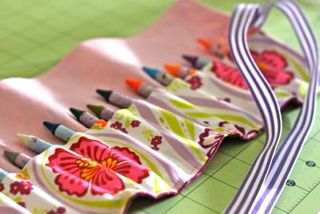
- The final form of the product in a straightened and folded form.
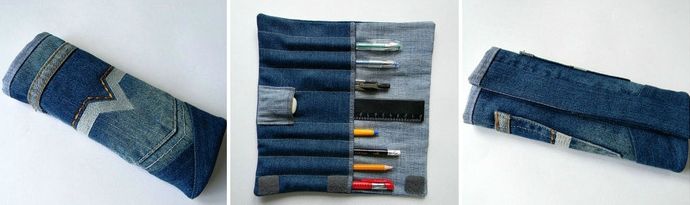
Denim pencil case
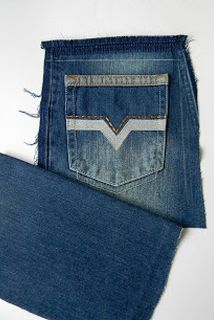
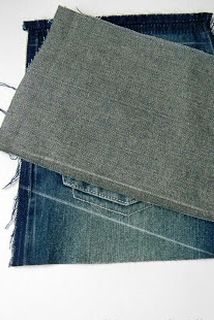
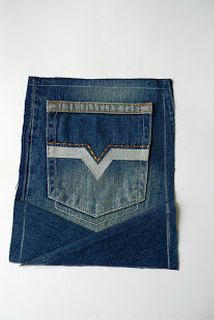
By a similar algorithm, you can sew yourself a stylish pencil case made of jeans. Choosing a more effective part of the pants to create an unusual product, we recommend to stay on a jeans pocket that has a stitch and choose a denim fabric of different shades.
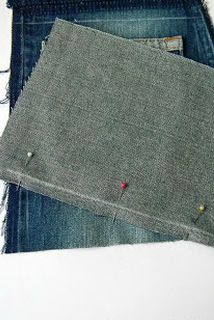
- Prepare the parts of the pencil case. A - pocket on the basis, B - denim square 25x25 cm (inside), C - rectangle 25x13.5 cm (office accessories), D- square 7x7 (pocket for eraser), E - 2 squares 20x20 cm (bottom parts of the front side); F - 2 rectangles 25x20 cm (side parts of the front side), G - rectangle 25x4 cm (top side of the front side).
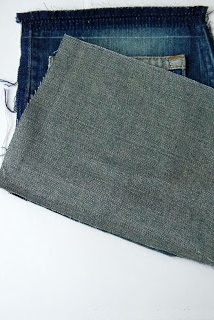
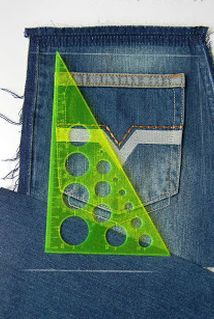
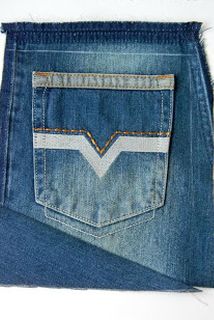
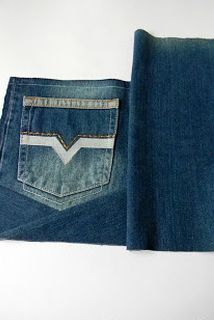
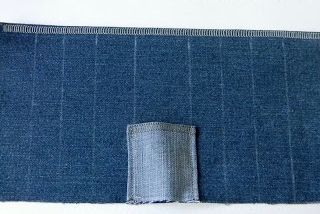
- Part E is applied at an angle to the bottom of the pocket. Combine the two parts, puncture the pins with the head, sharpen. Superfluous cut and iron.
- We plan with the help of the ruler the bottom of the pencil case, remove the excess. Apply a rectangle to the other side and, also noting, cut off the extra.
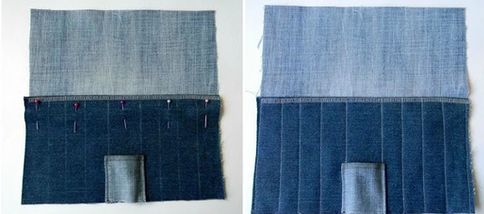
- We tie the side pieces, taking the part F, also cut off all the excess. After the side parts are sewn, we find the center, mark it, measure 25 cm. We cut off all unnecessary ones. Sew the part G.
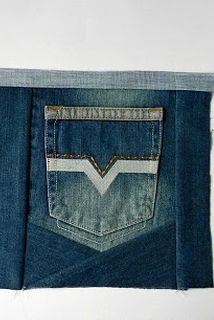
- We begin to make the inside of the pencil case. The part C is wrapped on one side and we make a decorative machine stitch. Using the ruler, apply the division for accessories. Part D is deducted from one side and we take note. We spend it by making a small stock to put a stiralk.
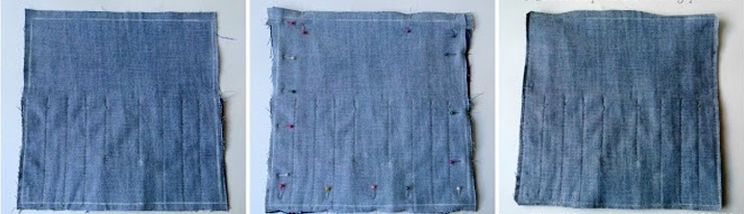
- Details B and C are connected, prikolov pins, we spend.
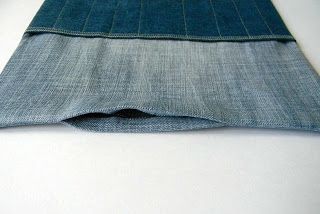
- We connect the two parts of the pencil case, the faces must be turned inwards. On one part, we design a square of 23x23 cm (this is the size of the pencil case). We prick the parts with pins and detach it, leaving a small hole for turning.
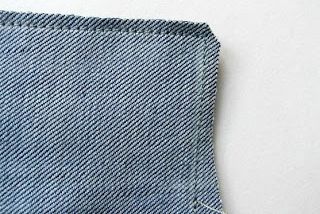
- Cut off excess at the edges, cut off the corners and turn (for more successful eversion, you can apply a stick for sushi). We sew up the top of the product.
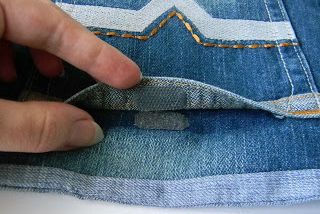
- Using a thermo-pistol, attach the Velcro to the inside first, and then outside the product.
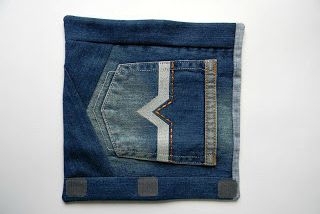
A pencil case for the school, made by own hands, is ready. Your honors pupil with such an original pencil case will learn even better!
With your own hands, you can make other interesting accessories for the student, for example, pencil and bookmarks .