Teachers at the school often give gifts - at the beginning of the school year, at the end, on the teacher's day, on the eighth of March and even on ordinary days, just to thank for the knowledge given to the child and a good attitude. So, let's say, the standard of the gift for the teacher is flowers and chocolate, but sometimes you really want some originality, something unusual, I want to remember the gift, and not become one of a hundred. And still a wonderful gift can be a school desk made of chocolates, made by own hands. This will be a very original gift, which you can also do with your child.
So, let's take a closer look at how to make a bouquet of chocolates in the form of a school desk.
Partha from sweets - a master class
First, let's define with the items and materials that you will need to make this gift to the teacher:
- sufficiently dense cardboard;
- scissors;
- ruler;
- corrugated paper (it is preferable to use gold, since it looks very festive, but you can take paper of any other color);
- glue;
- sweets (in this master class Roshen chocolates were used, which are very suitable for this bouquet in shape and size).
The materials were sorted out, so now we are boldly turning to the very process of making the desk:
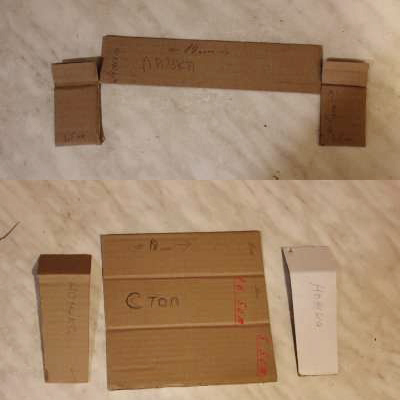
Step 1 : The first step is the preparation of workpieces for a desk made of cardboard. The dimensions of the workpiece for the table: the height of the legs is 11 cm, the length of the table top is 16 cm, the width of the lid is 18 cm. The dimensions of the bench billet that stands near the table: 14 cm in length, 4 cm in width, 5 cm in height By making these details you can resize to the ones you need. If desired, you can even change the proportions. In general, to create and experiment as much as you like.
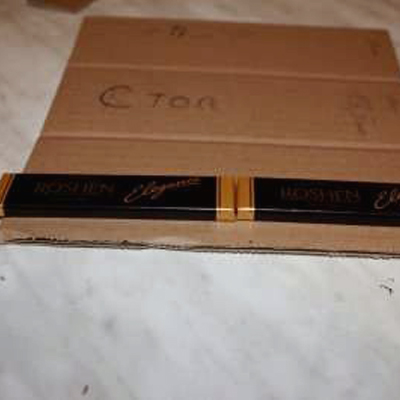
Step 2 : As you can see in the photo, the width of the table contains the length of two chocolates. If you use other sweets, then do not be too lazy to measure them, so that in size they come to the desk.
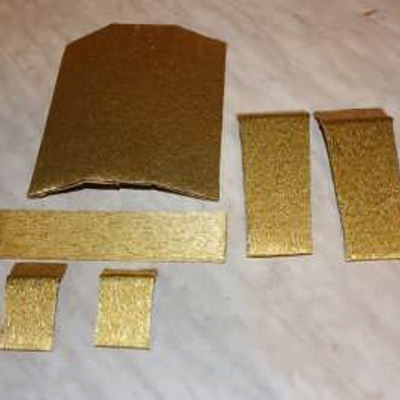
Step 3 : Gently coat the details of your desk with corrugated paper.
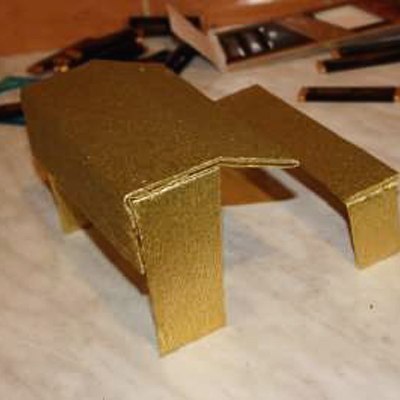
Step 4 : Then gather all the details of the desk together and glue them together with glue.
Step 5 : The next step is the most interesting - you need to glue the resulting chocolates with chocolate. Using glue, glue to your desk candy, and make a back from the bench with candies, simply gluing together two sweets together and fixing them with the help of two other sweets.
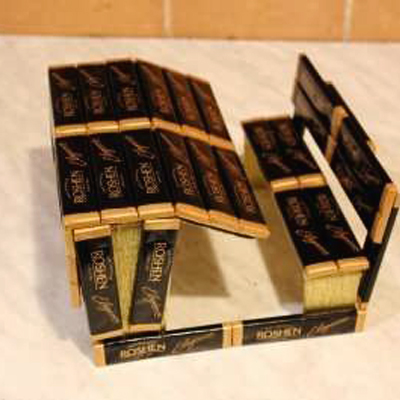
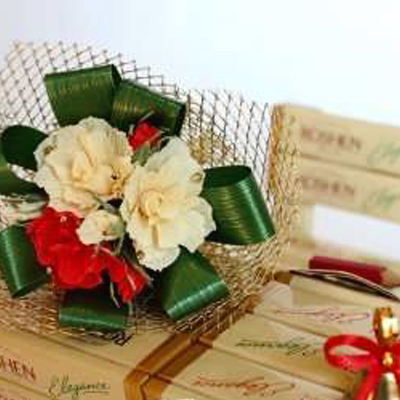
Step 6 : And the last step in making a school desk from chocolate sweets will be its decoration. Add to the desk such decor elements as bows and ribbon flowers, beads and other small ornaments that you find appropriate. Also you can strengthen on the desk and a small notebook with a pencil.
It's not difficult to make a desk of sweets with your own hands, and even, on the contrary, it's very interesting. And such a gift will surely be remembered by the teacher among all the others and will please him. As a simpler version, you can make from sweets and a pen .