Since the time of the Victorian era, ornamental cages for birds have been very popular among Irish, Englishmen and in wealthy Indian estates. After centuries, the fashion for elegant decorative cells returned to our land. To date, in the interior of a house or a city apartment, decorative bird cages are used not only for small singing winged inhabitants, but also for decorative candles, fruits, soft toys or toy birds, vases and mini-pots with live flowers or artificial floral compositions and any stuff.
In this master class we will give you an idea of how you can make a decorative bird cage with your own hands made of cardboard, polystyrene and wooden rods.
How to make a decorative cage?
To work on making a decorative bird cage, we need the following materials:
- wooden sticks-skewers for shish kebabs;
- dense bound bookboard with a thickness of about two millimeters;
- polystyrene with a thickness of about 2 centimeters in size not less than 20 cm x 10 cm;
- glue, it is best to use PVA;
- scissors;
- knife for cutting cardboard and styrofoam;
- ruler;
- pencil;
- brush;
- the paint is acrylic, in our case white.
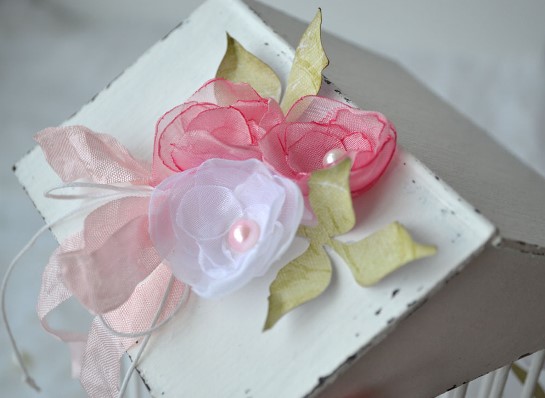
And also other materials for decorating the cell. We needed cuts of fabric and beads for making flowers, however, you can decorate a cell with anything, here you can fully express your imagination.
Decorative cage: master class
So, when we already have everything necessary for this, let's start working on the decorative cage:
1. Cut with a sharp knife polystyrene on a piece size 10x10 cm, the thickness of the foam should be small, about 1.5-2 centimeters. We make two identical parts of the foam - it will be the bottom and ceiling of the cage.
2. Make marks in pencil in order to place evenly, at the same distance from each other sticks in both parts of the foam.
3. We deviate from the edge of 5 millimeters and put each mark in 1.5 centimeters. Work should be extremely accurate, the cell will be very beautiful.
4. Wands, that is, skewers, cut into 15 centimeters and sharpened on both sides, to be more easily and accurately placed in the foam. You can sharpen the sticks with a special sharpener, but if you do not have one, you can do it carefully with a blade or with a knife. Rods need 24 pieces, this will be the rods for our future cell.
5. Accurately drip the glue on the marks and stick sticks into the foam - the future bars of our cage. And so on all the marks. In no case can you use the glue "Moment" in contact with polystyrene foam, it can spoil the material. Best suited glue PVA.
6. From above, also on the marks, we put on the rods the second piece of foam. We work very carefully, the stick is easy to break or break from the already stuck bottom piece of foam, it is also quite easy to damage the foam, and it should be perfect.
7. Then we cut out the details from the binding board. We work according to the scheme, which shows the dimensions of the elements and their number.
8. We glue the parts to the foam and to each other the joint in the joint. On the roof between the details you can stick a stick-skewer. Its length is 11.5 centimeters.
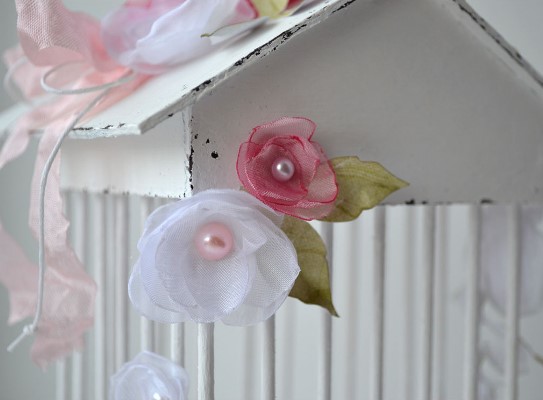
9. We dry the cage well and paint with acrylic paints in any shade suitable for the conceived style. We paint inside and outside all the details. We got a cell in the style of a shebbie-chic, so we painted it white and made light shabby.
10. The cage is ready, now we decorate it to your taste and admire the fine work!
| | |
The idea and images belong to Irina Pomogaeva (siy-pomogaevairina.blogspot.ru)