The history of encausticism or drawing art with wax goes back to ancient times. The first works of art created in this way date back to the era of Ancient Rome, but the very technology of drawing with hot wax remained for a long time a mystery behind seven seals. The first attempts to revive the ancient art were made in the middle of the 18th century, and in the middle of the 20th century there was a third wave of popularity of encausticism. Today, this art is so popular that in stores even special sets are being sold for creating paintings in the encaustic technique at home.
Enkaustika - a master class for beginners
This master class on encaustic is useful to beginning masters, making their first steps in this art. Draw we will be an abstract landscape, using as a heating surface a normal iron.
For drawing with hot wax we will need:
- A small iron with a smooth sole without holes;
- thick paper by type of photo paper for the printer;
- wax pencils;
- paper for covering the table.
Getting Started
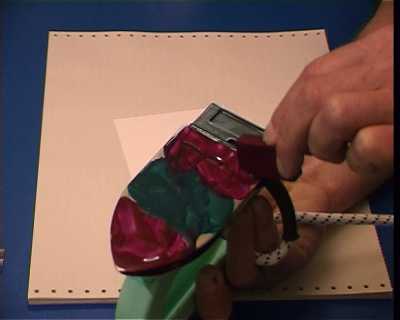
- We set the iron in the "nylon" mode and reheat it. Turn the iron sole up and start to melt the wax pencils on it.
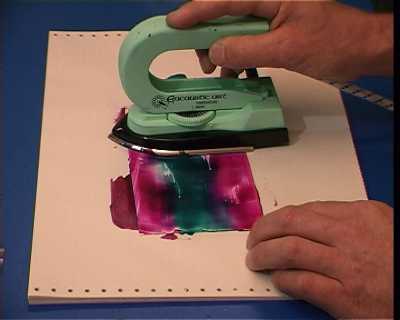
- Moving the iron from side to side, distribute the wax on the surface of the paper. Different colors of wax should be mixed at the same time.
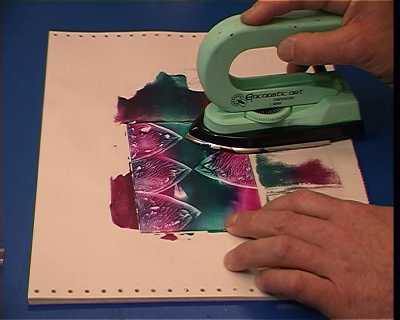
- Pressing the iron on the surface of the paper, we leave the prints on it.
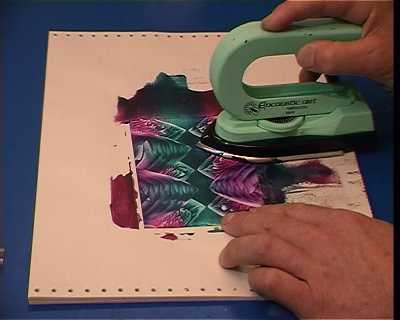
- Finalize the picture to the desired result.
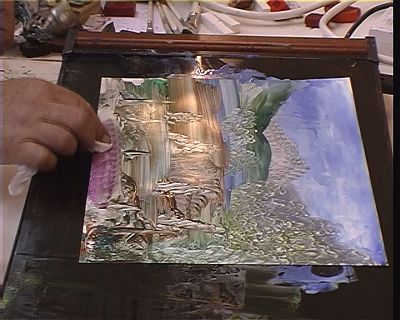
- After the picture has cooled slightly (25-35 seconds), polish its surface with a soft napkin. In the end we get here such an interesting landscape.
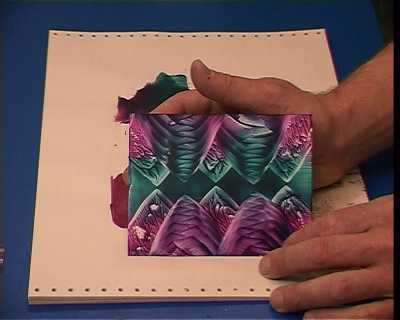
Enkaustika - a master class for experienced
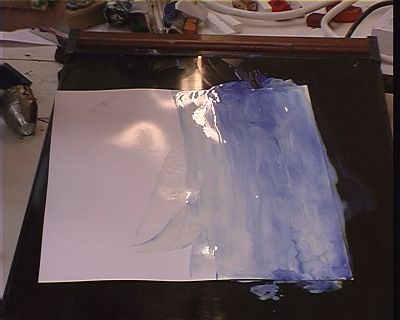
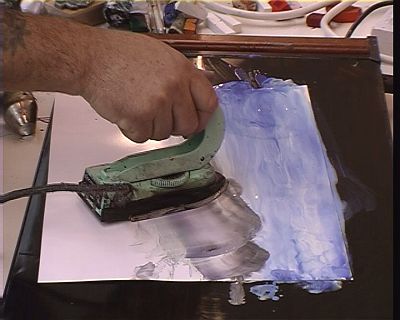
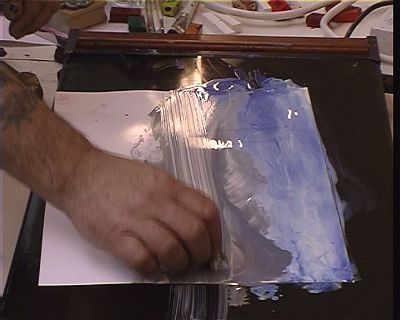
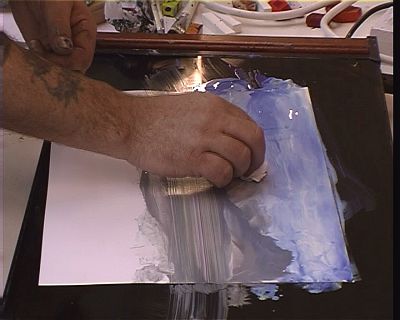
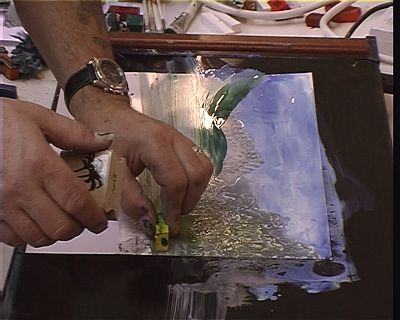
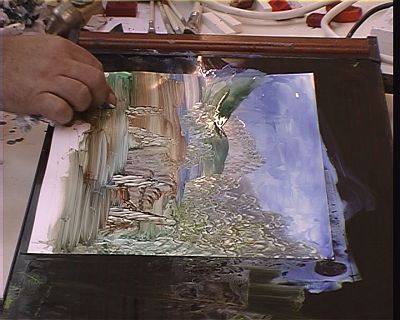
This master class is useful to people who have already mastered the basic techniques of working in the encaustic technique. We will melt the wax by means of an electric cooking surface, to which a sheet of paper will be attached. To create a different print, the iron, fabric, paper and foam rubber will be used. Of course, it's quite difficult to describe the step-by-step creative process, therefore we fix only its main points.
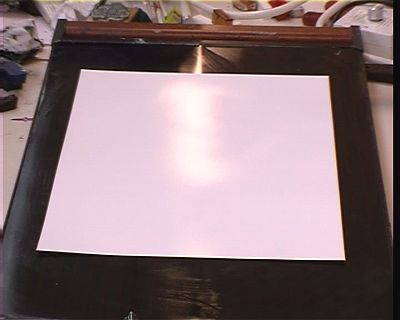
- Before starting work, fix a sheet of paper on the surface of the plate with the help of paint tape.
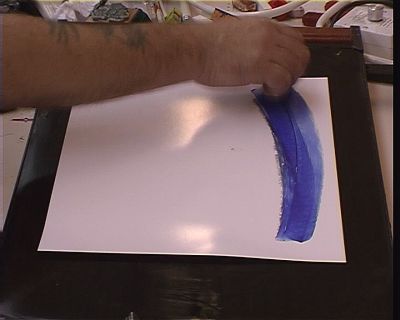
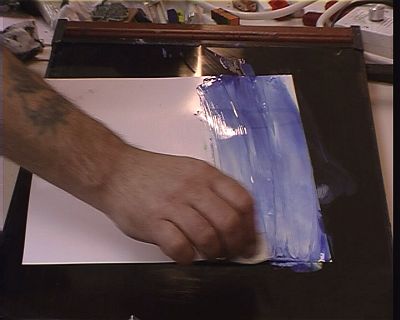
- Draw starting from the sky, for which we melted in the top of the sheet a blue pencil. We feather blue wax on the surface of the paper, achieving the desired saturation. To create a smooth transition from the blue of the sky to other areas, use a white wax.
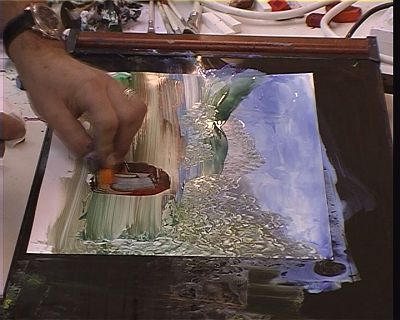
- We pass to the middle part of the picture. Silhouette of mountains can be created with the help of an iron, shaking with a wax sponge or cloth.
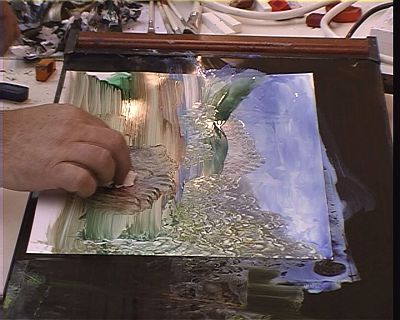
- We cover our mountains with greenery.
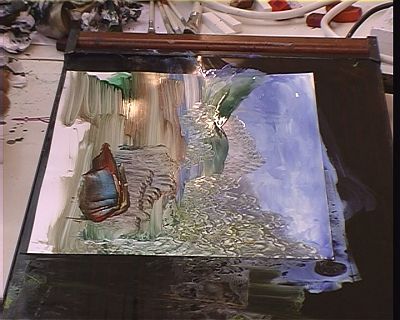
- Adding gradually other colors, draw all the details of our landscape.
| | | |
| | | |
| | | |
| | | |
| | | |
And the child can offer another interesting technique of drawing with fingers and palms .