The theme of beautiful cushions is inexhaustible. One has only to look at photos of these unique masterpieces, of which there are so many in the spaces of the worldwide network, as the hands themselves are drawn to scraps and a sewing machine. Well, stop watching, it's time to really get down to business. We will offer you three interesting workshops on sewing pillows. We are sure that at least one of them will inspire you for creativity.
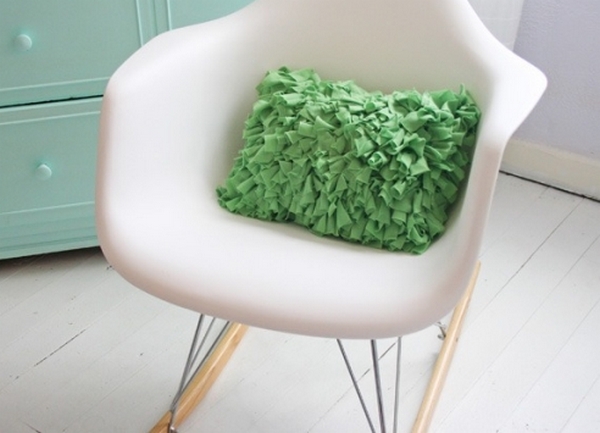
Pillows with their own hands - master class №1
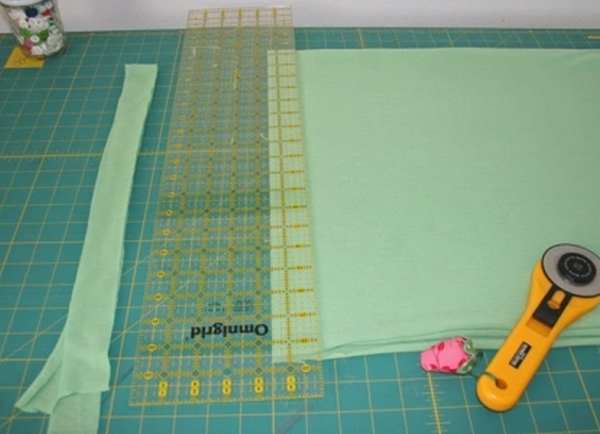
You will need a soft cloth, for example - jersey. It is important that it should not be stuck in slices. The basis of the cover for the pillow can be any dense fabric in tone.
Progress:
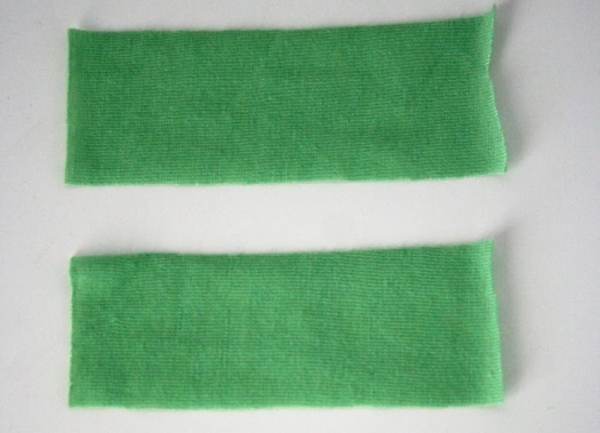
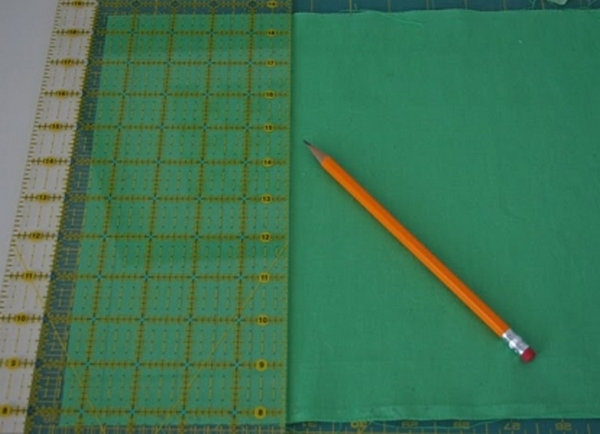
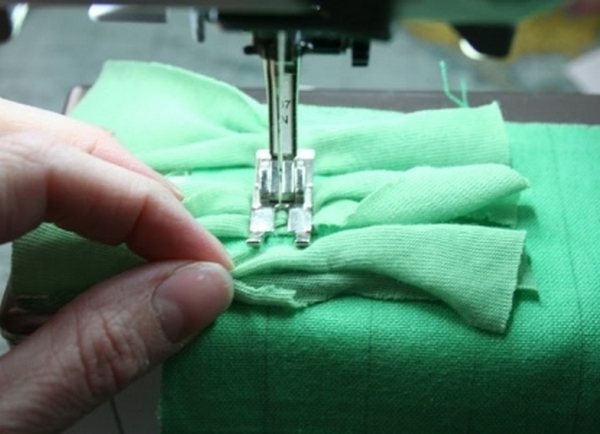
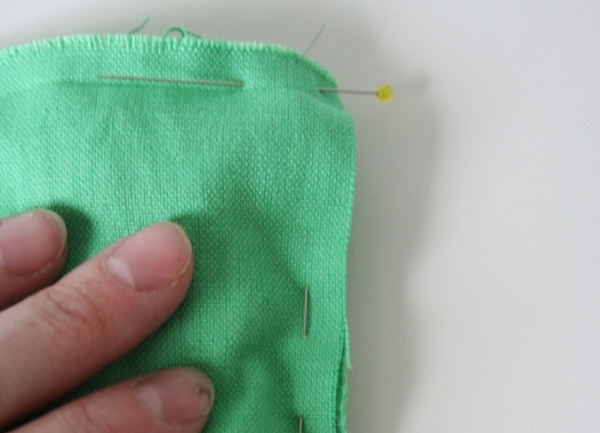
- We cut the jersey into the same rectangles. There should be quite a lot of them. Then cut out two squares of dense fabric for the cover and draw one of them (frontal) with a pencil and ruler. Start about 2 cm from the edge. To these lines we will sew our rectangles. There should be a distance of 1.5 cm between the rows.
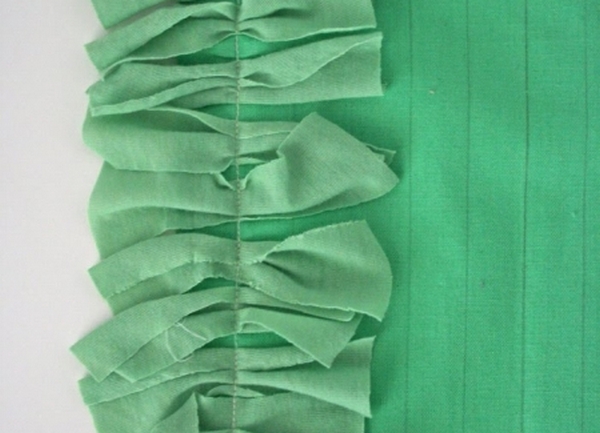
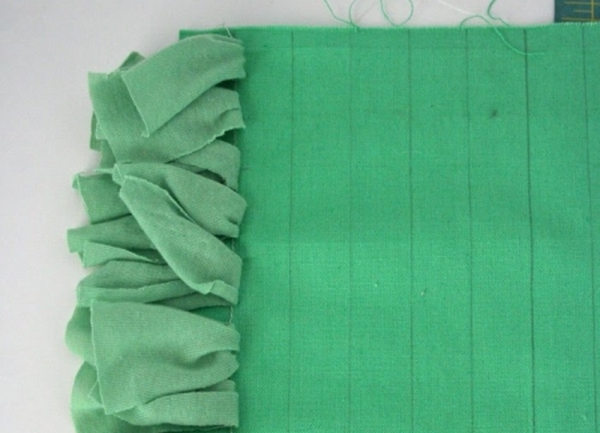
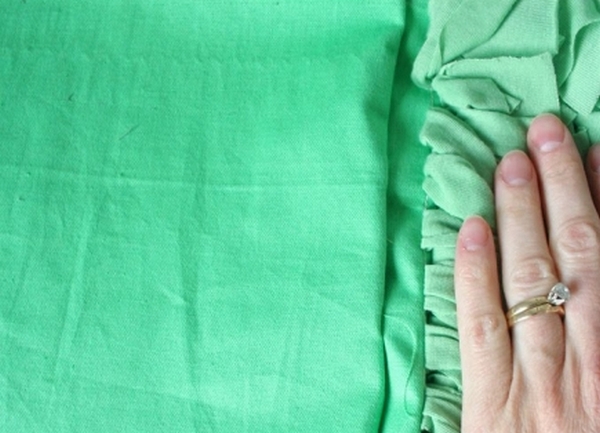
- We attach the rectangles to the base, applying them a short distance from each other directly under the foot of the sewing machine. When you finish one row, bend the strips in half so that they do not interfere with sewing the following. Lay the rectangular blanks in a staggered order - then the fringe will be more dense. Continue the work by gradually bending each previous row until you reach the end.
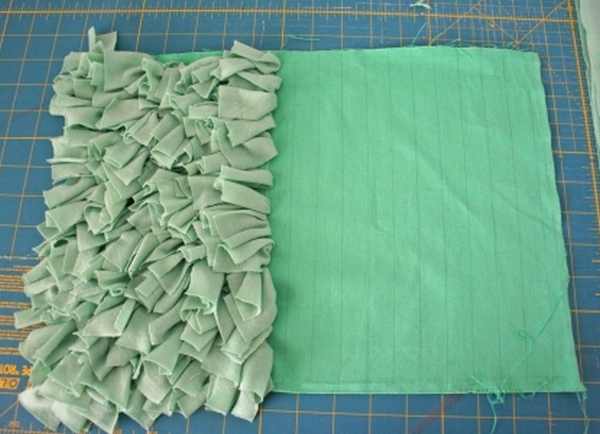
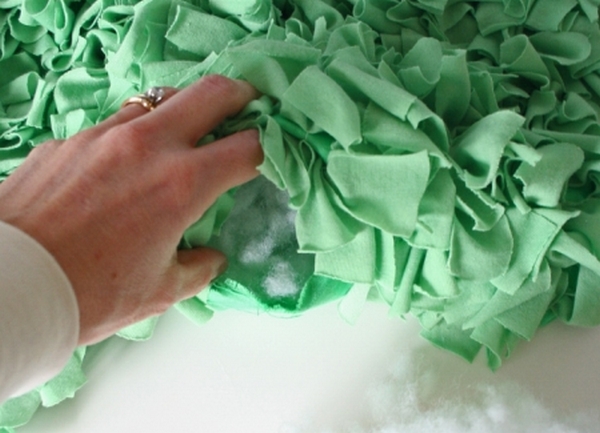
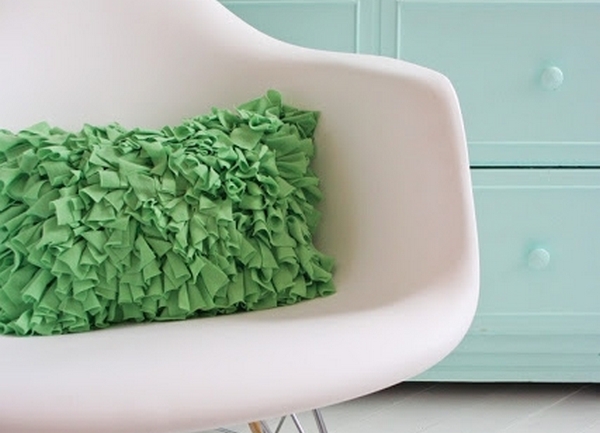
- When finished with the front half, sew it with the second square, leaving a small hole for the stuffing. Fill the cushion firmly with a sinthuffle or holofayber and sew it to the end. That's all, and all - your original pillow, made by yourself, ready!
| | |
| | |
| | |
| | |
| | |
| | |
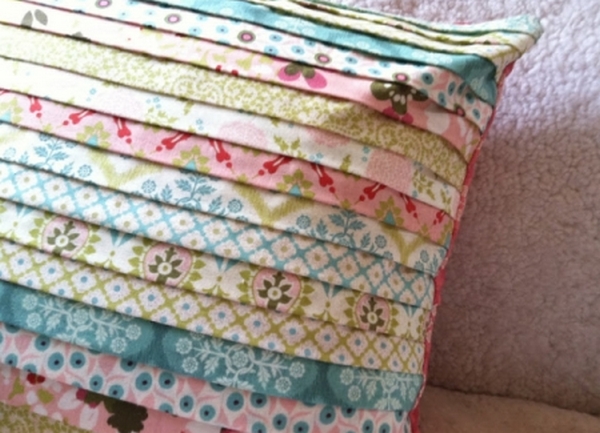
Original pillow - master class №2
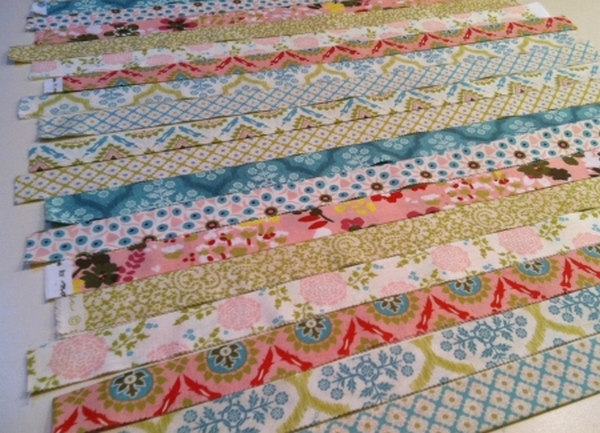
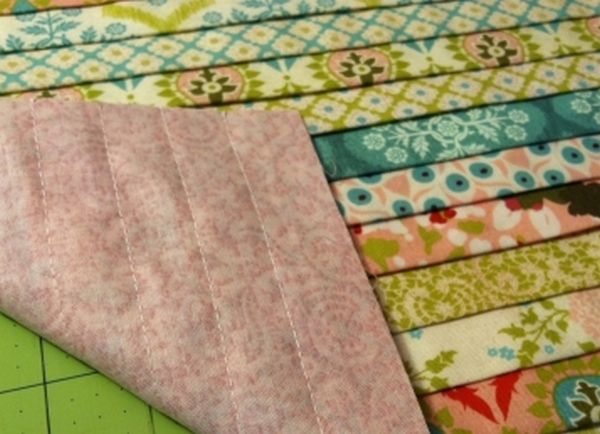
Now let's see how to sew this original pillow with your own hands. Under the foundation, we again need two squares of dense tissue, preferably a bright coloring. And again one square will be the front side of our cushion. We also need multi-colored flaps - all that is left and left off our needlework or from old unnecessary clothes.
Performance:
- Cut the colored rags into equal length and width of the strip. Fold them twice, ironing with a hot iron. These strips should be enough to completely cover the base. Step back from the edge of the base to the width of the strip, start sewing the workpieces, and each next should cover the previous one so that the seam is not visible.
- When finished with sewing strips, trim the side edges, trim the excess fabric. You will sew two halves of the pillow, as in the previous master class, and fill the pillow.
| | |
| | |
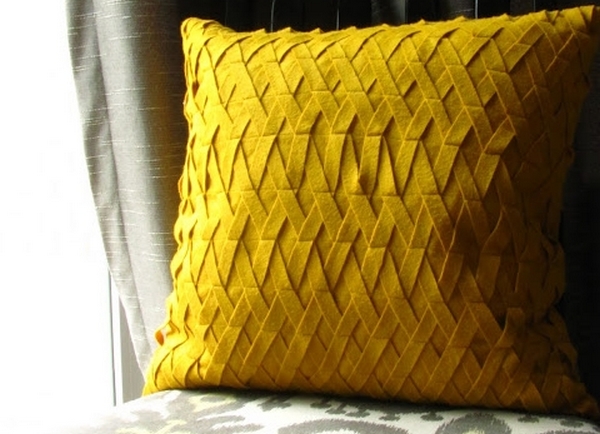
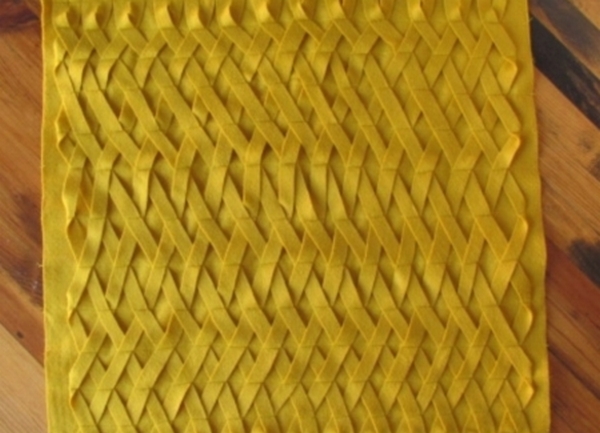
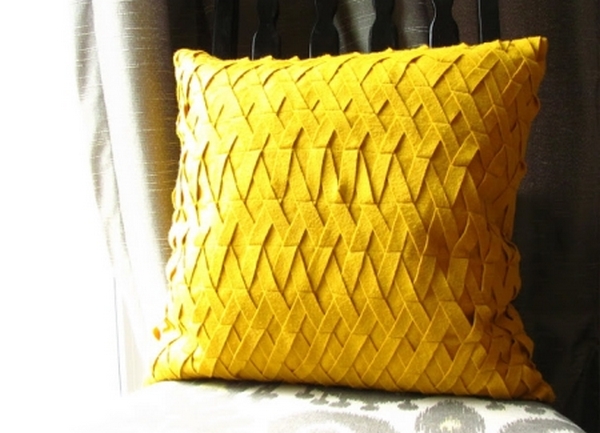
How to sew the original pillow - master class №3
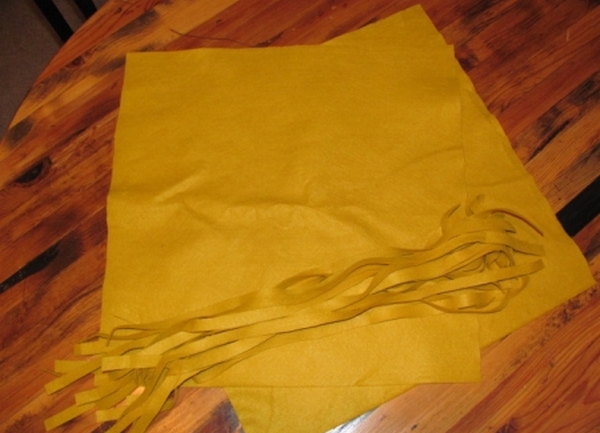
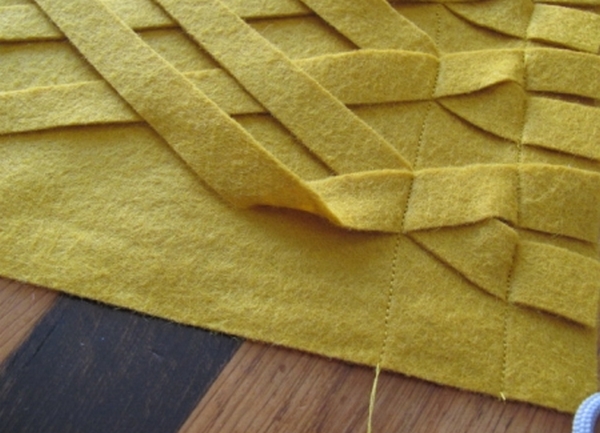
For this beautiful pillow, we need a thick fabric that does not pour. For example - it can be a thin felt. Prepare two square pieces for the base and one that you cut into strips 1 cm wide for the decor.
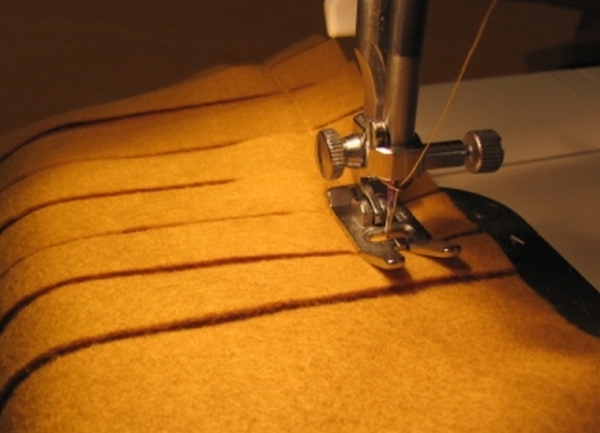
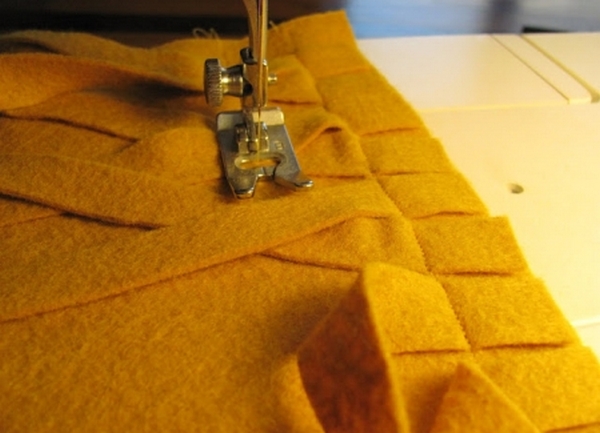
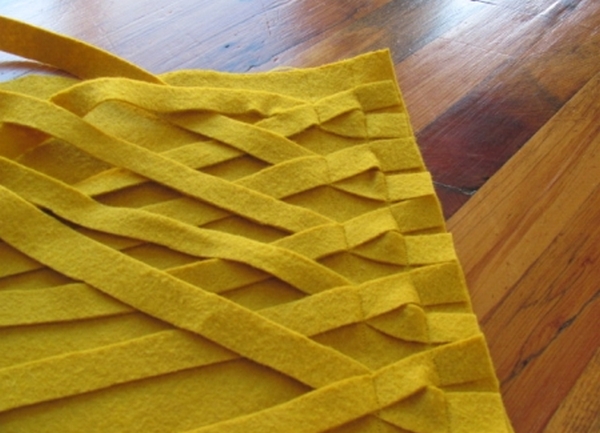
- First, attach all the ends of the strips to the front half of the cover. Cross and cross each other and make another line in the center of the crosshairs. In the same way, continue to cross the strips and consume them. You should get a beautiful cloth grille.
- When the strips reach the edge of the base, simply bend them in the opposite direction and fix the fold with the next stitch. To ensure that all crosshairs are even with equal distances, you can pre-mark the fabric with chalk. When finished with the front side, stitch the two halves, fill the pillow with filler and close the left hole with a hidden seam. All is ready! You can give it to someone, or you can find a cushion application in your interior .
| | |
| | |
| | | |