Various kinds of crafts can be created practically from nothing - from an old automobile tire, and today we will dwell on the parrot more in detail. Such an amazing bird of paradise will become the main attraction of your garden, especially if it combines several more elements in the style of hand-made, for example, crafts made of wood . If we put a pot on a parrot with curly summer flowers, the surprise of your guests will not be the limit!
Parrot from a car tire
So, let's make a parrot from a tire with our own hands. Here's what we need for this:
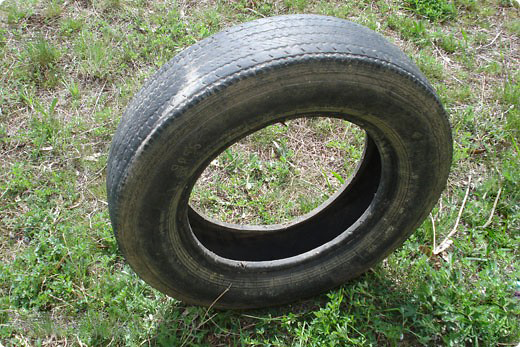
- car tire without metal cord, the protector is preferably shallow, radial; Of course, crafts of this kind are not made from new tires, but still try to keep it not too grated, or at least the main part was in a normal state;
- one bolt, one nut and two washers size M8;
- a strip of metal for the clamp, but in principle without it you can do without;
- paints and brushes - paint choose reliable, waterproof, so that our parrot is not afraid of rain, brushes are better to take two, one ordinary paint, one very thin for drawing thin details;
- sharp big knife;
- drill with a drill at number 10;
- set of wrenches.
If everything is ready, we can start work.
Parrot from a tire - a master class
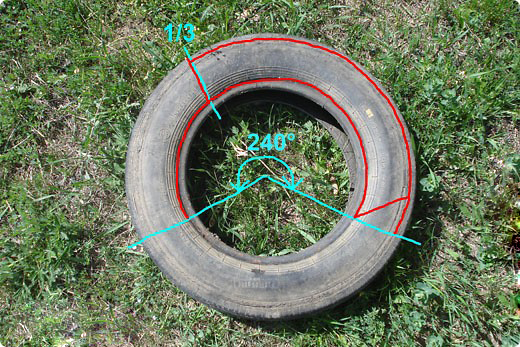
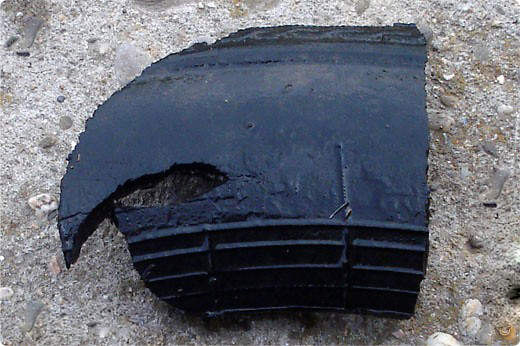
- First of all, we divide the tire into 3 equal parts, markings. Now from the starting point we begin to cut the tire from below, as shown in the image, to the point at an angle of 240o. Further, we cut from above with the same reference point to a point located below 120 °. We perform the same way on the other hand, orienting ourselves around the image.
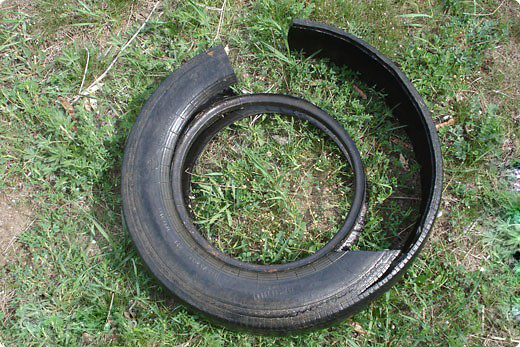
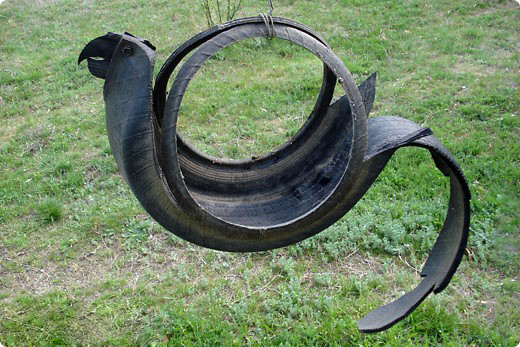
- As a result, we got here such a parison for a parrot from an automobile tire.
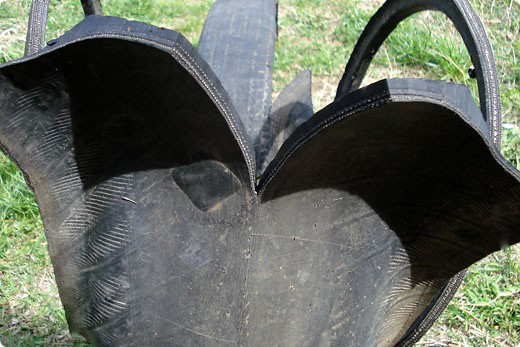
- Next, we turn the workpiece inside out, and that's what happened-it reminds us of a finished product from a distance.
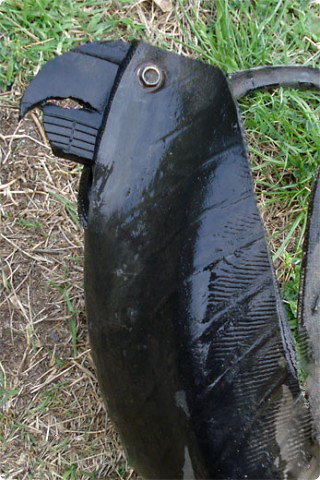
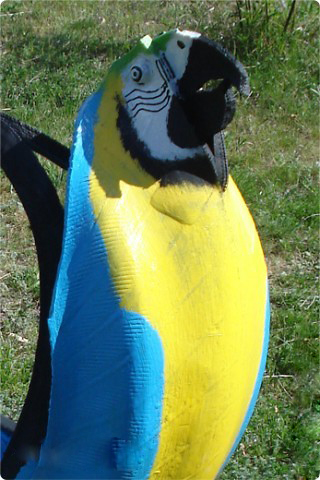
- Now we will work with trimming. Cut out the shape of the parrot's beak.
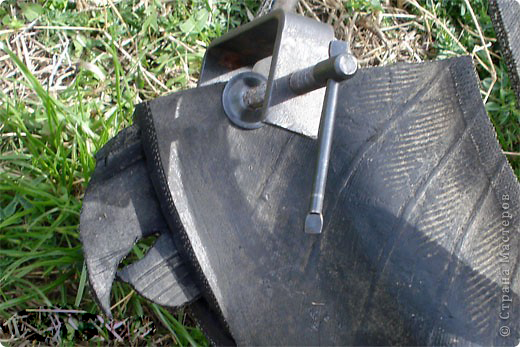
- Now take the edge of the tire, as shown in the image, cut it in half, cut out to a height slightly larger than the size of the beak.
- Then we put the beak between the two parts that have turned out, tighten it tightly with the vice (do not forget that the rubber used for the tires is quite a resilient material, plus we have turned the tire inside out).
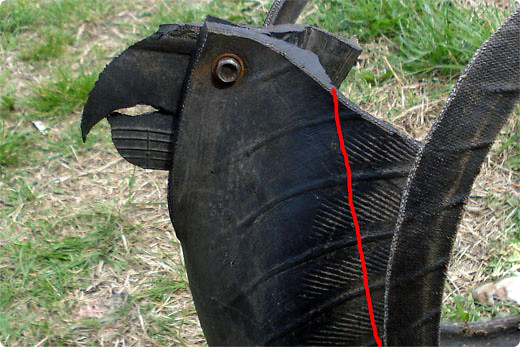
- Next, take a drill with a 10 mm drill and drill a hole in the place where the eye of our bird should be located. Next, take the bolt, put the washer on it, then pass the bolt into the hole, then another washer, and firmly-firmly, remembering the elasticity of the material, fix the whole of this construction with a nut. At this stage, many may have a question - why do we need washers? The answer is simple: although tires are used for solid tires, they are also rubber, but in the course of time it can stretch out, so that the bolt head can slip into the hole and the whole structure will fall apart. Fixing the position, we can remove the vice.
- Next we perform the final stroke - a cut, and the head of our amazing bird is ready.
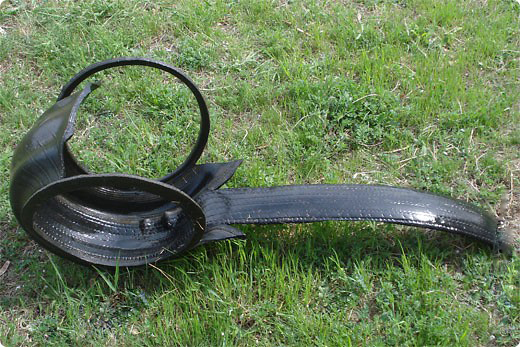
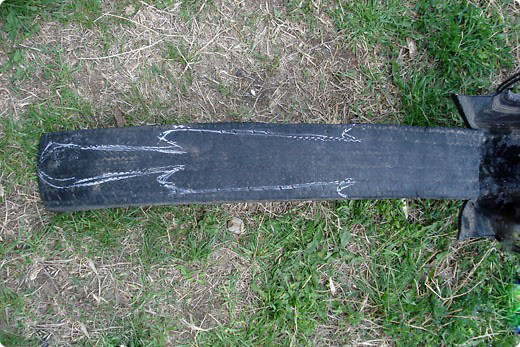
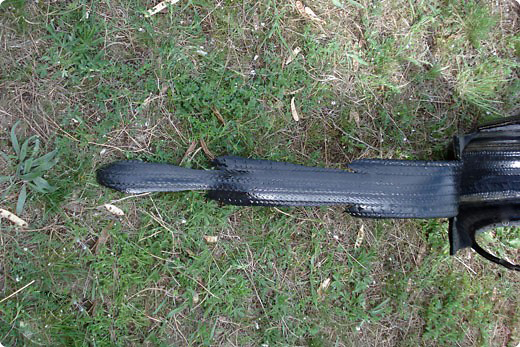
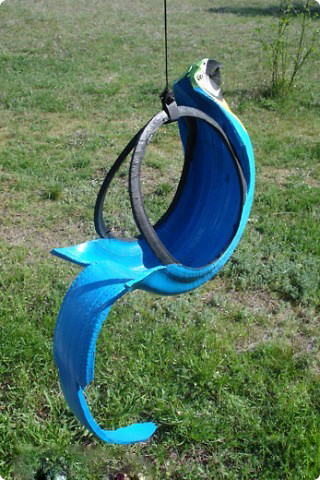
- Let's tackle the tail. On the larger side of the workpiece will sketch the contour of the tail.
- Now we cut out the tail of the parrot's tail out of the tire.
- Next, take the yoke and tighten the side rings of our parrot. But if there is no yoke, you can use wire, rope or other improvised means. This technical part of our work can be considered finished.
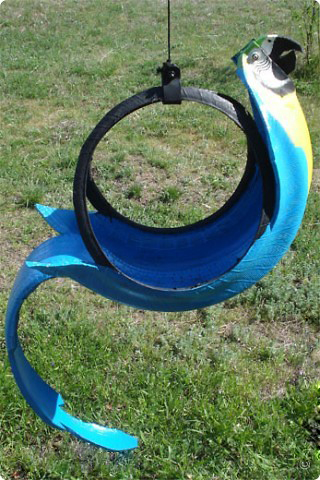
- Now let's take care of the most interesting - coloring. We liked the amazing color of the yellow-blue parrot of Ara.
- On-board rings are painted in glossy black, but you can simply cover with varnish.
- At the end of the work, we paint the head, and our parrot, made with his own hands from the tire, is ready to become the main attraction of your garden.
Crafts and flower beds of tires will be a real decoration of your garden site and give him a magical charm.